Sunday, 8 October 2023

The Anglo-Indian Intervention Force in Japan, Part Four (British Infantry)

After a determined effort, save for a brief sidetrack to round out the artillery, the infantry are at last done. The first of the infantry were done over a year ago, back in August 2022, so the completion of the full set has been a long time coming.

My decisions for the infantry weren't too complicated. In short, I wanted to get a reasonable variety of appearances while sticking with regiments that were more or less on hand. That meant the Yokohama garrison, the Hong Kong garrison, and some regiments from India. As it turns out that was actually not too tricky to do: the late George Nafziger's compilation of orders of battle includes almost yearly accountings of the locations of the regiments of the British Army, so it was easy to check who was where.

It also helped that there is some information on the Yokohama garrison I could draw on, which led to me finding out that there was a changing of the guard in early 1868 as the 1/10th took over from the 2/9th. That, conveniently, gives me a useful element of backstory to my 1868 campaign setting, with the 2/9th remaining in Japan and being reinforced, rather than relieved, by the 1/10th.

Slide taken from this video by Prof. Thomas French, who has done a number of talks over the last few years about the British garrison at Yokohama: https://www.youtube.com/watch?app=desktop&v=944XNCyF6-U

As with the Indian infantry, the plan was for each battalion to have enough men to provide two Groups for Sharp Practice, which would mean at least 16 men plus command figures. This would also be enough for one unit for The Men Who Would Be Kings. With plans laid, it was time to get painting.

2nd Battalion, 9th (East Norfolk) Regiment of Foot


This, along with the 1/10th, I finished in mid-September.

What made this an interesting one was the regimental emblem. Where most regiments would have their number in Roman numerals on their colours, and in Arabic numerals as a cap badge, the 9th were allowed to use Britannia as their symbol by George III in 1799, which they bore on both their regimental colours and their cap badges. Now, while I did go to the trouble of painting a Britannia on their colours (for the simple reason that I wasn't happy with how my printer did it), I was not about to do the same on their caps, hence the somewhat abstract blob I have done on them.

The figures are Perry BIF.

1st Battalion, 10th (North Lincoln) Regiment of Foot


There's less of an interesting history to the 10th, they're really rather bog standard as far as appearance goes. I did this in a batch with the 2/9th, mainly for the sake of convenience, as both regiments had yellow facings. That meant that I'd only need to struggle with that accursed, semi-transparent colour once, and never again (at least for this lot). That said, I did find success with doing the entirety of the cuffs, collars, and shoulder straps in white, and then filling in the yellow bits.

Figures are Perry BIF.

73rd (Perthshire) Regiment of Foot


This one I did quite a while earlier, back in November of last year. The 73rd had started out as the 2nd battalion of the Royal Highlanders in 1780, becoming its own regiment in 1786 but losing its Highland status in 1809. It then managed to suffer not one, but two major maritime disasters: many of its wounded died in the wreck of the Arniston off the coast of South Africa in 1815, and several hundred died during the wreck of the Birkenhead in 1852. While it was officially redesignated a Highland regiment in 1845, it seems as though it never readopted tartan save for officers, and it was made a line regiment again in 1862. In 1866-71 it was the main part of the Hong Kong garrison, hence its inclusion with this force. In a rather fitting coda, in 1881 the Childers Reforms saw the 73rd reunited with the 42nd to form the Black Watch (Royal Highlanders).

Figures are Perry BIF.

42nd (Royal Highland) Regiment of Foot


I used the camera flash on these to make the tartan show better.

A closeup of the piper with full Royal Stewart tartan.

Speaking of the Black Watch, this was the part that I most dreaded doing and most wanted done, but I think the results do speak for themselves. Having fought in India in 1857, they were still there ten years later, so I thought I'd give them a change of scenery.

Most of the regiments I did as a large batch of men followed by the command figures individually or in small batches where uniforms matched. For these, the sheer quantity of tartan meant I decided that I would not try to attempt that. Instead, I'd do small batches of 4 at a time for men, 2 at a time for command figures, each of which would be about a day or two's worth of painting. This ultimately took about two weeks to finish.

I admit that I'm not entirely sure about the accuracy of the piper's uniform, which I based on some photos from 1866 with attributed colours, but he's a fun splash of extra colour to the regiment.

The figures are slight conversions from Iron Duke/Empress Miniatures' Sutherland Highlanders from their Indian Mutiny range. These are wearing the low-cut 'China boat-coat' with simplified cuffs issued for the early part of the Arrow War in southern China, rather than the standard doublet with tashes and cuff flaps. A dremel was used to create the tashes, and I painted the cuff flaps on.

3rd Battalion, Rifle Brigade (Prince Consort's Own)


Sorry for the odd colour balance here, some setting must have changed without my notice.

I thought I'd make things easy for myself right at the end, with the much simpler uniform of the Rifle Brigade. Well... I thought I'd make things easy for myself, but some little niggles crept in.

The main thing was that Rifle battalions used the 'two-band' Short Rifle rather than the 'three-band' Long Rifle. Now, that just meant cutting the rifles down, no? Well... the shorter rifle means that the slings tend to attach differently, with most examples having the sling going from the second band to about halfway down the stock. So that meant also cutting and filing round the slings, then using Green Stuff to extend them. Funnily enough, Perry modelled the sergeant half-correctly: the rifle is the shorter version, but the sling terminates in front of the trigger guard as on the long rifle. Ah well, I only caught that after I'd finished painting, and it's not inaccurate, just uncommon.

Figures are, again, Perry BIF.

2/20th (East Devonshire) Regiment of Foot

This is a bit of a small supernumerary unit that I'd done up for Ronin games for use as legation guards, hence the 2/20th which was the first of the Yokohama garrison battalions. I might buff it out to a full size force at some stage, but given how many troops I have already... probably not.

The sergeant and men are from Foundry's Indian Mutiny range, while the officer is a conversion from Artizan's Second Anglo-Afghan War range,

Infantry in Review

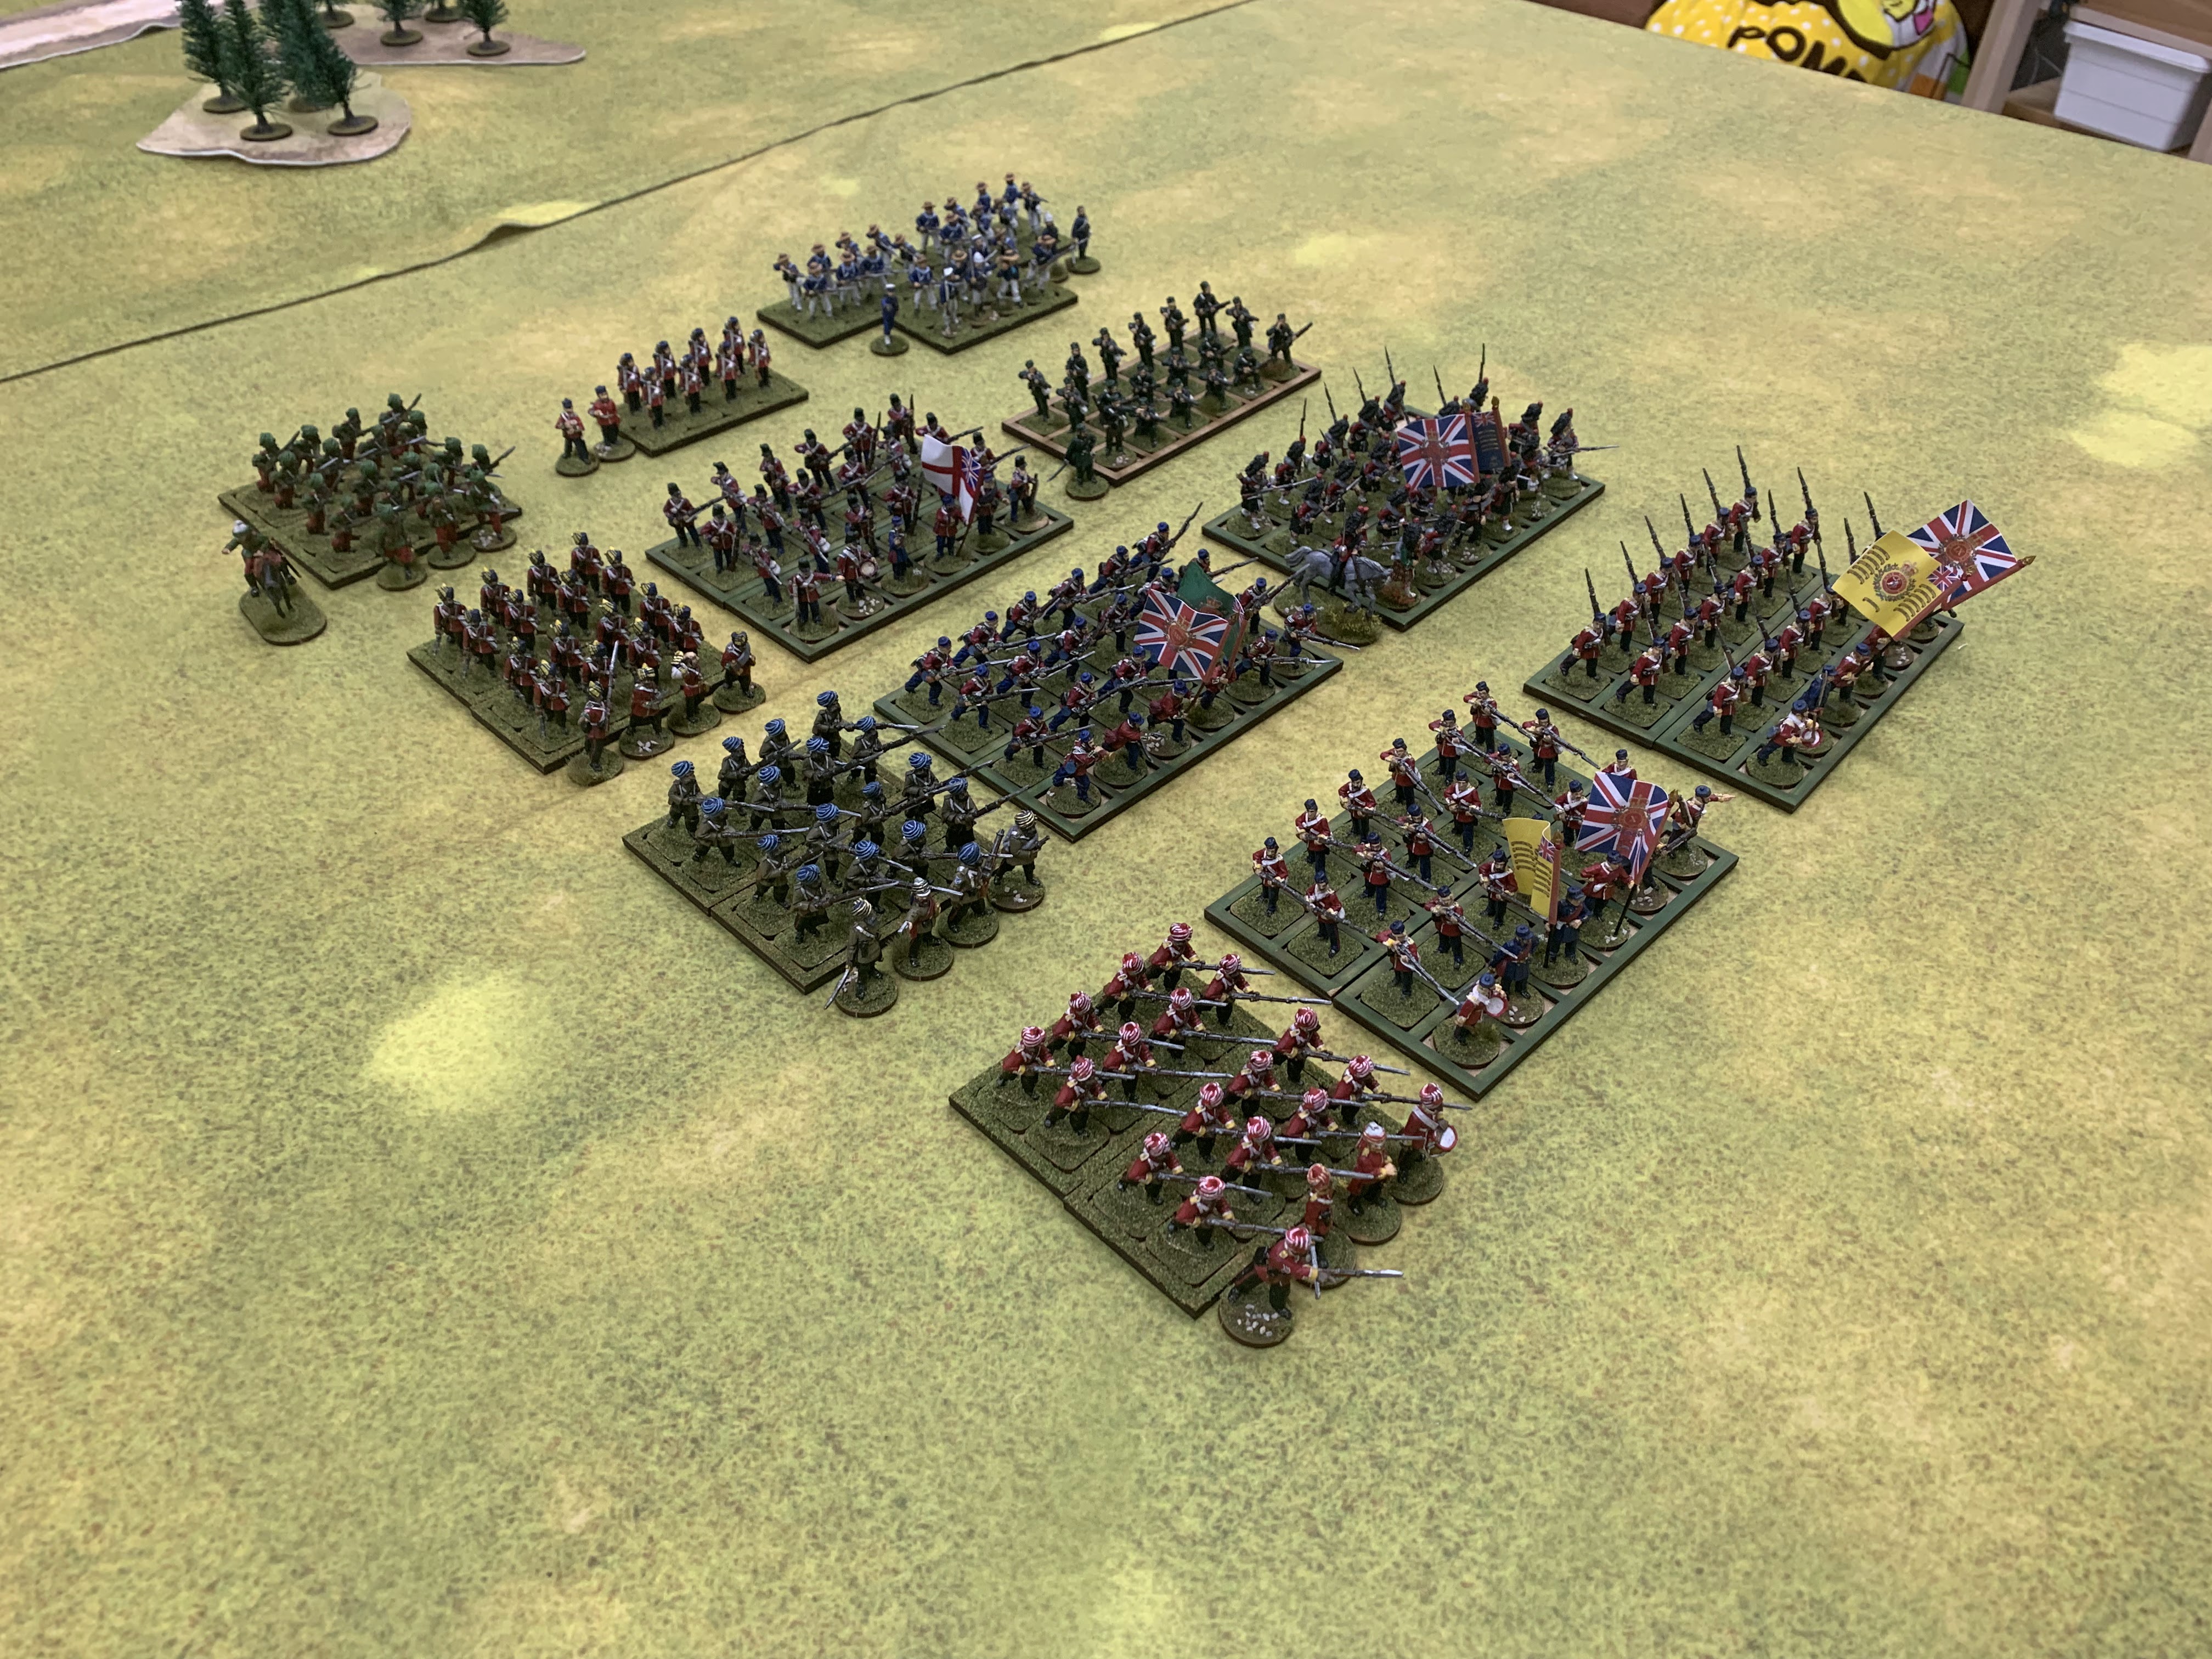
With the infantry done, I decided to lay them all out:


That's 256 men and 2 horses: 76 Indians (including Baluchis) plus 4 British officers; 82 British line infantry, 24 highlanders, 19 Rifles, 24 Royal Marines, and 27 Naval Brigade.

These I've organised into the three brigades in which I plan to organise them, plus supernumeraries at the back:

  • 1st Brigade: 10th BNI, 2/9th, 1/10th
  • 2nd Brigade: 45th BNI, 73rd, 42nd
  • 3rd (Light) Brigade: 6th BNLI, RMLI Bn., 3/Rifle Bde.
  • Extras: 29th ByNI, 20th, Naval Bde.

Each brigade will also have an artillery battery.

Progress Review

  1. Indian Infantry (complete)
  2. Naval Forces (complete)
  3. Artillery (essentially complete)
  4. British Infantry (complete)
  5. Cavalry (not started yet)
  6. Support Figures (a few done)
The cavalry will be the real gauntlet here for no other reason than that I hate painting horses, but if I could do 24 Highlanders, I can do... er... well. You'll see how many cavalry I need to do once I've done all of them.

Friday, 6 October 2023

Take the High Road: A TMWWBK AAR

For the usual Tuesday game night I was very close to subjecting my sparring partners to the rather maths-heavy Smooth and Rifled (a set that I do like, for what it's worth), but having had a bad night's sleep I decided instead for all our sakes to go with the old reliable The Men Who Would Be Kings instead, doing Scenario F: Take the High Road.

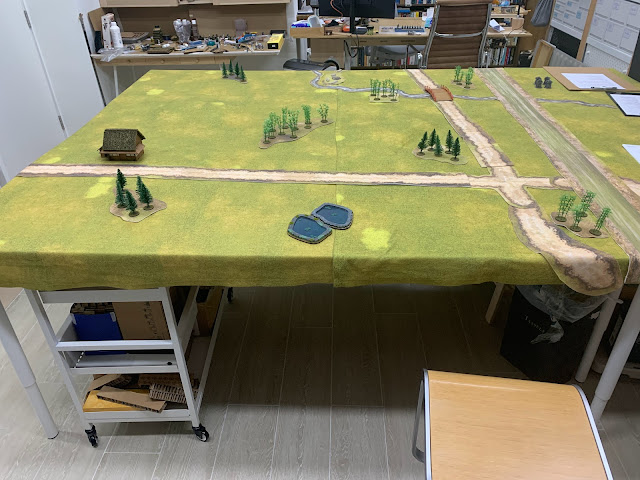
In this scenario, one side has 12 turns in which to take control of an objective from a smaller defending force. Per the rules, this is played lengthwise on a 6'x4' table, with the attacker having a 24-point force and the defender an 18-point force. Given that I had three players and a large table, I widened the table to 6' and increased the forces by half, so the attackers would have a 36-point force and the defenders 27. I also took the liberty of setting up the terrain in advance, but giving the attackers a choice of one of three locations to serve as their objective:

The terrain setup. The river at the back marks the rear edge of the play area.

The attackers could go for the hill (this is hard to spot on the photo, but it's right between the small bamboo grove and the stand of pines, to the right of the seam between the mats), the crossroads, or the bridge. In the event, he chose the hill.

The attacking army (Shogunate), which was jointly commanded between myself and one player, comprised the following seven units:

  • Elite Regular Cavalry (Denshūtai Horse) – Leadership 6+; A Damned Fine Fellow (no effect)
  • Elite Regular Infantry (Denshūtai Foot) – Leadership 6+; Wheezy (cannot move At the Double)
  • Poorly-Armed Regular Infantry (Shogunate Infantry) – Leadership 6+; Coward (must always attempt to move out of enemy charge range)
  • Poorly-Armed Regular Infantry (Shogunate Infantry) – Leadership 5+; Brave (remove one Pinned marker for free before activating*)
  • Veteran Fierce Tribal Infantry (Shinsengumi) – Leadership 5+; Musketry Buff (Leadership is 5+ when Firing)
  • Tribal Infantry (Spearmen) – Leadership 5+; A Jolly Good Chap (Leadership is set to 5+)
  • Poorly-Drilled Field Gun – Leadership 6+, Lucky (can force one full reroll at any point in the game)

The defending army (Imperial) was helmed by one player, and composed of six units:

  • Regular Infantry (Chōshū) – Leadership 6+; Inexperienced (no Free Action)
  • Poorly-Armed Regular Infantry (Satsuma) – Leadership 6+; Keen Shot (re-roll 1 miss when firing)
  • Poorly-Armed Regular Infantry (Satsuma) – Leadership 6+; Fine Swordsman (+2D6 in melée)
  • Irregular Infantry (Tosa) – Leadership 5+; Idiot (must test by rolling 1D6 before activating – on a 1, the enemy chooses its action, but cannot order it to attack its own side*)
  • Tribal Infantry (Spearmen) – Leadership 6+; Drunkard (Leadership can be either 6+ or 8+ depending on a die roll before the start of the game; in this case the defending player got the better result.)
  • Poorly-Drilled Field Gun – Leadership 6+; Bag of Nerves (must test by rolling 1D6 after first becoming Pinned – on a 3+, the Leader deserts and counts as an extra casualty)

Deployment

The defending player set up his three Regular units on his left, extending from the stand of pines towards the pond. The artillery was on the hill, with the spearmen in front, covered by fire from the Irregulars on the opposite bank of the river.

We as the attackers aimed to advance along three axes: our two Poorly-Armed Regulars would move up on the right and try to occupy the Imperial riflemen; the two Tribal units would come up through the centre towards the hill; and the two Elite units would try to drive off the Irregulars on the left before swinging to support the centre. The artillery would most likely achieve very little for us, so the plan was to get it up onto a hill on our side and support where possible.

I forgot to take a photo of our deployment but it should all be pretty clear from the photo of turn 1. From here on out the Imperial objective is marked by four large stone lanterns.

The Game

End of Turn 1.
The Shogunate force inches forward while the Imperial riflemen wheel into line on their left.

End of Turn 2.
A bit more activity here as the bulk of the Shogunate army surges forward... save for the field gun, which remains frustratingly static (evidently one of the crewmen has tripped over a stray root.) The Imperial artillery, on the other hand, draws first blood for the game, taking out one of the Shinsengumi in the Shogunate centre.

End of Turn 3.
The action begins in earnest as the two sides begin exchanging fire. The Shogunate are down 3 riflemen, and the Shinsengumi have been especially hard hit, losing 5 men to artillery and rifle fire. The Shogunate artillery, for its part, remains completely static. The cavalry also fail to do anything, rolling a 3 on 2D6 (they only need a 4 to activate).

On turn 4 the Shinsengumi manage to make contact with the Imperial spearmen...

But do exceptionally poorly, suffering six casualties to the spearmen's five.
Turn 4 overall is a very mixed bag for the Shogunate. In addition to the Shinsengumi being decimated, enemy fire has downed a further two riflemen and three spearmen. The artillery at last manage to advance, but the cavalry roll a 3 again!


End of Turn 5.
If things look very static that's because they are. The elites on the left do get some shots off, and the Imperial rifle line looks increasingly worse for wear, but both Tribal units for the Shogunate fail to advance, and suffer yet another round of fire.

End of Turn 6.
At this stage the balance seems to tip decisively in the Shogunate's favour. While the Shinsengumi wipe themselves out in an attack on the spearmen, they do at least manage to get rid of another three in the process, and casualties continue to mount on the Imperial rifle line, albeit matched by their Shogunate counterparts. The Irregulars by the river are just about down to half strength as well. Throughout this time, the Imperial player managed to pass nearly all his Pinning tests, a source of endless frustration for us – though to be fair, we were managing to pass most of ours as well.

End of Turn 7.
A charge by the Shogunate spearmen is somehow repelled by the surviving Imperials, who are left with their leader. But at long last, the Irregulars are pinned under rifle fire from the Denshūtai foot, freeing up the cavalry to move towards the centre. On the Imperial right, the Chōshū infantry are also Pinned but fail to rally and are forced to retreat. Amid this pressure on his left the Imperial commander realises that he needs to try and save his now-collapsing right, and begins transferring his last intact unit. His artillery again manages to fire, taking out one cavalryman but failing to cause a Pinned result.

On Turn 8 the cavalry swing into action, and with a lucky At the Double roll getting them up onto the hill, they set about slaughtering the gunners.

Elsewhere, a miracle occurs as the Shogunate artillery finally gets a shot off, taking out two of the riflemen in the Imperial reserve. The last Imperial spearman is downed by rifle fire from the Denshūtai, and the loss of the gun also leads to a series of Pinning tests among the Imperial infantry, most of which are failed. While all of these are successfully rallied, this does cause them to miss a turn – something they can ill afford at this juncture.
The Imperial commander grimly assesses the situation.

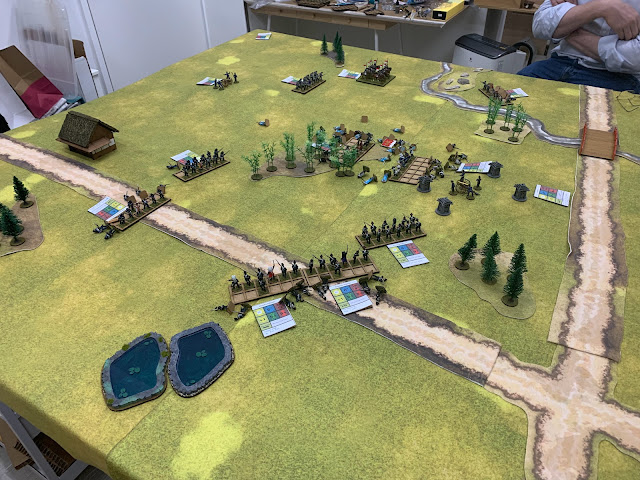
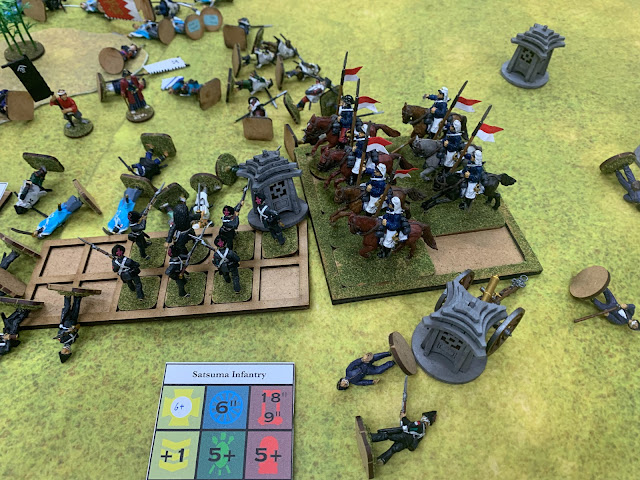
On Turn 9, the Satsuma infantry, further weakened by enemy fire, are charged in the flank by the cavalry on the hill, losing five men for the loss of only one horseman.

With the Imperial position having now almost completely collapsed, their commander decides to cede the field to the Shogunate.

Thoughts

It's been a while since my opponents had had a go at these rules but we all seem to have had a good time of it. There was some exceptionally good dice rolling on the Imperial side and exceptionally bad rolling. for the Shogunate, making it all the more amazing that we came out of this one on top. For instance, the Imperial artillery fired six times, while the Shogunate artillery fired all of once. Even accounting for the fact that we needed to move our gun into position, it proved an exceptionally unenthusiastic piece of ordnance.

On review, we thought that the Imperial player ought to have made better use of the woodlands either side of the hill to provide cover to his riflemen, who would also be better able to concentrate fire against troops coming up through the centre. As it was, his right flank was extremely vulnerable, and even though we had to take serious losses cracking it, once we were through there was very little to stop us rolling up the middle. We perhaps could have given the Imperials a smidge more defensive terrain, or moved the large wood in front of the hill back a bit so that the Shogunate troops weren't in as much cover; I also wonder whether a 4:3 advantage may be a little too much for the attacker, especially when the game is enlarged like this. All things to think about.

Rules Questions

That being said, the wording of some traits did give me some pause, and while we agreed on particular interpretations before we started, these may be worth flagging up for future interest:

  • Brave reads Remove one Pinned Marker for free before activating this Unit in your turn. I have always understood this to mean every turn, but it does seem like this ability allows a unit to shrug off all but the most withering punishment if so. At the same time, nothing says that it only applies once per game the way that Lucky does. Speaking of,
  • Lucky suggests that it could apply to any dice, but my own house rule has been that it must involve the unit whose Leader has this trait: so you can use Lucky to force a re-roll of fire by your unit, but not of a different unit in the same Field Force.
  • Idiot applies every time the unit is about to activate. Presumably this includes Stand To, which is a Free Action, and not actually passing your turn as such. We chose to treat Stand To as just passing and not activating, but perhaps you are supposed to roll before trying to Stand To.
Again, minor quibbles that really only come up in the course of playing, and where there are easy enough ways of resolving the matter.

No Retreat from Nyaungchidauk – Burma 1942

In an unusual move for me, I ended up playing an early  Burma scenario thanks to having the figures to justify it. Instead of early Commonwe...