Showing posts with label Expeditionary Forces. Show all posts

Thursday, 7 March 2024

The Anglo-Indian Intervention Force in Japan, Part Five (Cavalry)

After a long absence from this project, I finally made a big push to get the last combat troops for it done and dusted last week. When I started out, the plan was to do something along the lines of the British expeditionary force in China in 1860, with one British and two Indian regiments. As I went about planning, though, I decided that I wouldn't be able to choose between a Lancer or a Hussar regiment for the British, so I may as well go with both. Later on, as I was doing some reading on the 1860 campaign, it stuck out to me that the merits of heavy cavalry in particular – in this case the 1st Dragoon Guards – were heavily emphasised in the British reports, and that therefore, I probably ought to have a heavy dragoon regiment to hand, too. The end result was that I went from just three cavalry regiments to five.

None of the regiments depicted here had any particular history with Japan; I simply pulled out three British regiments that were stationed in India in late 1867, plus two Indian regiments with interesting uniforms, and called it a day.

Each British regiment comprises nine men, one NCO, one musician, and one officer; the Indian regiments have eight men, one NCO, one musician, and two officers, one Indian and one British. This is enough to do either a full Group of eight men, plus Leaders and a musician, for Sharp Practice, or a single 8-man unit for The Men Who Would Be Kings.

5th (Royal Irish) Lancers

This regiment was the first one I finished, way back in October. There never seems to have been a standardised uniform for the then-five Lancer regiments, so while this lot may look a bit 'generic' their particular combination of uniform features is unique. The musician's uniform, though, is a bit uninspiring, with the only difference being the cap.

Figures are all Perry BIF.

3rd Regiment of Bengal Cavalry

This Sikh regiment I finished just before Christmas. I have to admit that I'm not sure if I quite got this one correct uniform-wise. To my understanding, in 1868 this regiment, originally raised as the second regiment of Skinner's Horse (though this distinction had long since lapsed by 1861, when it formally became the 3rd Bengal Cavalry), wore red uniforms with blue facings and silver lace, and a light blue turban with darker blue stripes. I am not 100% sure, however, and I also know for a fact that I did the officer a little bit incorrectly based on a different regiment.

The British officer is by Perry, converted from a Naval Brigade command figure from either the Sudan or the Zulu War range, and the NCO and two of the men are from their Victoria's Little Wars range. The remainder are all from Artizan's Second Anglo-Afghan War range.

19th Hussars


My first regiment of the new year, the 19th were a pretty obvious inclusion given that they were originally raised in India as a European unit in 1858. Supposedly, the laxer height requirements that the Company army had for European troops led to the 19th being dubbed 'The Dumpies' by some less kind comrades elsewhere in the service! The 19th Hussars' uniform wasn't too tricky to deal with, and in any event most Hussar uniforms were pretty similar, with some minor variations in what exact colour went where. The one bit of fun was the musician's alternating blue-and-white lace, which you can just about see from this angle.

Figures are all Perry BIF.

1st Regiment of Bengal Cavalry


I couldn't exactly ignore the iconic Skinner's Horse in this project, could I? Following shortly on from the Hussars, I did this one up in pretty short order, despite the yellow tunics. What did cause a bit of a headache were a) my desire to give lances to figures with swords drawn, which I have to admit I don't think I did a brilliant job of (I really ought to have used natural rather than synthetic thread), and b) the fact that the turban at this time was not blue with yellow stripes as seen in the early 20th century, which a large number of depictions opt for, but instead red with yellow and black stripes, and I am not just saying that because I may or may not have had to repaint a bit...

The Indian officer and three of the men are Artizan Second Anglo-Afghan War figures; the rest are from Perry's Victoria's Little Wars range.

2nd Dragoon Guards (Queen's Bays)

Finally, early last week, I finished off this lot. I have to admit that I was a bit underwhelmed by what I found of the Dragoon Guards' uniforms, which are just a little bit plain and workmanlike. Still, it gave me a chance to test out some new metal paints I'd got (Darkstar's Molten Metals), although my tendency to go for relatively subtle colour differences I think has meant the effect I got on the helmets doesn't show up well in the photos. As far as I could tell, the 'bays' in the regimental name were entirely nominal by this stage, hence the decidedly non-bay horses on show.

Figures are from Great War Miniatures' Crimea range, with a little bit of cutting at the back to get rid of the coattails so that the tunic better resembles the later stable jacket.

Final Review

Please ignore the slightly Liliputian effect caused by the glimpses of some 20mm ancients that were caught in shot...
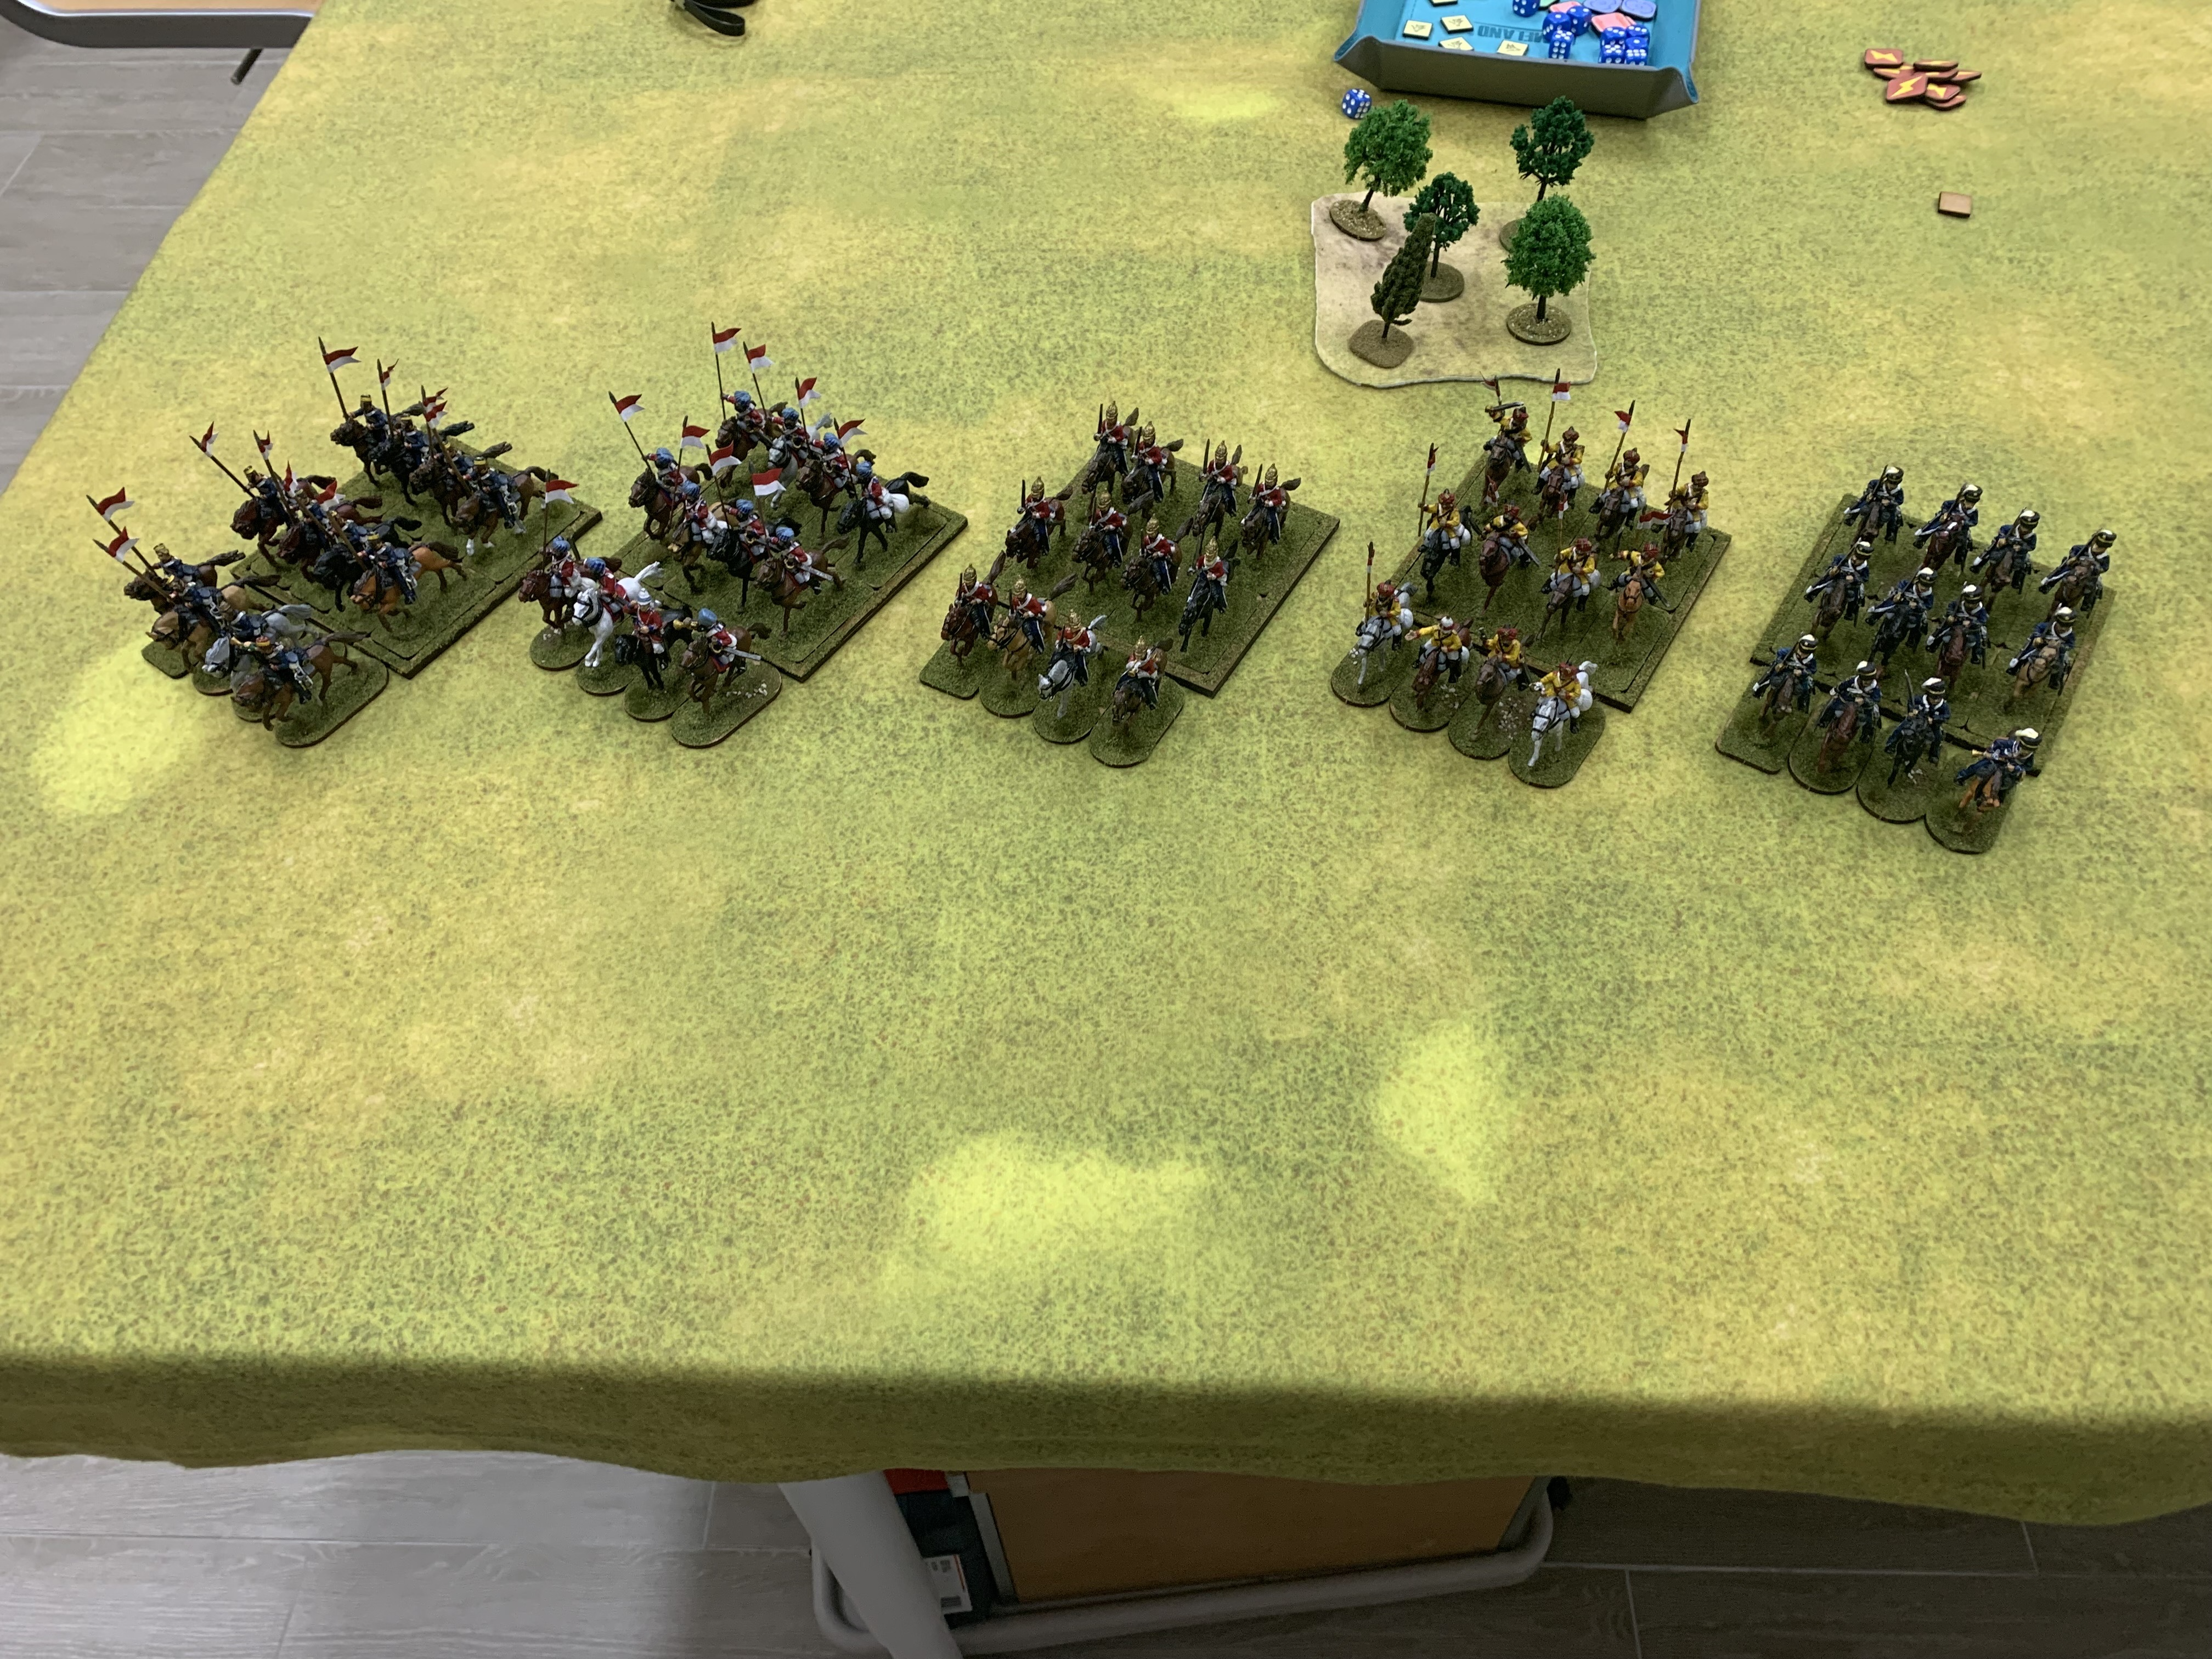


Well, at long last that means all of the combat troops for the British project are now done and dusted. What remains are a handful of supporting figures, and then I can finally say, definitively, that it will all be finished! Probably. I think.

Progress Review

  1. Indian Infantry (complete)
  2. Naval Forces (complete)
  3. Artillery (essentially complete)
  4. British Infantry (complete)
  5. Cavalry (complete)
  6. Support Figures (a few done)
Unfortunately I have a big chunk of time coming up where I will not be able to get any painting done, so I'm hoping to get the support figures finished before then. If not... well, see you again in the second half of April!

Sunday, 8 October 2023

The Anglo-Indian Intervention Force in Japan, Part Four (British Infantry)

After a determined effort, save for a brief sidetrack to round out the artillery, the infantry are at last done. The first of the infantry were done over a year ago, back in August 2022, so the completion of the full set has been a long time coming.

My decisions for the infantry weren't too complicated. In short, I wanted to get a reasonable variety of appearances while sticking with regiments that were more or less on hand. That meant the Yokohama garrison, the Hong Kong garrison, and some regiments from India. As it turns out that was actually not too tricky to do: the late George Nafziger's compilation of orders of battle includes almost yearly accountings of the locations of the regiments of the British Army, so it was easy to check who was where.

It also helped that there is some information on the Yokohama garrison I could draw on, which led to me finding out that there was a changing of the guard in early 1868 as the 1/10th took over from the 2/9th. That, conveniently, gives me a useful element of backstory to my 1868 campaign setting, with the 2/9th remaining in Japan and being reinforced, rather than relieved, by the 1/10th.

Slide taken from this video by Prof. Thomas French, who has done a number of talks over the last few years about the British garrison at Yokohama: https://www.youtube.com/watch?app=desktop&v=944XNCyF6-U

As with the Indian infantry, the plan was for each battalion to have enough men to provide two Groups for Sharp Practice, which would mean at least 16 men plus command figures. This would also be enough for one unit for The Men Who Would Be Kings. With plans laid, it was time to get painting.

2nd Battalion, 9th (East Norfolk) Regiment of Foot


This, along with the 1/10th, I finished in mid-September.

What made this an interesting one was the regimental emblem. Where most regiments would have their number in Roman numerals on their colours, and in Arabic numerals as a cap badge, the 9th were allowed to use Britannia as their symbol by George III in 1799, which they bore on both their regimental colours and their cap badges. Now, while I did go to the trouble of painting a Britannia on their colours (for the simple reason that I wasn't happy with how my printer did it), I was not about to do the same on their caps, hence the somewhat abstract blob I have done on them.

The figures are Perry BIF.

1st Battalion, 10th (North Lincoln) Regiment of Foot


There's less of an interesting history to the 10th, they're really rather bog standard as far as appearance goes. I did this in a batch with the 2/9th, mainly for the sake of convenience, as both regiments had yellow facings. That meant that I'd only need to struggle with that accursed, semi-transparent colour once, and never again (at least for this lot). That said, I did find success with doing the entirety of the cuffs, collars, and shoulder straps in white, and then filling in the yellow bits.

Figures are Perry BIF.

73rd (Perthshire) Regiment of Foot


This one I did quite a while earlier, back in November of last year. The 73rd had started out as the 2nd battalion of the Royal Highlanders in 1780, becoming its own regiment in 1786 but losing its Highland status in 1809. It then managed to suffer not one, but two major maritime disasters: many of its wounded died in the wreck of the Arniston off the coast of South Africa in 1815, and several hundred died during the wreck of the Birkenhead in 1852. While it was officially redesignated a Highland regiment in 1845, it seems as though it never readopted tartan save for officers, and it was made a line regiment again in 1862. In 1866-71 it was the main part of the Hong Kong garrison, hence its inclusion with this force. In a rather fitting coda, in 1881 the Childers Reforms saw the 73rd reunited with the 42nd to form the Black Watch (Royal Highlanders).

Figures are Perry BIF.

42nd (Royal Highland) Regiment of Foot


I used the camera flash on these to make the tartan show better.

A closeup of the piper with full Royal Stewart tartan.

Speaking of the Black Watch, this was the part that I most dreaded doing and most wanted done, but I think the results do speak for themselves. Having fought in India in 1857, they were still there ten years later, so I thought I'd give them a change of scenery.

Most of the regiments I did as a large batch of men followed by the command figures individually or in small batches where uniforms matched. For these, the sheer quantity of tartan meant I decided that I would not try to attempt that. Instead, I'd do small batches of 4 at a time for men, 2 at a time for command figures, each of which would be about a day or two's worth of painting. This ultimately took about two weeks to finish.

I admit that I'm not entirely sure about the accuracy of the piper's uniform, which I based on some photos from 1866 with attributed colours, but he's a fun splash of extra colour to the regiment.

The figures are slight conversions from Iron Duke/Empress Miniatures' Sutherland Highlanders from their Indian Mutiny range. These are wearing the low-cut 'China boat-coat' with simplified cuffs issued for the early part of the Arrow War in southern China, rather than the standard doublet with tashes and cuff flaps. A dremel was used to create the tashes, and I painted the cuff flaps on.

3rd Battalion, Rifle Brigade (Prince Consort's Own)


Sorry for the odd colour balance here, some setting must have changed without my notice.

I thought I'd make things easy for myself right at the end, with the much simpler uniform of the Rifle Brigade. Well... I thought I'd make things easy for myself, but some little niggles crept in.

The main thing was that Rifle battalions used the 'two-band' Short Rifle rather than the 'three-band' Long Rifle. Now, that just meant cutting the rifles down, no? Well... the shorter rifle means that the slings tend to attach differently, with most examples having the sling going from the second band to about halfway down the stock. So that meant also cutting and filing round the slings, then using Green Stuff to extend them. Funnily enough, Perry modelled the sergeant half-correctly: the rifle is the shorter version, but the sling terminates in front of the trigger guard as on the long rifle. Ah well, I only caught that after I'd finished painting, and it's not inaccurate, just uncommon.

Figures are, again, Perry BIF.

2/20th (East Devonshire) Regiment of Foot

This is a bit of a small supernumerary unit that I'd done up for Ronin games for use as legation guards, hence the 2/20th which was the first of the Yokohama garrison battalions. I might buff it out to a full size force at some stage, but given how many troops I have already... probably not.

The sergeant and men are from Foundry's Indian Mutiny range, while the officer is a conversion from Artizan's Second Anglo-Afghan War range,

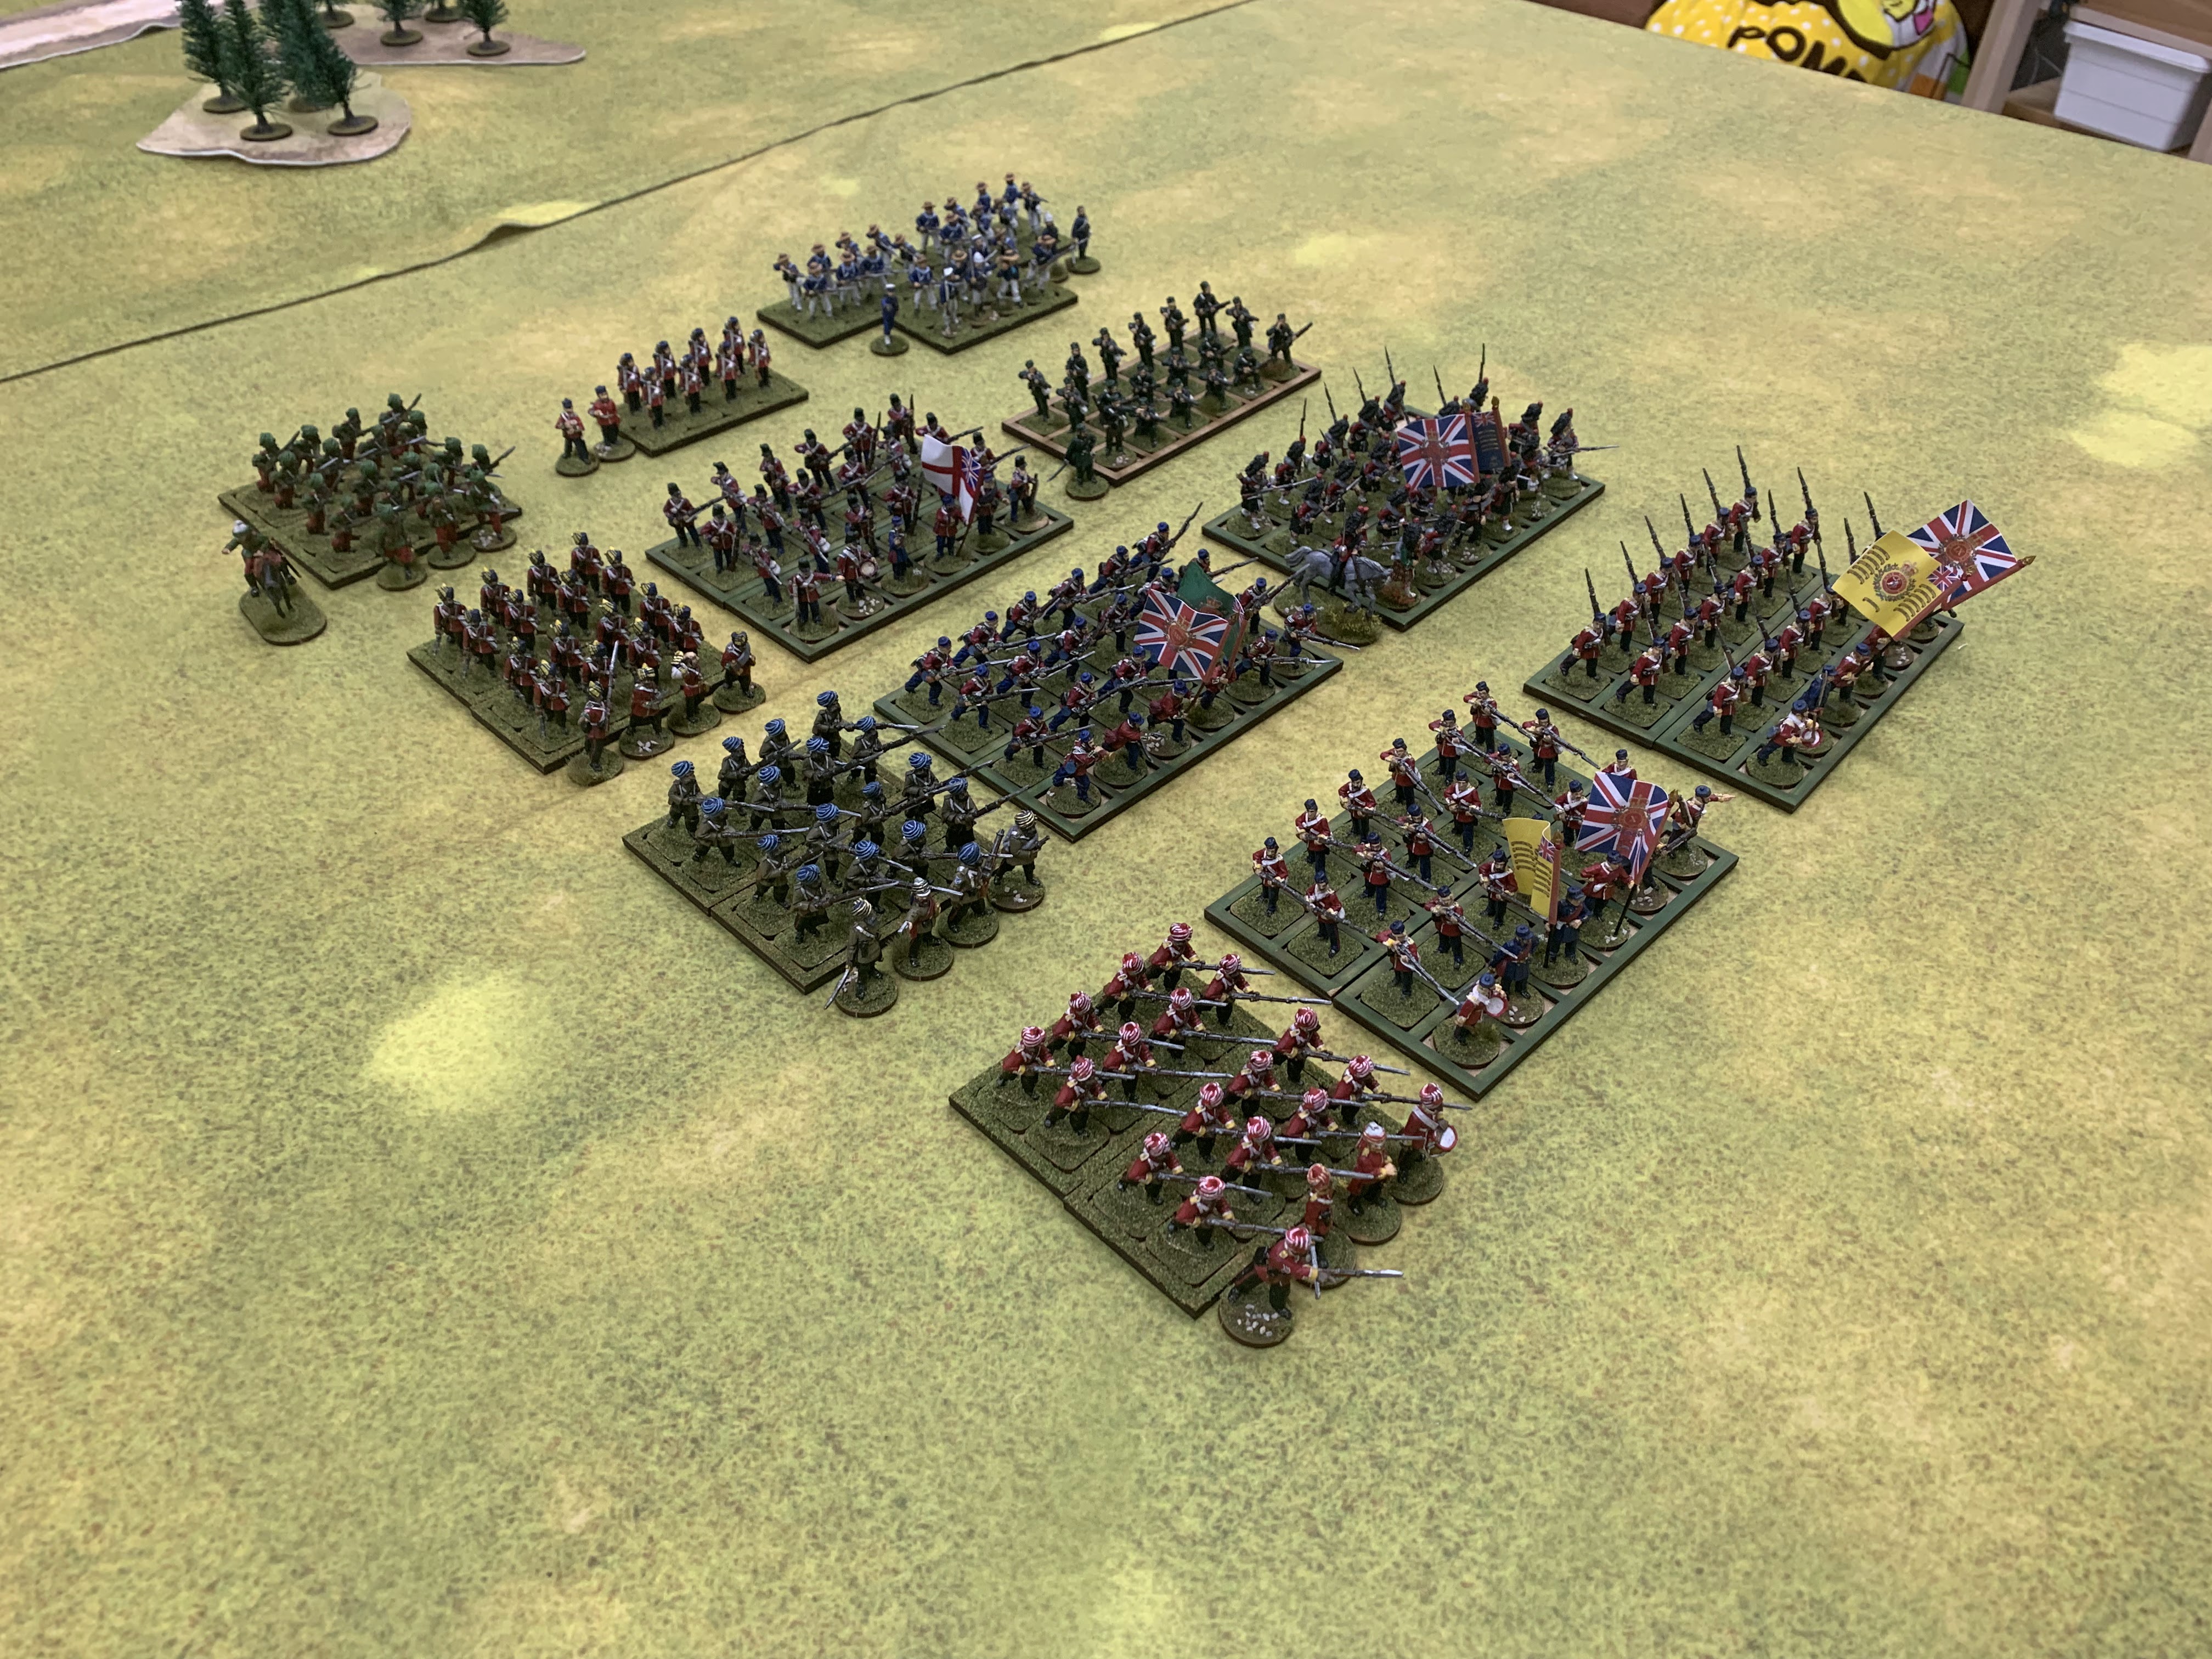
Infantry in Review

With the infantry done, I decided to lay them all out:


That's 256 men and 2 horses: 76 Indians (including Baluchis) plus 4 British officers; 82 British line infantry, 24 highlanders, 19 Rifles, 24 Royal Marines, and 27 Naval Brigade.

These I've organised into the three brigades in which I plan to organise them, plus supernumeraries at the back:

  • 1st Brigade: 10th BNI, 2/9th, 1/10th
  • 2nd Brigade: 45th BNI, 73rd, 42nd
  • 3rd (Light) Brigade: 6th BNLI, RMLI Bn., 3/Rifle Bde.
  • Extras: 29th ByNI, 20th, Naval Bde.

Each brigade will also have an artillery battery.

Progress Review

  1. Indian Infantry (complete)
  2. Naval Forces (complete)
  3. Artillery (essentially complete)
  4. British Infantry (complete)
  5. Cavalry (not started yet)
  6. Support Figures (a few done)
The cavalry will be the real gauntlet here for no other reason than that I hate painting horses, but if I could do 24 Highlanders, I can do... er... well. You'll see how many cavalry I need to do once I've done all of them.

Friday, 22 September 2023

The Anglo-Indian Intervention Force in Japan, Part Three (Artillery)

Finally following on from the last part, I stalled a bit on the artillery because there was just going to be a lot of technical complexity involved, in two main ways: firstly, I hate painting wheels and have no idea how anyone gets paint between the spokes and along the inside; secondly, I like my wheels to turn, which means a lot of drilling and messing around with brass and pewter to get the axles fixed. Technically I wouldn't consider the artillery fully done per se, but given that I've got all the guns and crew finished, I will call them just about complete even though I still have a couple of limbers and horse teams still to do.

I have to admit it is quite funny that the first image you get when you google 'Armstrong Gun' is this one, showing of one of the half-dozen guns that were built in Nagasaki, rather than at Elswick or Woolwich.

I did up the artillery basically on a whim based on what I thought would look fun, in no small part because my attempts to actually find details on Victorian field and siege pieces came to very little. If anyone has any good resources, please direct them my way!

Incidentally, I had no luck identifying the artillery pieces at either end of the line shown here in Felice Beato's 1864 photographs of the Yokohama garrison. The ones on the left seem like bronze field pieces and the ones on the right some sort of mountain guns, but I could be totally off.

Following my plan of one cavalry and three infantry brigades, I decided I'd want at least four crews and field guns, and grab anything else within the realms of plausibility that caught my fancy, just for fun.

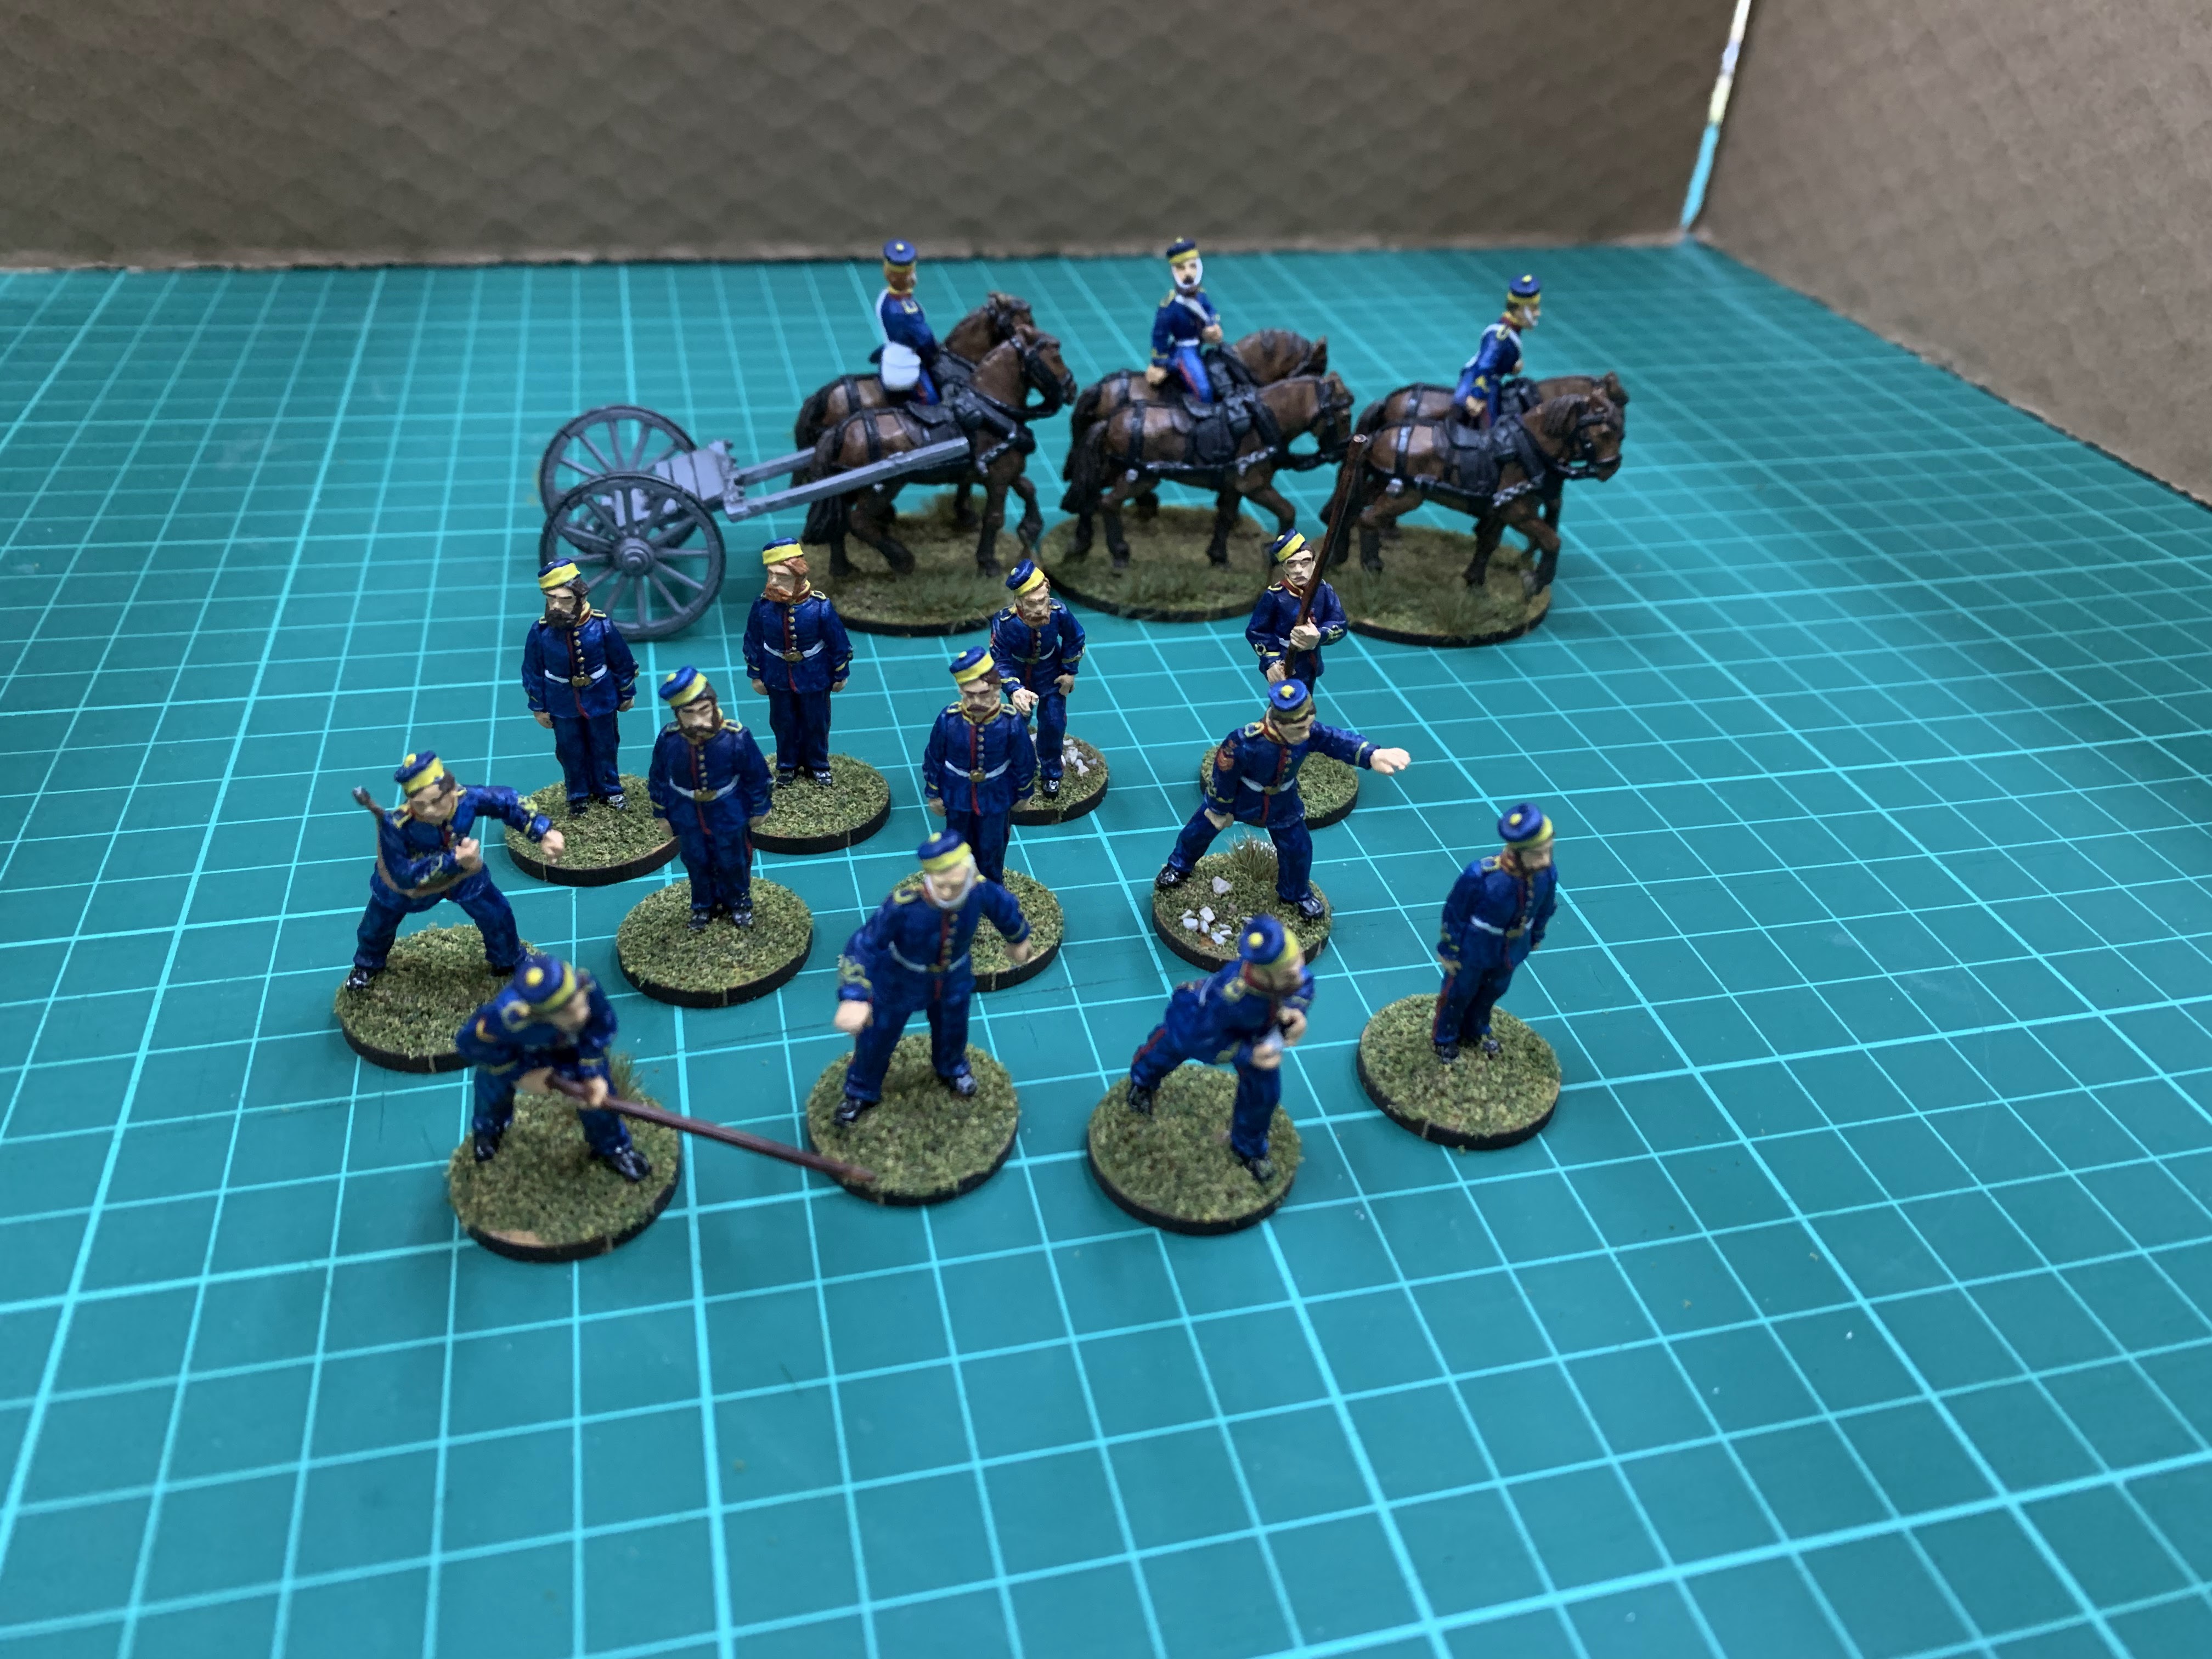
Foot Artillery


These were actually the first figures I did for what would become the expeditionary force. I had bought a couple of Armstrong guns from Perry's BIF range for the Japanese, and after some indecision over whether to do headswaps on the crew or paint them as British, I decided to do the latter, knowing full well that others would have to follow...

I went off a couple of uniform references for these and I think I got the colours right, but it seems like, as with all parts of this project, exceptions and ambiguities abound. The 12 crew here include some painted up as NCOs, which is enough for two Sharp Practice guns (5 crew per gun + 1 NCO to serve as Leader) or for three TMWWBK (4 crew per gun).

The dismounted crew are all from Perry's BIF range, while the limber and horse team are from Foundry's Crimea range (with some significant modification to the uniforms).

Horse Artillery


I got a little carried away here, deciding that much as I liked the first batch of crew in pillboxes, I may as well also do some in busbies, so that's why I have two crews despite only planning one battery. If nothing else, these figures taught me how much I hate having to paint yellow onto dark surfaces, which will be, er, fun when I get to some figures I have planned in future...

The crew in pillbox hats are from Foundry's Indian Mutiny range, with the sun covers filed down, while the crew in busbies are unmodified from their Crimea range. The man with a carbine is from Empress Miniatures' Zulu War range, again with modified headgear. That also came with a mounted officer but I decided I'd use him as a general and put him on the backburner.

Mortars


Oh yes, this is where the fun begins. After seeing mortars in Foundry's Crimea range I decided I had to have some, and so here we are. I can't see any particular use for them, but I do at least have them.

Siege Guns

You didn't think it stopped there, did you? If I was going to get mortars, why not go the whole hog and have some heavy pieces too? Four of the guns are from Foundry's Crimea range: a 32-pounder and a 24-pounder bronze howitzer, a 10-inch howitzer (I believe iron), and a 32-pounder naval gun on field carriage. In the back is a 3D-printed 40-pounder Armstrong gun from Actual Size Miniatures.

Rockets


It was more or less sheer coincidence one day that I was looking at Hale rockets – it must have been after a rewatch of Zulu Dawn – and noticed that they were introduced into the British Army in 1867, which means they are of course just in time for my hypothetical 1868 expedition.

So, yet another conversion coming up, with some Perry Zulu War figures given some Green Stuff to make airpipe helmets, and all painted as RA crew rather than the mixture of RA and infantry that they're notionally supposed to be. Yes, that does mean several figures have rifles, but that seemed a small enough detail, easy to ignore.

Full Review


I will be the first to say that I have a lot of guns here, more than I'd originally anticipated. I wish I could tell you it was planned, but, er, not quite. I'd originally had three Perry Armstrongs that came with the crew: one was done up on a plain wooden carriage for the Japanese and the remaining two on grey carriages for the British. I then decided I wanted more Armstrongs, but I seem to have decided this on two separate occasions, as, after putting in an order from 1st Corps, I found, in a box, two unpainted Perry guns and crews. Whoops! The three guns in front of the foot crews and the one on the limber are thus Perry pieces, while the two guns being operated by the horse artillery are from 1st Corps' American Civil War range.

What next?

Before committing to finishing the artillery, I made a start on the British infantry, who are now over the halfway mark in terms of completion. That would then leave the cavalry (which I am dreading already) and then various miscellaneous figures such as command staff. And then, onwards to something else!

  1. Indian Infantry (complete)
  2. Naval Forces (complete)
  3. Artillery (essentially complete)
  4. British Infantry (3 of 5 battalions complete)
  5. Cavalry (not started yet)
  6. Support Figures (a few done)

Wednesday, 16 August 2023

The Anglo-Indian Intervention Force in Japan, Part Two (Naval Troops)

Following my last post, which covered the Indian infantry on this project, I've now rounded out the naval forces. These make up one of the smaller portions of the overall force, consisting of one unit of Royal Marines, a unit of Naval Brigade, and a gun crew. The plan originally was to do only a small handful of sailors, but earlier this year I decided to do a participation game at the Overlord show in Abingdon based on the 1864 Shimonoseki Expedition.

A photograph by Felice Beato showing one of the British naval brigades – and a few stray Marines in the foreground? – in possession of a Japanese coastal battery at Shimonoseki in 1864.

To do that, I decided I would need two units of Marines, two of British sailors, and one of French. When I started the process, however, I somehow completely failed to do any research into the kit worn at the time, which is why my Naval Brigade are all wearing sennet hats rather than white caps. Similarly, for the Marines I went with troops with shakoes on the basis that those were what I saw in contemporary illustrations, but in retrospect it's become clear that they would have been wearing Kilmarnock forage caps. Oh well, at least it makes them look different!

But truth be told, errors of research were a bit of a running theme with these, and I won't call them my proudest effort as such from the standpoint of historical verisimilitude.

Royal Marine Light Infantry


I forget where I came across the apparent use of the White Ensign on land, but it would postdate the 1864 period that I had originally painted these figures for. The uniform is sort of off, too, as the shako is the taller 'Albert' withdrawn in 1855 rather than the 'French-style' one I was trying to mimic. Still, you likely wouldn't be able to tell at a distance. Moreover, they are possibly the only troops wearing the correct tunic for 1868, that being the 1863 tunic with the pointed cuffs and loopy bits, rather than the 1856 tunic with rectangular elements that most of my infantry figures have (and which I mimicked for the Indian regiments).

In total, there are 18 men and 6 command figures, which means two Groups plus command and support for Sharp Practice, or two full units for The Men Who Would be Kings.

The figures are from Perry's BIF range, being their Canadian militia with the aforesaid mixed kit.

Naval Brigade


As previously noted, the sennet hats were an unfortunate error. One of the officers here also is wearing an 1877 Foreign Service Helmet, which again, oopsie. But what makes these fun, besides just being a different colour, is the presence of cutlass bayonets, which I think look appropriately vicious. As with the Marines, there's enough for either two Sharp Practice Groups, or two TMWWBK units.

Figures are primarily Perry, drawn from their Victoria's Little Wars range for the men, and both the VLW and Sudan ranges for the officers. There's also one chap in late 1850s garb from Foundry's Mutiny range.

Naval Gun Crew


There are two crews here, one from Foundry's Mutiny range who are operating the 32-pounder naval gun, and then some figures for a Perry Sudan Gatling gun. I got the Gatling – despite being an anachronistic model – for the forces of Nagaoka, who did have two of them, but I've since bought a more period-accurate model that I'll do up eventually, probably.

The Full Lineup

What next?

Well, that now ticks off another entry on the list. I have a few more artillery elements to do, including some, er, recent orders, so I'll hold off on marking those as complete until they really truly are complete. In the meantime that will mean forging ahead again on the infantry.
  1. Indian Infantry (complete)
  2. Naval Forces (complete)
  3. Artillery (mostly complete)
  4. British Infantry (1 of 5 battalions complete)
  5. Cavalry (not started yet)
  6. Support Figures (a few done)

And Incidentally...

Overlord made it into the local papers – with my game in the header image!

Sunday, 13 August 2023

The Anglo-Indian Intervention Force in Japan, Part One (Indian Infantry)

For reasons I can no longer really work out, I decided, just as I was starting to build up some decently sized Japanese forces for the 1868-9 Boshin War, that a fun additional project would be doing some British and French expeditionary forces. Should I ever finish the British one, it alone will probably number almost as much as both my Imperial and Shogunate armies put together. Logically of course, that means the latter two ought to be enlarged...

Questionable decisions aside, it's something that I've made fits and starts on in the last year, and that I now feel I ought to make a more determined push on. So, this first post will document the one complete element of these forces so far, that being the Indian infantry, and hopefully that spurs me on to get the rest of these finished in the coming months.

The decision to field Indian troops in this force was made for three reasons. Firstly, why not? Secondly, the hypothetical structure of my expeditionary force was based on a slightly reduced version of the force that made up the British expeditionary force to Peking in 1860, in which each of the four brigades consisted of two British battalions and one Indian. The difference would be that I would have three brigades instead. Thirdly, there were actually Indian troops in Japan for a brief spell in 1864. At the height of the antiforeign crisis during the Chōshū attempt to blockade the Straits of Shimonoseki, two companies of the 29th Bombay Native Infantry (formerly the 2nd Bombay Baluch Regiment) were dispatched to Yokohama to bolster the garrison there, until being withdrawn later that year.

Felice Beato's photograph of the Yokohama garrison at its peak in 1864; the Baluch companies are just right of the centreline in the foreground. 
Slide taken from this video by Prof. Thomas French, who has done a number of talks over the last few years about the British garrison at Yokohama: https://www.youtube.com/watch?app=desktop&v=944XNCyF6-U

That being said, I actually found out about the Baluchis quite late in the process, so these ended up being a 'bonus' battalion alongside the others. 

It would be gratifying to say I had a particularly good plan for these, but I really didn't. Each unit consists of 16 men, one British Officer, one Native Officer, one NCO, and one musician, for a total of 20. That gives enough for two Groups for Sharp Practice, but is not quite enough to do two units for TMMWBK. (Oops!)

6th Bengal Native (Light) Infantry


It seems to be somewhat of a received wisdom that the British Indian Army broadly wore khaki uniforms after the uprisings of 1857-8 with scarlet reserved for dress uniforms, but in fact scarlet undress remained common for the Bengal Army outside of the Punjab regiments, which specifically chose drab. The 6th BNLI, formerly the 43rd Light Infantry, were among the non-mutineer regiments, and part of the ordinary Bengal army, hence the red. I didn't have good access to uniform guides for the infantry, so what I did here was relatively speculative based on what I could find of turban and facing colours; I was also faced (throughout) with ambiguity over the use of gilt piping by officers, but decided in favour of it for aesthetics' sake. I am happy to be told I am wrong, but will not be repainting these at this time.

All of the Indians are from Artizan's 2nd Anglo-Afghan War range, but with liberal use of Green Stuff to bulk out the puttees into trousers. The British Officer is from Foundry's Indian Mutiny range, without alteration.

10th Bengal Native Infantry


As with the 6th, the 10th were the descendants of a loyalist regiment, the 65th. There seems to be some ambiguity on the turban which ultimately led me to pick the lengthways white stripes on a red base, but it may be that in this earlier period, they had the same sort of turban as the 6th (yellow stripes on blue base) while having yellow facings. Nevertheless, I picked the red and white for distinctiveness.

Also as with the 6th, the Indians are all converted Artizan figures. The British Officer is from the same pack of Indian Mutiny characters as the one for the 6th, but modified from a spiked cavalry helmet to an air-tube type.

45th (Rattray's Sikh) Bengal Native Infantry


The inclusion of a Sikh regiment seemed warranted, and I very nearly went for the 23rd, a Pioneer regiment. I decided, however, that I didn't feel like doing up a load of tools as part of the conversion process, and, inspired by a rendition of them I saw on Will's Toy Soldier Blog, I instead did up a unit of the 45th based on a photo of them in the Second Anglo-Afghan War, during which they wore field service khaki tunics but kept their dress trousers and turbans. It is at this point that I ought to acknowledge that it was only after I finished the Indian infantry that I discovered that their trousers ought to be very dark blue rather than black, but I thought it was not worth going back over them again at this point.

As with the two Jat regiments above, Native Officers and enlisted men are by Artizan; the British Officer is from Foundry. The NCO comes from the pack of Sikh and Askari NCOs in Foundry's Darkest Africa range, hence the anachronistic Martini.

29th Regiment of Bombay Native Infantry (or 2nd Bombay Baluch Regiment)


As noted, the Baluchis were somewhat of an afterthought and ultimately a bit of a bodge, but I think they came together nicely. The thing that really distinguishes them is of course their green and red kit, which I think adds a nice extra splash of colour.

The men are somewhat modified Sikh Sepoys from Empress' Indian Mutiny range (possibly formerly Iron Duke?), while the command figures are the Jacob's Rifles command pack by Perry – with added trouser legs! I did consider the Foundry Baluchis, but I decided that I wanted a bit more dynamism and figure variety, and that the Empress Sikhs were close enough, if a little more thickly-bearded than Baluchis of the time would have been. (Note that these are specifically IMBC64BNI rather than 5/6/7/21.)

The Full Lineup

What next?

The way I have conceived of these forces, I have decided to divide them into six relatively sensible and manageable chunks, at varying stages of completion. They are arranged here in the order in which I intend to finish them:

  1. Indian Infantry (complete)
  2. Naval Forces (mostly complete)
  3. Artillery (mostly complete)
  4. British Infantry (1 of 5 battalions complete)
  5. Cavalry (not started yet)
  6. Support Figures (a few done)

On that basis, I'd say I'm about half done with all this. What remains to be done are a couple of naval officers, four more units of infantry (totalling 88 men – three units of 24 and one of 16); four units of cavalry (I forget my exact numbers for these but that'll be between 36 and 48 figures); an extra horse artillery crew; and a variety of odd supporting figures. My plan, ideally, is to finish before the end of the year. This should be viable, but I tend to be pretty slow with cavalry, so let's see how it goes. I also feel like I need a few more field-calibre guns (don't ask why but I decided I wanted a huge siege train and sort of forgot the lighter pieces) so that may also impose a delay. But. It is all getting there.

General Roundup for Early August

It's been a fairly hectic period with a lot of games for me, so rather than spending lots of time writing lots of detailed battle report...