The Anglo-Indian Intervention Force in Japan, Part Three (Artillery)
Finally following on from the last part, I stalled a bit on the artillery because there was just going to be a lot of technical complexity involved, in two main ways: firstly, I hate painting wheels and have no idea how anyone gets paint between the spokes and along the inside; secondly, I like my wheels to turn, which means a lot of drilling and messing around with brass and pewter to get the axles fixed. Technically I wouldn't consider the artillery fully done per se, but given that I've got all the guns and crew finished, I will call them just about complete even though I still have a couple of limbers and horse teams still to do.
 |
| I have to admit it is quite funny that the first image you get when you google 'Armstrong Gun' is this one, showing of one of the half-dozen guns that were built in Nagasaki, rather than at Elswick or Woolwich. |
I did up the artillery basically on a whim based on what I thought would look fun, in no small part because my attempts to actually find details on Victorian field and siege pieces came to very little. If anyone has any good resources, please direct them my way!
_-_Google_Art_Project.jpg) |
| Incidentally, I had no luck identifying the artillery pieces at either end of the line shown here in Felice Beato's 1864 photographs of the Yokohama garrison. The ones on the left seem like bronze field pieces and the ones on the right some sort of mountain guns, but I could be totally off. |
Following my plan of one cavalry and three infantry brigades, I decided I'd want at least four crews and field guns, and grab anything else within the realms of plausibility that caught my fancy, just for fun.
Foot Artillery

These were actually the first figures I did for what would become the expeditionary force. I had bought a couple of Armstrong guns from Perry's BIF range for the Japanese, and after some indecision over whether to do headswaps on the crew or paint them as British, I decided to do the latter, knowing full well that others would have to follow...
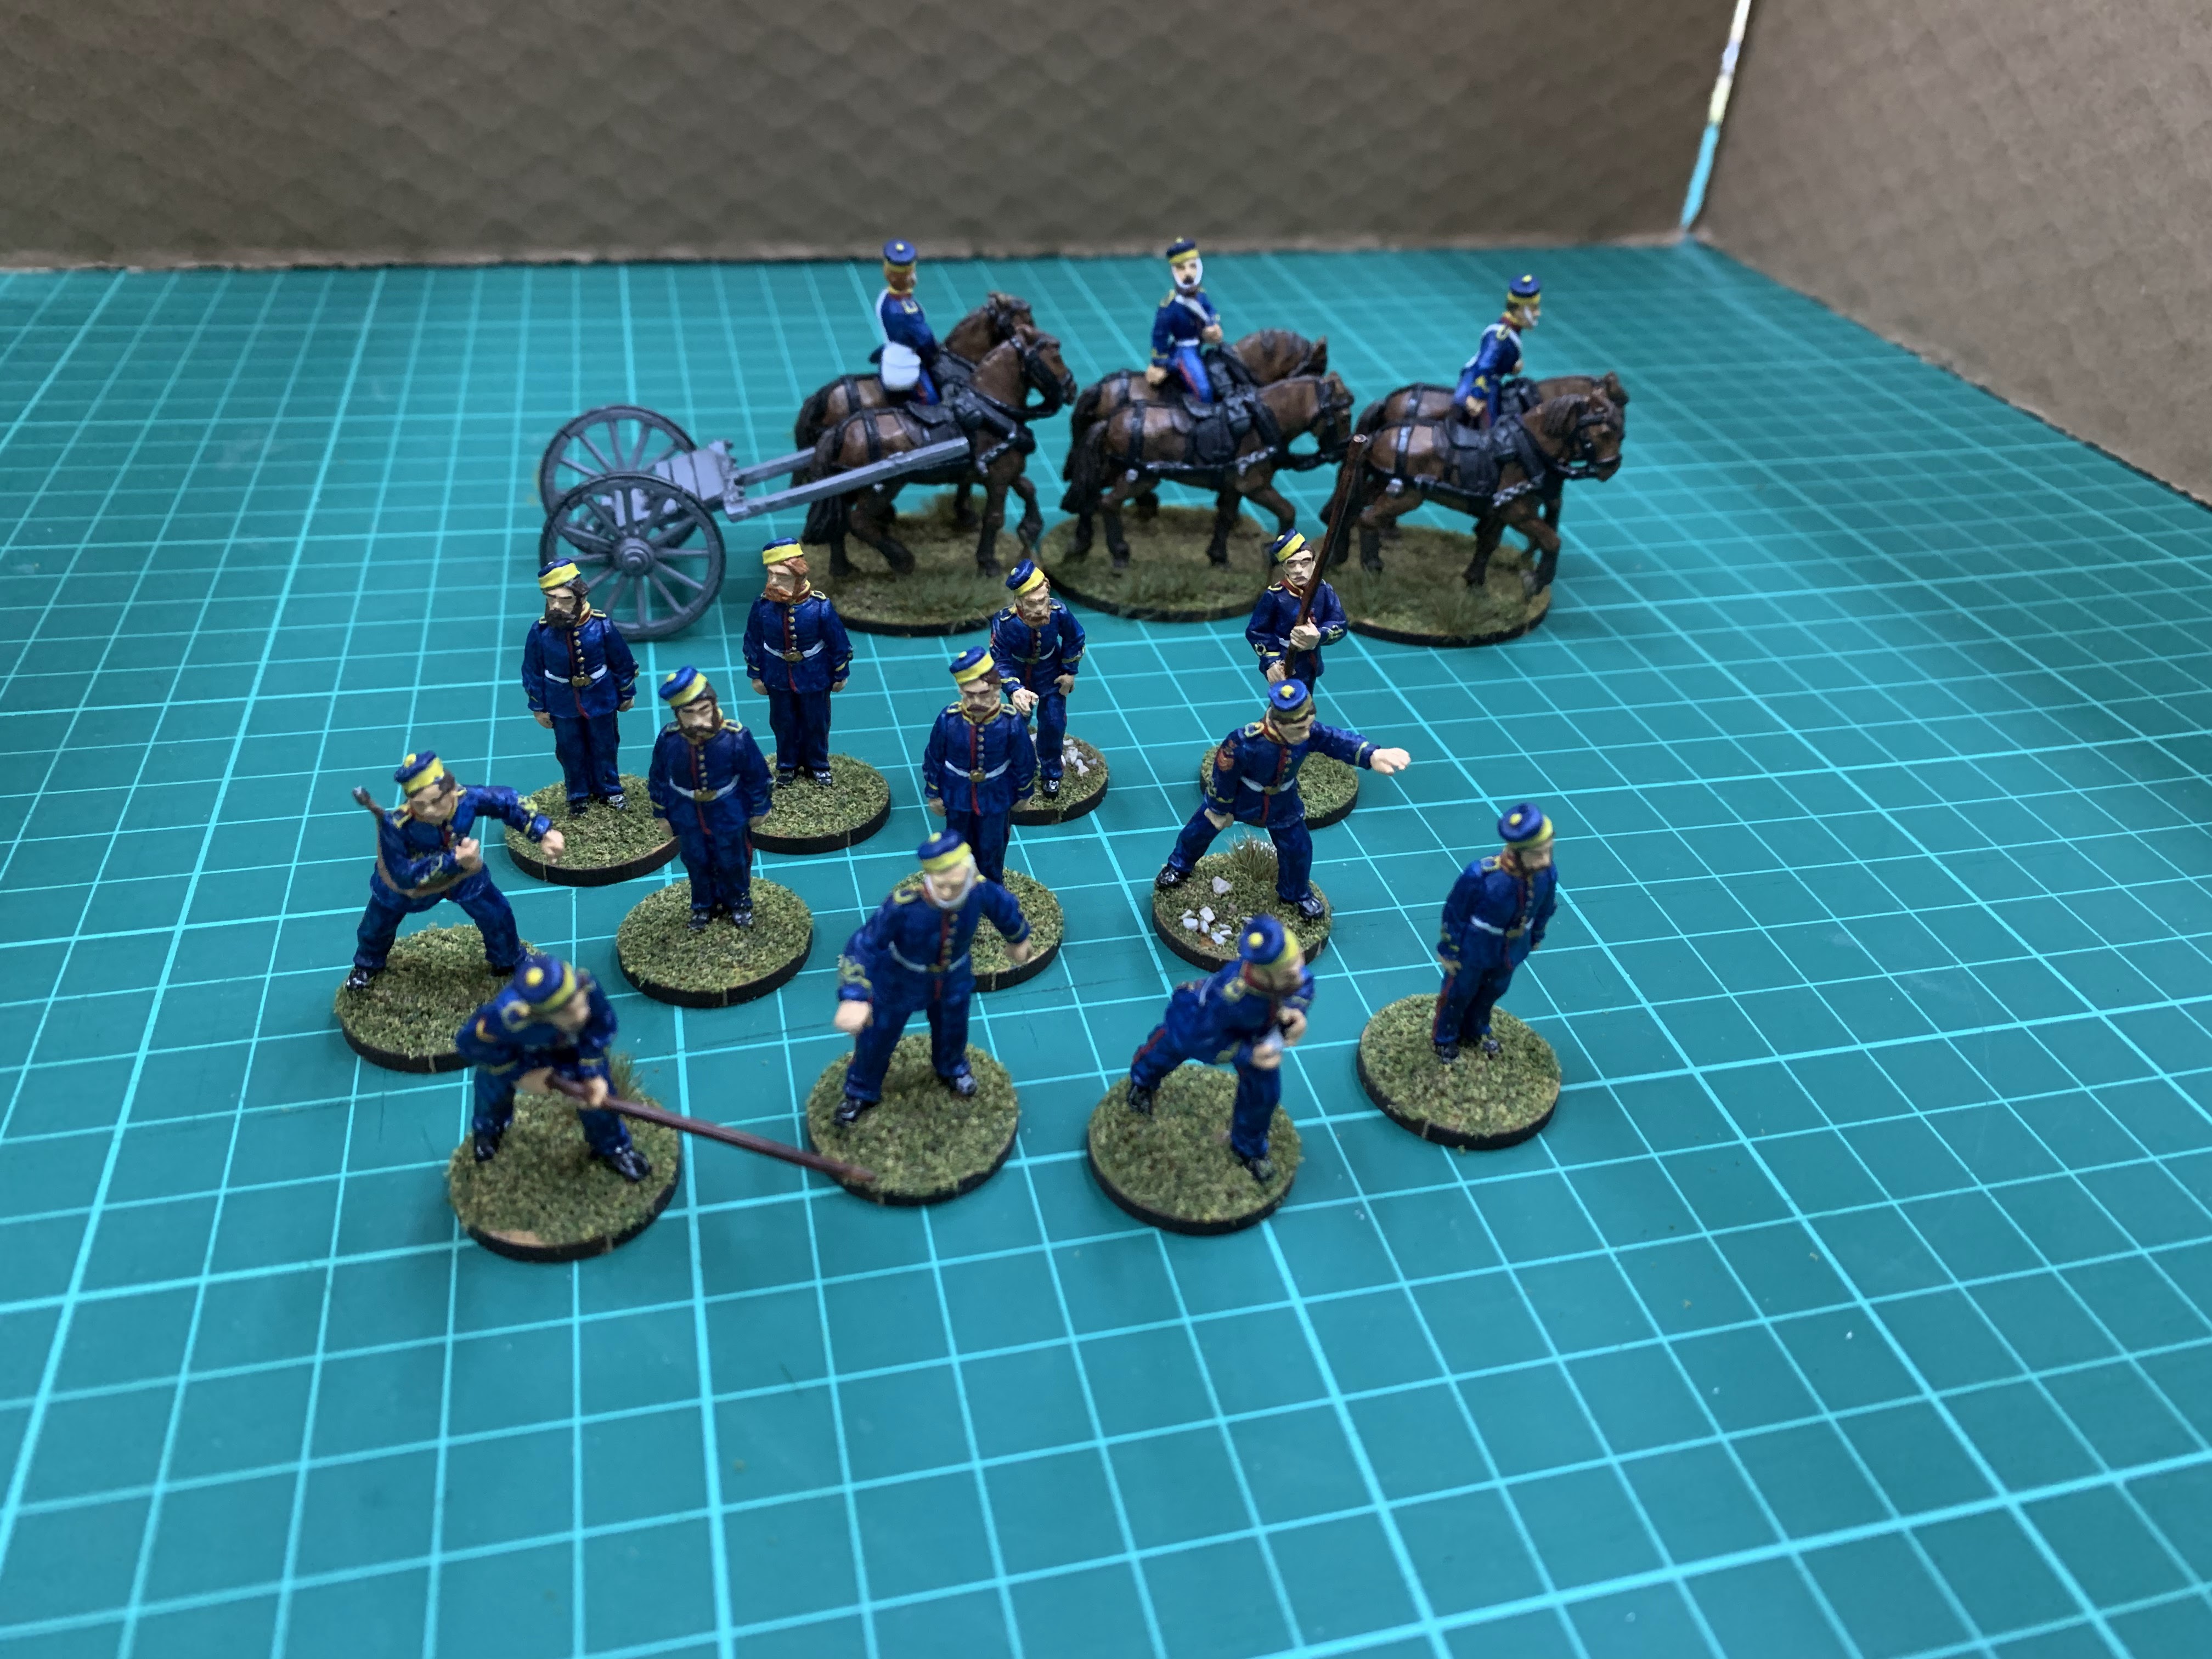
I went off a couple of uniform references for these and I think I got the colours right, but it seems like, as with all parts of this project, exceptions and ambiguities abound. The 12 crew here include some painted up as NCOs, which is enough for two Sharp Practice guns (5 crew per gun + 1 NCO to serve as Leader) or for three TMWWBK (4 crew per gun).
The dismounted crew are all from Perry's BIF range, while the limber and horse team are from Foundry's Crimea range (with some significant modification to the uniforms).
Horse Artillery


I got a little carried away here, deciding that much as I liked the first batch of crew in pillboxes, I may as well also do some in busbies, so that's why I have two crews despite only planning one battery. If nothing else, these figures taught me how much I hate having to paint yellow onto dark surfaces, which will be, er, fun when I get to some figures I have planned in future...
The crew in pillbox hats are from Foundry's Indian Mutiny range, with the sun covers filed down, while the crew in busbies are unmodified from their Crimea range. The man with a carbine is from Empress Miniatures' Zulu War range, again with modified headgear. That also came with a mounted officer but I decided I'd use him as a general and put him on the backburner.
Mortars

Oh yes, this is where the fun begins. After seeing mortars in Foundry's Crimea range I decided I had to have some, and so here we are. I can't see any particular use for them, but I do at least have them.
Siege Guns

You didn't think it stopped there, did you? If I was going to get mortars, why not go the whole hog and have some heavy pieces too? Four of the guns are from Foundry's Crimea range: a 32-pounder and a 24-pounder bronze howitzer, a 10-inch howitzer (I believe iron), and a 32-pounder naval gun on field carriage. In the back is a 3D-printed 40-pounder Armstrong gun from Actual Size Miniatures.
Rockets

It was more or less sheer coincidence one day that I was looking at Hale rockets – it must have been after a rewatch of Zulu Dawn – and noticed that they were introduced into the British Army in 1867, which means they are of course just in time for my hypothetical 1868 expedition.
So, yet another conversion coming up, with some Perry Zulu War figures given some Green Stuff to make airpipe helmets, and all painted as RA crew rather than the mixture of RA and infantry that they're notionally supposed to be. Yes, that does mean several figures have rifles, but that seemed a small enough detail, easy to ignore.
Full Review

I will be the first to say that I have a lot of guns here, more than I'd originally anticipated. I wish I could tell you it was planned, but, er, not quite. I'd originally had three Perry Armstrongs that came with the crew: one was done up on a plain wooden carriage for the Japanese and the remaining two on grey carriages for the British. I then decided I wanted more Armstrongs, but I seem to have decided this on two separate occasions, as, after putting in an order from 1st Corps, I found, in a box, two unpainted Perry guns and crews. Whoops! The three guns in front of the foot crews and the one on the limber are thus Perry pieces, while the two guns being operated by the horse artillery are from 1st Corps' American Civil War range.
What next?
Before committing to finishing the artillery, I made a start on the British infantry, who are now over the halfway mark in terms of completion. That would then leave the cavalry (which I am dreading already) and then various miscellaneous figures such as command staff. And then, onwards to something else!
- Indian Infantry (complete)
- Naval Forces (complete)
- Artillery (essentially complete)
- British Infantry (3 of 5 battalions complete)
- Cavalry (not started yet)
- Support Figures (a few done)


Comments
Post a Comment