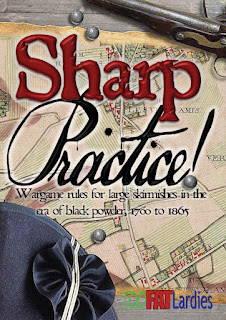
Back to Sharp Practice this week, with a relatively simple setup as Gareth took charge of an Imperial attacking force going up against a Shogunate defender, using the 'Defence in Depth' scenario out of the rulebook. I decided I'd bring out the temple terrain again, a decision with... fateful consequences. We rolled quite high for support (16), so Gareth upgraded his main infantry over to breechloaders, upgraded his light infantry Leader, and got a Musician as well. For my part, the Shogunate force was 1 point lower, so I decided to spend 16 support points on a unit of Yugekitai Skirmishers and took a Holy Man with the leftover point. Suitably fuelled with some churros from a local confectioner's, we set our sights on the battlefield.
 |
| The table: Imperial DP in the upper right corner, Shogunate Primary DP behind the main shrine building, and secondary DP in the theatre (roof removed). |
 |
| The Imperial force: two Groups of Regulars with BL rifles led by a Status III Leader (black headdress) and accompanied by a Musician, two Groups of Regulars with ML rifles led by a Status II (white headdress), and one Group of Light Infantry with BL rifles led by a Status II (red headdress). |
 |
| The Shogunate force: two Regulars with ML rifles led by a Status III Leader, two Skirmishers with BL rifles led by a Status II, two Regulars with Muskets led by a Status I, and a Clan led by a Status II. |
 |
A set of custom tokens I've done up for Boshin War games, as an alternative to cards.
|
Gareth opted to try to beeline for his objective by going past the pagoda, but some unfortunate bad draws in the first couple of turns meant he only had a single formation on the table to start off with and didn't have the covering fire he might have liked, especially as my skirmishers started taking up positions in the pagoda.
 |
| End of turn 1: Some Shogunate elements on the table; Imperial column prepares to enter the temple complex. |
 |
End of turn 2: Imperial column shelters behind a shrine as the Shogunate skirmishers start occupying the pagoda.
|
 |
| End of turn 3: Imperial force fully deployed. |
 |
| End of turn 4: Developing situation on the left as the Imperial skirmishers rush into the woods to try and occupy the Shogunate rifle line. |
 |
| Turn 5 is a Chapter End as the Tiffin is drawn first. |
 |
Turn 6: First fire by the skirmishers against the Imperial army's second-tier riflemen deals unexpectedly severe damage: three dead and a light wound to the officer!
|
 |
| End of Turn 7: The Shogunate skirmishers shift their fire to the Imperial column in the open, which takes severe Shock as a result. |
 |
Turn 8: shock result as the Imperial skirmishers manage to kill three Shogunate riflemen!
|
 |
| Shogunate losses mount further as rifle fire from the men behind the fence manages to kill one of the skirmishers on the first floor. |
 |
| Gareth takes advantage of a four-card activation to fire his muzzleloaders again (to no effect) and to do some more rallying on his beleagured breechloader men. |
 |
| Unfortunately, I managed to get my musketeer Leader to activate with three cards, which means an Ambuscade! |
 |
| In two close range volleys, the Imperial light infantry lose five men, their Leader is knocked out, and they suffer four Shock points and become Broken. |
 |
| By the end of Turn 8, some good shooting on the left has led to the Imperial breechloaders taking heavy losses too. Is this the end already? |
 |
Turn 9 suggests perhaps the answer is no! Three more Shogunate Skirmishers dead, and Shock starting to come in too. At the end of the turn, they will begin withdrawing from the pagoda towards safety
|
 |
| On Turn 10 I decided to push forwards to cover the withdrawal of my skirmishers, forming my line troops into column and advancing towards the central road. |
 |
| No Imperial activations on Turn 11, but my only significant move was to try to push my musketeers further up, only to roll a triple 1. |
 |
| Turn 12 saw more favour from the dice gods as the musketeers raced across the gates onto the flank of the Imperial riflemen. |
 |
| Unfortunately, I had yet to reload my muskets, giving the Imperial riflemen a head start on Turn 13, while both my Skirmisher leader and Gareth's force commander worked hard at rallying the Shock from their beleaguered troops. |
 |
| A volley into the rear of the Imperial musketeers failed to cause decisive damage: six Shock on one Group and two on another, not enough to cause any involuntary movements, and considering that they were moving away, not slowing them down either. Worse still, a Random Event meant my musketeers could now only fire at close range! |
 |
And so the Imperial riflemen were able to rush through the gate to relative – if temporary – safety, while the Shogunate riflemen shook out into line and prepared to enfilade them should they attempt to move out.
|
 |
| Turn 14 saw an interesting reversal of the scenario concept in which the defenders managed to take the attackers' primary DP. |
 |
| Tense standoff on Turn 15 as the Shogunate musketeers move up while the Imperial officers focus on rallying, in the hopes that they might be able to make one last mad dash towards the side of the pagoda. |
 |
| But it was not to be. After a brief Turn 16 that saw the musketeers advance, on Turn 17 they pushed up to the fence and fired a devastating volley into the rear of the Imperial assault column. Not enough to break anyone... yet. |
 |
| But this withdrawal now forced the column directly into the line of fire of the Shogunate riflemen, who, in their first volley of the game, decisively broke the Imperial force. |
 |
| With Force Morale down to 4 and commander's morale not much better, this was where we called a halt. |
I do wonder whether my terrain setup was just a bit too favourable to the defender here. The pagoda is a tough strongpoint, especially with two windows and a doorway facing in every direction on each floor. Even rating it as Light cover wouldn't help much when Skirmishers get an extra cover level anyway. On the other hand, if the Imperial Light Infantry unit had joined one of the line units behind the fences and fired into the pagoda from cover, that might well have provided the necessary covering fire for the other line unit to push forwards and perhaps seize the tower at bayonet point.
For my part, the Ambuscade with the musketeers was a lucky break that was far from guaranteed, and had I not pulled it off I would have been in a tough spot. The table setup here created a lot of open sight lines, and the fighting was far away from the deployment points, which meant that the Shinsengumi shock infantry were unlikely to get very far, while my decision not to upgrade my Status I Leader for the musketeers to a Status II meant that I was really sacrificing those troops' ability to receive fire as well as deliver it. A number of gambles were made today, and it seems mine paid off in a way Gareth's didn't.
A further thought is I should really have been using the smoke house rule that I'd been borrowing from some of the Lard Magazine issues, where units need to roll a 'smoke die' when firing. Had I done so, the fire from the pagoda might well have suppressed itself and led to some more movement again.


Great looking table. I have some of those Bac Ninh minis - lovely figures.
ReplyDeleteVery nice, unusual period for me, but very smart. Incidentally, if I was umpiring, skirmishers wouldn't get the 'hard to hit' bonus as well as the building cover.
ReplyDeleteTo head off any possible confusion, skirmishers don't get a penalty to being hit, they just count as one cover higher. Light Infantry in particular get a very specific bonus where if they are in hard cover, they also ignore the first casualty in each round of fire, but that wouldn't have applied in this case anyway as these were Skirmishers, not LI. What I was alluding to was that even if I rated the pagoda as light cover, they would count as being in hard cover anyway.
DeleteI'm aware that skirmishers count as one level of cover better, with no exception. I just don't personally think they should get this when occupying a building.
ReplyDelete