Showing posts with label The Men Who Would Be Kings. Show all posts

Sunday, 21 April 2024

Comparing Skirmish Rules for the Boshin War

Being a bit of a prolific collector of rules, I thought I'd procrastinate a bit on finishing off various other projects in order to go over the ones I've used for the Boshin War over the last few years. To just lay things out in advance, I think all of these rules work both about equally well as games in their own right and for the Boshin War in particular, even if there are a couple I gravitate more towards than others.

What I will do in this post is run very quickly through each set of rules on its own (on the off-chance that any given reader is unfamiliar, but I suspect that's only likely to be true of one of these rule sets), then cover how they, or supplemental material, cover the Boshin War, or can be made to. At present this post only covers four sets of rules, but that could go up over time as I try adapting other sets for use with the period (I'm already eyeing Test of Honour and Bushidan, for instance).

Sharp Practice (2nd edition) (TooFatLardies, 2016)
Sharp Practice was the only one of these sets of rules that I'd already played beforehand, and it was the existence of an official set of army lists for the period that got me to bite the bullet and branch into the period.

Sharp Practice is a Lardies skirmish game through and through, with a heavy emphasis on chance and friction. Command and control is handled using a pack of cards (or in my case some tokens drawn from a bag), corresponding to specific Leader figures who can in turn activate and/or rally a certain number of units within a certain radius, both of which depend on their Status. Also in the pack is a Tiffin Card which ends the turn, so rarely will all Leaders get to go during a turn. Interspersed with these are Command cards that can be used to pre-emptively activate units or Leaders, to activate certain unit abilities, and to activate 'left over' units after the Tiffin card is drawn.

Movement, as in most Lardies games, is randomised, with units typically moving 2D6 inches. When firing, each firing figure rolls 1D6, with the chance to score a potential hit depending on range and a few other factors, followed by rolls for the effect of those hits depending on cover. In melée, by contrast, the number of dice rolled is instead tied to the number and type of units involved (and whether they are above or below half strength), with sometimes quite substantial modifiers for terrain. All combat and some forms of movement tend to incur Shock, which penalises most forms of activity and can, at high levels, force units to retreat or even rout. Such reverses, as well as killed and wounded Leaders, cause players to have to roll on a 'Bad Things Happen' table to test for the effect this has on their force morale; a force will lose once this reaches 0. As alluded to, there are actually quite a few tables and lists of modifiers to keep track of, which may put some off, but in my experience they're not too hard to deal with.

Sharp Practice, unlike the other rules I've played for this period, offers a lot of latitude for including special objectives, non-player characters and the like, although it's not something I've taken much advantage of in the past, especially as some of this would require umpiring. What I also give Sharp Practice some extra credit for is that it has relatively granular rules for dealing with terrain, which as an avid collector of buildings and foliage is a very helpful touch.

As someone who tends to gravitate to bigger games with more figures, I do find that things can really start to drag if you try and bring much larger forces. The Lardies suggest increasing the Command Card limit for each side, which I think works well, but note that it is probably a bad idea to combine this with adding a Status IV Leader (something that is also an option for expediting play) because it will probably synergise just a bit too strongly with the 'free' activation you can get from four Command Cards. From experience, ten or so Groups with four to eight Leaders per side is still practicable for what I'd term an 'evening-sized' game, but much beyond that and you'd be at what I'd call 'afternoon-sized', with maybe 20 units and 10-12 Leaders per side (and on a larger table, preferably at least 8' by 4') as a pretty hard upper limit.

For the Boshin War in particular, a force list can be found as a free download here, with a standard suggested core force for each of the Imperial and Shogunate armies (technically each has two, but the difference is simply whether the two higher-quality line infantry Groups are armed with muzzleloaders or breechloaders), as well as a couple of extra unit options outside those core forces. 

There are some aspects where I find that Sharp Practice doesn't fully scratch the itch for the period, relating mainly to how I feel that it is a set of rules that works a lot better for the musket period than the rifle period. The line/light distinction was one that eroded heavily even during the Napoleonic era, and having super-skirmishers running circles around rigid line troops and blasting them to bits just doesn't really gel with my understanding of 1860s warfare. I don't think that's fundamentally unsolvable, though, and I've been looking at a couple of suggested optional rules in the Lard Magazine (see Simon Walker's 'Pushing the Envelope' in the 2019 issue and/or John Savage's 'In the Age of Rifles' in 2022) which might mitigate most of my prior issues. There's also the fact that rifle-armed troops tend to cost about twice as much, but support points for scenarios are not adjusted accordingly and are all based on the musket era; that's more easily fixed by either halving unit costs (although you may want to correct for differences in core force value), or alternatively doubling the support points given for scenarios, while also doubling the costs of options in the Generic Support List.

In short, if you're after a set of rules with a good deal of of 'fluff', lots of scope for making use of interesting terrain layouts, and a relatively moderate figure requirement, then I'd go with Sharp Practice.

Smooth and Rifled (Dadi & Piombo, 2011)

A rather obscure skirmish game from a somewhat less obscure publisher (D&P are also behind the IMPETVS series of ancients rules), Smooth and Rifled was actually the first set of rules I used for the period (despite originally planning around Sharp Practice) thanks to the fact that it required fewer figures.

There's a lot to commend about these rules, with the caveat that it's quite a mathsy game at times, especially with more troops involved. At the start of each turn, you roll 3D6 for each unit, which generates its pool of Action Points (AP) for the turn, and units can also hold over up to 6 AP from the previous turn; units then activate in descending order of starting AP. Rather than automatically activating as a whole, you instead activate individual figures and/or groups, led by an officer or NCO, within those units (though there is no limit to group size, so you can potentially move the whole unit as a group). Individuals and groups can make up to three actions (move, fire, reload, and/or aim) per turn, with increasing costs for each successive action. Ordinary line troops are usually 1/2/3 (so the first action by an individual costs 1 AP, the second 2, and the third 3), conscripts tend to be 2/2/3, and elites as good as 1/1/2. Groups can be of any size as long as they come from a single unit, and are activated at twice the cost of an individual figure.

Movement is pretty straight-forward, but has some interesting nuances. The first movement action that an individual or group makes is faster than the second or third, and individuals move faster than groups unless moving in column of march. Similarly, individuals performing aimed fire can theoretically score more hits than if they all fired in a group, but AP is rarely likely to be high enough (particularly in large units) to allow this. The result is that the rules create some interesting cost-benefit decisions in terms of how much to spend AP on large group actions versus individuals.

Speaking of firing, this again is a bit of a mathsy thing: when rolling individual fire, you roll 2D6 and need to reach a certain target number depending on range. In a group, you roll 1D6 per figure, give or take a few depending on modifiers, and you divide the total result by the the same range-based target number. On a hit, the figure may be killed or simply Shaken; Shaken men require an individual action to unshake. The result is that once you have firing lines lined up against each other, they can (depending on how you interpret the rules around unshaking men) lose cohesion over time, which I think gives a nice degree of period flavour, particularly for linear warfare.

Melée is simpler and actually quite satisfying, but force morale adds in another layer of maths. Each figure in a unit contributes to its Morale Value (MV); once that falls to one-third of its starting value (rounded up), the unit needs to start taking morale tests every time it suffers casualties, and will rout from the table the first time it fails. In a multi-unit game, one side will break when it suffers 50% losses (including routed figures). This means keeping track of yet more numbers as you work out which units have become fragile and whether you're near your 50% breakpoint.

Unfortunately, because of all this calculation, the rules really do have a limit to how large of a game you can play. A ~1000-point, three-unit-per-side game can just about fit into an evening in a multiplayer setting, but I've found that even five units will be a bit of a stretch for an afternoon (and that's with one of those units being artillery and thus a bit easier to manage).

Moreover, because individual figures have a cost, which can be subjected to a lot of modifiers, army-building can be a slow process, especially without an official calculator app like some more modern games provide. I personally took to simply creating a series of roughly 300-point preset unit profiles that my players could pick and choose from.

A Boshin War force list can be found here, also implicitly covering potential Western intervention forces. While individual unit compositions are not suggested, they do have some suggestions for the number of each given unit that various types of force should be allowed to have. But, as noted, under these rules a game with any more than three units per side will probably take up most of an afternoon.

The rules can definitely be a little clunky, but on the whole I think they work quite well when engaged with on their own terms, and I actually don't have any significant gripes with how they fit the Boshin War setting. The one thing I will note is that I have increased the cost of breechloaders from +5pts to +7pts per figure, because breechloaders come with an implied melée bonus equivalent to equipping a figure with a sword at +2pts (this sounds a little convoluted but makes more sense in context!) and I'm not entirely sure it was intended that halving reloading times should only increase the cost of a typically 17-point figure by just +3pts.

I think these rules are definitely worth having a go at just to see how you like them, because I suspect some people will be pleasantly surprised (even if others will not). It is very much like Sharp Practice in terms of what sort of game it's trying to be (i.e. halfway between a 1:1 skirmish game and grander, brigade-scale formation fighting), but with a lower figure count, a little less fluff, and a little more historicity. The barrier to entry is going to be the amount of maths, which is definitely not for everyone, and I have to confess, it's not for me more than a few times a year!

Ronin (Osprey, 2013)

Craig Woodfield's Ronin, rated by some reputable authorities as one of the best rulesets in the Osprey Games catalogue, caught my eye when I found out that it does in fact have some extra army lists and optional rules for the Bakumatsu period tucked in at the back.

While I have some plans for going deeper into Feudal Japan stuff in the medium term, I have to admit that Ronin is sliding slowly down the list as far as rules go, not because it's a bad set, but rather because I think it has a lot of kinks in it, helpfully ironed out – quite successfully in my opinion – by its successor, En Garde. As of writing, I haven't yet tried adapting the Late Edo optional rules for the latter set yet, so my review here focusses on Ronin, though I will be pointing out differences in En Garde where I think they're relevant. For the most part, the En Garde rule changes can be back-ported with little issue, though for my part I've instead gone the opposite direction, updating the Ronin army and weapon lists to En Garde.

Compared to the funkier command and control in the other rules discussed, Ronin runs on simple alternating activations: the player with Priority activates their first model, the other player activates one of theirs, and so on until everyone has gone. En Garde adds some variety by allowing models with the Commander attribute to perform a group move or shoot activation with themselves and a number of equal or lower Rank models equal to their own Rank value (e.g. a Rank 2 figure with Commander can activate themselves and two other models of Rank 2 or lower), which makes winning the initial Priority roll quite a bit more important than in the earlier rules.

Once movement is done, you enter the Combat Phase, in which all melées are resolved. This is where Ronin's key mechanic, which I understand it shares with GCT Games' Bushido, comes in: each model has a Combat Pool which determines how many Attack and Defence counters it draws; in turn, Attack counters allow models to make attacks, while Defence counters allow them to make Enhanced Defence rolls. Attacks always have 2D6 effect, although in an Enhanced attack you roll 3D6 and discard the lowest; models always defend automatically, but roll only 1D6 normally, and 2D6 if Enhanced. Unless a model has quite a high defensive modifier thanks to armour and/or a higher Fight stat than its opponent (and even then), going into a fight and not taking Defence counters can be quite a risky approach.

While Ronin has a decent amount of complexity, it is largely concentrated in its combat. The remainder of the game is really quite straight-forward, which is in many ways a good thing. You can probably get through two smaller games (100-odd points) in an evening with less experienced players, and three or four mid-sized games (150-200) in an afternoon is probably doable. Troop costs vary depending on the army list, but for a 100-point game using Boshin War forces you're really only looking at about 5-8 figures a side, so it's definitely a game suitable for those with limited budget, space, and/or carrying capacity. Because it is so mechanically straightforward, forces can also scale up a good amount without being enormously unwieldy: 400-500 a side as a multiplayer game would fit comfortably into an afternoon.

The thing that drags down Ronin a bit for the Boshin War is the fact that firing is not particularly satisfying when that is the main difference that distinguishes that latter period. There is a lot of luck involved in getting good hits, without the sort of mind games and strategising that you can have in melée. And, as an aside, there is a bit of a gaffe at one point where the rules claim that the Shinsengumi were a pro-Imperial force in Edo, not a pro-Shogunate force in Kyoto...

I'm not saying to avoid these rules by any means – they are good! – but I personally have ended up with slightly more reservations over time about using them for the Boshin War specifically. I think for things like the early Yakuza or scenarios involving Shinsengumi patrols rooting out anti-Shogunate agitators, you can still have a good deal of fun with these.

The Men Who Would Be Kings (Osprey, 2016)

The chronologically latest in what might be termed Dan Mersey's 'Rampant Series', The Men Who Would Be Kings (or TMWWBK or Kings for short) takes the basic formula of Mersey's medieval rules and reworks them quite successfully for the colonial period. While I picked these up mainly as a source of ideas, they've quite quickly managed to become my mainstay for my Boshin War games.

As Mersey notes in his preambles and other commentaries, he goes by the idea that command and control becomes a lot more fluid and flexible over time. Whereas Lion Rampant requires that all units test to activate, gives each unit type a different target number on 2D6, and (most controversially) causes the turn to end immediately once you fail a test, Kings is a lot more forgiving in that units have certain Free Actions that require no test (e.g. rifle-armed infantry can always Fire), they have only a single Leadership value which is their target for all activations (though this target number is generally higher than for other rules in the series), and a failed activation only ends the unit's turn, not the whole army's. While the turn sequence is a simple IGOUGO, the activation tests mean that units don't all necessarily get to go – especially troublesome if your plans depend on them.

Movement notionally takes place at fixed rates, but there is the option of attempting to move At the Double which grants an extra 6" on top of the base rate. I know there are certain house rules saying that you cannot make two consecutive At the Double actions, or that units can only perform a certain number of such activations in the course of a game, but in my view there is a certain logic to how the free actions and non-free actions work alongside At the Double, so I think the rules are fine as written.

Firing and melée are both handled basically the same way: units roll 1D6 per figure, with a target number to hit (typically 5+ for most purposes). Typically one hit results in one enemy casualty, but long range and cover can increase this number. So a unit attacking a fortified position will need to inflict 2 hits per casualty, while the defenders only need to score 1 hit per casualty on the attacker. Units firing at enemies in hard cover at long range will need a whopping 4 hits to cause a casualty!

When units take casualties, they then need to test to see if they are Pinned as a result; Pinned units must attempt to rally on the next turn, and if they succeed they will cease to be Pinned, but perform no other action that turn. If they fail, they will be forced to retreat half a move, or even rout altogether. Pinning is probably the one mechanic that grates the most, especially for units with low Leadership values who have a hard time avoiding Pinning in the first place, and an equally hard time recovering from it. On the other hand, it adds some layers to your decision-making: units that aren't supported are more likely to end up stuck in a Pinned state until destroyed, creating a risk-reward proposition in terms of how far to keep your force concentrated versus dispersed, especially if a scenario's objectives require that you cover a relatively wide frontage.

Where Kings really gets a lot of its flavour is in the way unit leadership is handled. Before starting, units roll for Leadership quality, usually ranging from 5 to 7 (though Irregular units can sometimes be saddled with an 8). This then becomes the unit's target number for passing any sort of Leadership test. Leaders can, however, also have Traits, of which there is a list of 36, with slightly more of them being negative than positive (and with many of the negative effects being more substantial than the positives). While some effects can be quite crippling and I do sometimes allow re-rolls (e.g. artillery with a Short-Sighted leader who cannot give orders to fire at long range, or shock troops with a Yellow-Bellied leader who cannot order them to charge), it is generally quite interesting having leaders who can quite drastically affect how certain units can be used. A cavalry unit led by a Coward might be more reliant on the carbine than the sabre; a Sporting Umpire in charge of a rifle unit might be quite annoying to deal with if he is unwilling to deliver the coup de grace to a Pinned opponent, and so on.

In terms of scale, Kings armies can vary a lot in size, but my Boshin War forces tend to be in the roughly 60-figure range for the standard 24-point scenarios found in the rulebook. I often scale up to 32 or 36 points while still doing scenario games, while for bigger, 'defeat the enemy' bashes, even 60-point armies could still be pretty manageable on a wide enough table in a multiplayer setting. Unit size can also be tinkered with a bit: the rules suggest a 'Skirmish Kings' variant with half-sized units and that seems to be decently well-liked; for my part I've at times contemplated doing units at 1.5x size, but that might just make Pinned results a bit too frequent to be particularly fun.

Although Kings doesn't cover the Boshin War directly, its unit builder is very flexible, and while I have been tinkering with a period-specific unit list for a while, even the core rules give you a lot to work with. A typical force for me will be built around a core of Regular Infantry downgraded to Obsolete Rifles, which are a pretty good way to represent typical domain troops. Supporting elements can be drawn from all across the troop types in the book, such as Crewed Weapons (both field guns and, in Nagaoka's case, machine guns), cavalry, Irregular Infantry (mainly for 'genuine' irregulars as opposed to non-fully-samurai troops called 'irregulars' like Kiheitai or Yugekitai), and Tribal Infantry (which I use to represent Shinsengumi-style shock troops). The one thing not really covered are 'heavier' shock infantry like lightly-armoured spearmen, but I've found that just taking the movement bonuses off Tribal Infantry in exchange for making them take an extra hit per melée casualty is something that balances out pretty well. One other thing that some may find more of an issue than others is that at Kings' level of abstraction, firearms are distinguished by range, but not rate of fire. While I am happy to say that the Snider and Chassepot are 'Modern' rifles with 24" range while muzzleloading rifles are 'Obsolete' with 18" range, others may prefer to instead distinguish breechloader from muzzleloader troops by increasing their firing dice or their to-hit number.

And it would be remiss not to mention the game's solo rules for pitting a 'colonial' against a 'native' force, which aren't without potential applications: the Aizu campaign in the northern mountains would be a good way to 'play it straight' by pitting a relatively well-armed Imperial column against a mixed Northern Alliance force, while the Second Chōshū Expedition of 1866 flips the script in quite an interesting way by having a heavily traditional Shogunate coalition army harassed by rifle-armed Chōshū guerrillas.

Kings I would characterise as being the easiest game to just pick up and play and tinker around with, as long as you have the forces for it.

Summary

Me being the rather nerdy sort that I am, here's a table where I've laid out what I think are the key takeaways: whether there are official Boshin War forces, what size of forces you are likely to field, and some both general and period-specific pros, cons, YMMV ('your mileage may vary') points.


Sharp Practice

Smooth & Rifled

Ronin/En Garde

TMWWBK

Official Boshin War forces?

Yes, as free PDF here

Yes, as free PDF here

Yes, included in Ronin book

No

‘Standard’ force size (per side)

@~80 pts:

40-60 figures & up to 5 leaders

@~500 pts:

20-30 figures in 1 unit

@~100 pts

5-8 figures

@24 pts:

50-80 figures

Practicable ‘Evening’ game

@~120 pts:

60-80 figures & up to 8 leaders

@~900 pts:

30-60 figures in 3 units

@~200 pts

10-20 figures

@36 pts:

70-120 figures

Practicable ‘Afternoon’ game

@~250 pts:

100-200 figures & up to 12 leaders

@~1500 pts:

60-100 figures in 5 units

@~500 pts

20-50 figures

@60 pts:

120-200 figures

Pros

• Interesting command and control system

• Lots of ‘fluff’ elements

• Quite good historical ‘feel’ 

• Interesting command and control system

• Requires very few figures

• Fast-playing

• Engaging melée system

• Mechanically straightforward

• Leaders add a lot of flavour

• Very flexible force-building

• Lots of scenarios

Cons

• A bit unwieldy at larger sizes

• Command system can be unintuitive for beginners

• Lots of tables

• Lots of maths

• Very clunky when trying to play with large forces

• Quite granular list-building

• Firing is a bit unsatisfying

• Requires more figures

YMMV

• May be better suited to 18th century linear warfare than 19th century skirmishing


• Very bloody combat when forces have no armour

• Some may find Pinning a bit annoying

• Mechanics may be too simple for some


As noted, this is not intended to be the final word, nor even my own final word, and I'm happy to hear any thoughts or suggestions people have from their own experience.

Friday, 6 October 2023

Take the High Road: A TMWWBK AAR

For the usual Tuesday game night I was very close to subjecting my sparring partners to the rather maths-heavy Smooth and Rifled (a set that I do like, for what it's worth), but having had a bad night's sleep I decided instead for all our sakes to go with the old reliable The Men Who Would Be Kings instead, doing Scenario F: Take the High Road.

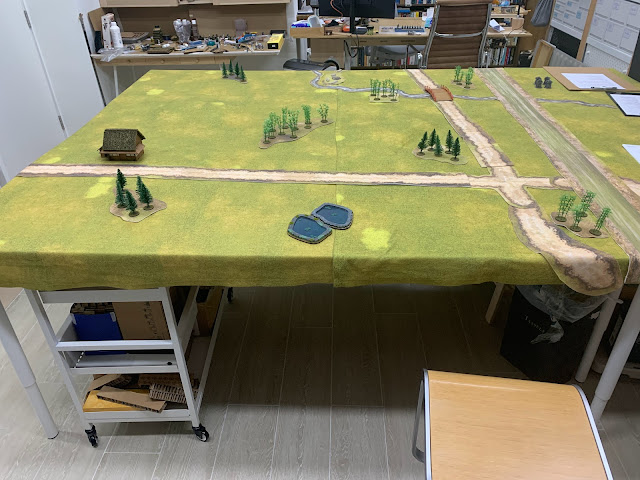
In this scenario, one side has 12 turns in which to take control of an objective from a smaller defending force. Per the rules, this is played lengthwise on a 6'x4' table, with the attacker having a 24-point force and the defender an 18-point force. Given that I had three players and a large table, I widened the table to 6' and increased the forces by half, so the attackers would have a 36-point force and the defenders 27. I also took the liberty of setting up the terrain in advance, but giving the attackers a choice of one of three locations to serve as their objective:

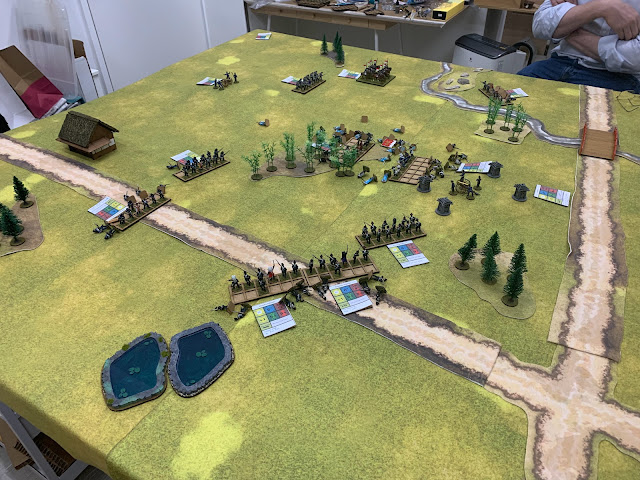
The terrain setup. The river at the back marks the rear edge of the play area.

The attackers could go for the hill (this is hard to spot on the photo, but it's right between the small bamboo grove and the stand of pines, to the right of the seam between the mats), the crossroads, or the bridge. In the event, he chose the hill.

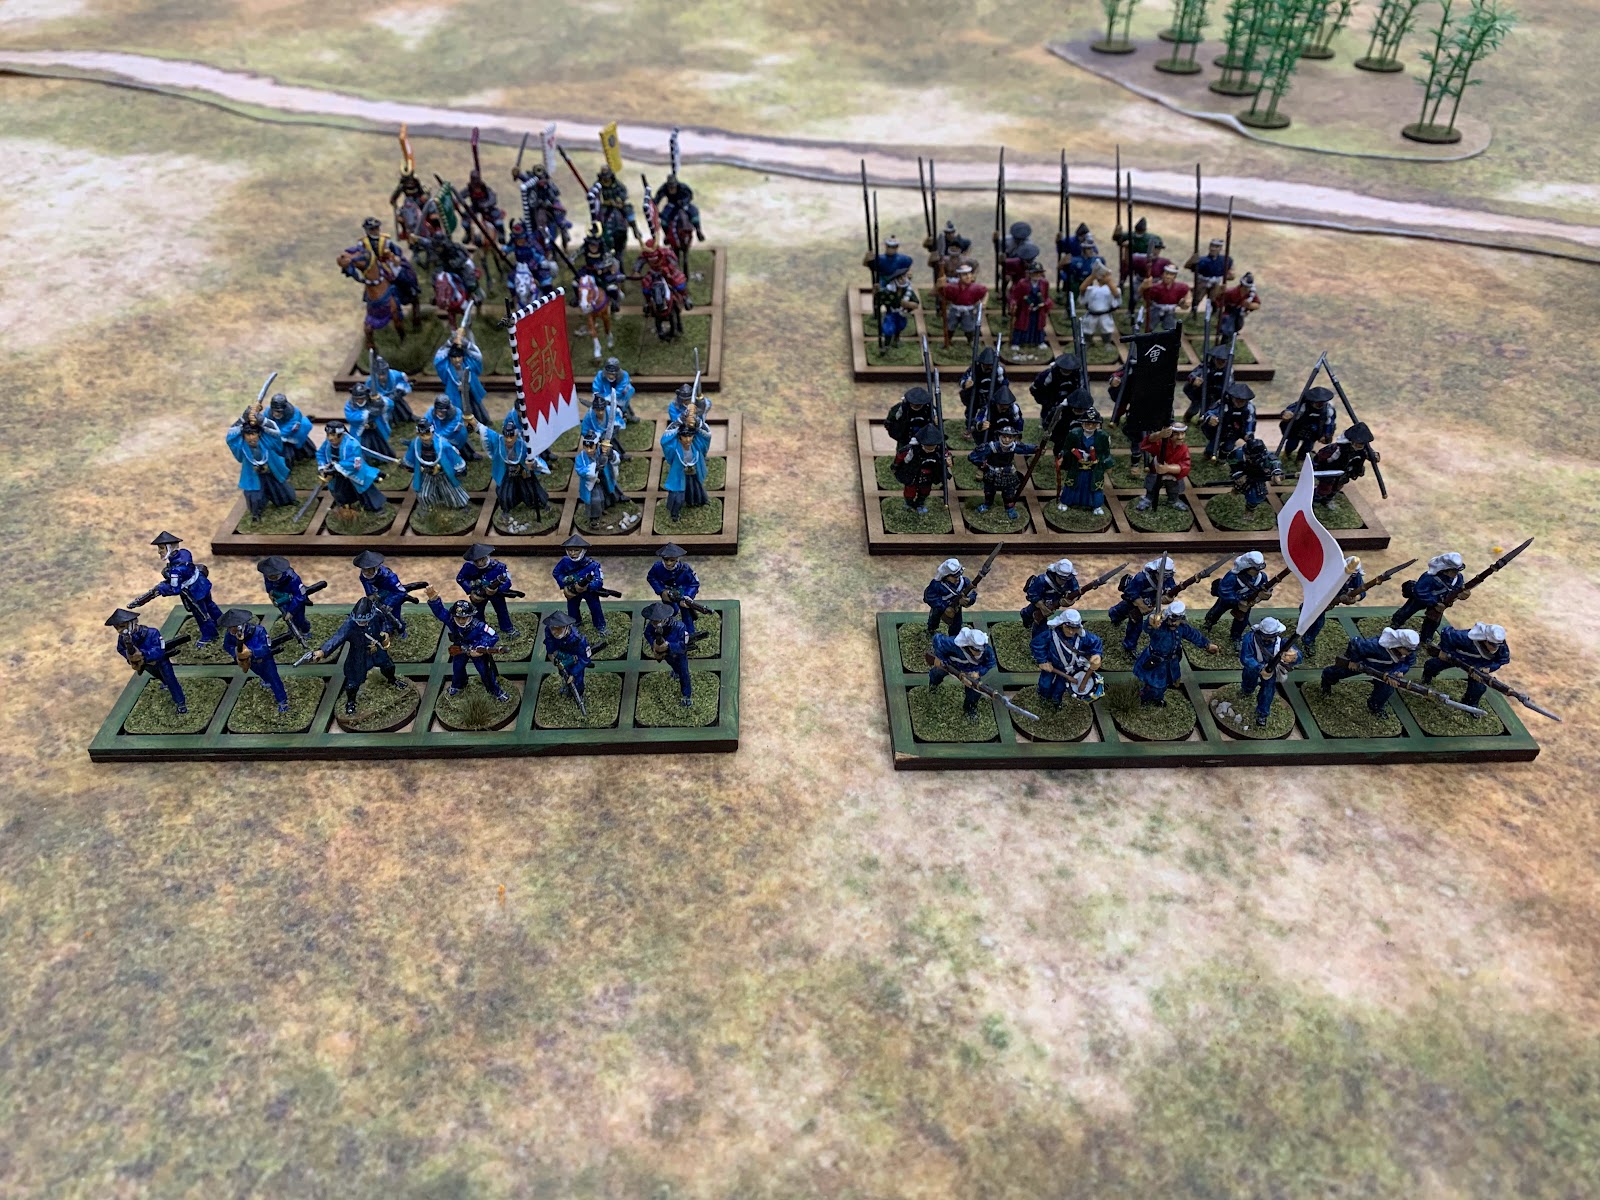
The attacking army (Shogunate), which was jointly commanded between myself and one player, comprised the following seven units:

  • Elite Regular Cavalry (Denshūtai Horse) – Leadership 6+; A Damned Fine Fellow (no effect)
  • Elite Regular Infantry (Denshūtai Foot) – Leadership 6+; Wheezy (cannot move At the Double)
  • Poorly-Armed Regular Infantry (Shogunate Infantry) – Leadership 6+; Coward (must always attempt to move out of enemy charge range)
  • Poorly-Armed Regular Infantry (Shogunate Infantry) – Leadership 5+; Brave (remove one Pinned marker for free before activating*)
  • Veteran Fierce Tribal Infantry (Shinsengumi) – Leadership 5+; Musketry Buff (Leadership is 5+ when Firing)
  • Tribal Infantry (Spearmen) – Leadership 5+; A Jolly Good Chap (Leadership is set to 5+)
  • Poorly-Drilled Field Gun – Leadership 6+, Lucky (can force one full reroll at any point in the game)

The defending army (Imperial) was helmed by one player, and composed of six units:

  • Regular Infantry (Chōshū) – Leadership 6+; Inexperienced (no Free Action)
  • Poorly-Armed Regular Infantry (Satsuma) – Leadership 6+; Keen Shot (re-roll 1 miss when firing)
  • Poorly-Armed Regular Infantry (Satsuma) – Leadership 6+; Fine Swordsman (+2D6 in melée)
  • Irregular Infantry (Tosa) – Leadership 5+; Idiot (must test by rolling 1D6 before activating – on a 1, the enemy chooses its action, but cannot order it to attack its own side*)
  • Tribal Infantry (Spearmen) – Leadership 6+; Drunkard (Leadership can be either 6+ or 8+ depending on a die roll before the start of the game; in this case the defending player got the better result.)
  • Poorly-Drilled Field Gun – Leadership 6+; Bag of Nerves (must test by rolling 1D6 after first becoming Pinned – on a 3+, the Leader deserts and counts as an extra casualty)

Deployment

The defending player set up his three Regular units on his left, extending from the stand of pines towards the pond. The artillery was on the hill, with the spearmen in front, covered by fire from the Irregulars on the opposite bank of the river.

We as the attackers aimed to advance along three axes: our two Poorly-Armed Regulars would move up on the right and try to occupy the Imperial riflemen; the two Tribal units would come up through the centre towards the hill; and the two Elite units would try to drive off the Irregulars on the left before swinging to support the centre. The artillery would most likely achieve very little for us, so the plan was to get it up onto a hill on our side and support where possible.

I forgot to take a photo of our deployment but it should all be pretty clear from the photo of turn 1. From here on out the Imperial objective is marked by four large stone lanterns.

The Game

End of Turn 1.
The Shogunate force inches forward while the Imperial riflemen wheel into line on their left.

End of Turn 2.
A bit more activity here as the bulk of the Shogunate army surges forward... save for the field gun, which remains frustratingly static (evidently one of the crewmen has tripped over a stray root.) The Imperial artillery, on the other hand, draws first blood for the game, taking out one of the Shinsengumi in the Shogunate centre.

End of Turn 3.
The action begins in earnest as the two sides begin exchanging fire. The Shogunate are down 3 riflemen, and the Shinsengumi have been especially hard hit, losing 5 men to artillery and rifle fire. The Shogunate artillery, for its part, remains completely static. The cavalry also fail to do anything, rolling a 3 on 2D6 (they only need a 4 to activate).

On turn 4 the Shinsengumi manage to make contact with the Imperial spearmen...

But do exceptionally poorly, suffering six casualties to the spearmen's five.
Turn 4 overall is a very mixed bag for the Shogunate. In addition to the Shinsengumi being decimated, enemy fire has downed a further two riflemen and three spearmen. The artillery at last manage to advance, but the cavalry roll a 3 again!


End of Turn 5.
If things look very static that's because they are. The elites on the left do get some shots off, and the Imperial rifle line looks increasingly worse for wear, but both Tribal units for the Shogunate fail to advance, and suffer yet another round of fire.

End of Turn 6.
At this stage the balance seems to tip decisively in the Shogunate's favour. While the Shinsengumi wipe themselves out in an attack on the spearmen, they do at least manage to get rid of another three in the process, and casualties continue to mount on the Imperial rifle line, albeit matched by their Shogunate counterparts. The Irregulars by the river are just about down to half strength as well. Throughout this time, the Imperial player managed to pass nearly all his Pinning tests, a source of endless frustration for us – though to be fair, we were managing to pass most of ours as well.

End of Turn 7.
A charge by the Shogunate spearmen is somehow repelled by the surviving Imperials, who are left with their leader. But at long last, the Irregulars are pinned under rifle fire from the Denshūtai foot, freeing up the cavalry to move towards the centre. On the Imperial right, the Chōshū infantry are also Pinned but fail to rally and are forced to retreat. Amid this pressure on his left the Imperial commander realises that he needs to try and save his now-collapsing right, and begins transferring his last intact unit. His artillery again manages to fire, taking out one cavalryman but failing to cause a Pinned result.

On Turn 8 the cavalry swing into action, and with a lucky At the Double roll getting them up onto the hill, they set about slaughtering the gunners.

Elsewhere, a miracle occurs as the Shogunate artillery finally gets a shot off, taking out two of the riflemen in the Imperial reserve. The last Imperial spearman is downed by rifle fire from the Denshūtai, and the loss of the gun also leads to a series of Pinning tests among the Imperial infantry, most of which are failed. While all of these are successfully rallied, this does cause them to miss a turn – something they can ill afford at this juncture.
The Imperial commander grimly assesses the situation.

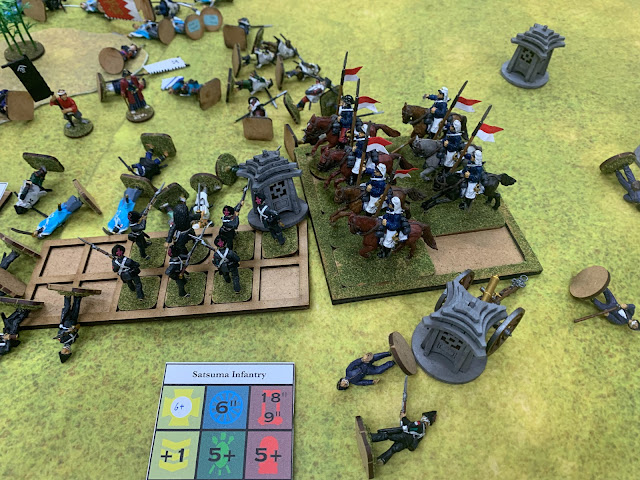
On Turn 9, the Satsuma infantry, further weakened by enemy fire, are charged in the flank by the cavalry on the hill, losing five men for the loss of only one horseman.

With the Imperial position having now almost completely collapsed, their commander decides to cede the field to the Shogunate.

Thoughts

It's been a while since my opponents had had a go at these rules but we all seem to have had a good time of it. There was some exceptionally good dice rolling on the Imperial side and exceptionally bad rolling. for the Shogunate, making it all the more amazing that we came out of this one on top. For instance, the Imperial artillery fired six times, while the Shogunate artillery fired all of once. Even accounting for the fact that we needed to move our gun into position, it proved an exceptionally unenthusiastic piece of ordnance.

On review, we thought that the Imperial player ought to have made better use of the woodlands either side of the hill to provide cover to his riflemen, who would also be better able to concentrate fire against troops coming up through the centre. As it was, his right flank was extremely vulnerable, and even though we had to take serious losses cracking it, once we were through there was very little to stop us rolling up the middle. We perhaps could have given the Imperials a smidge more defensive terrain, or moved the large wood in front of the hill back a bit so that the Shogunate troops weren't in as much cover; I also wonder whether a 4:3 advantage may be a little too much for the attacker, especially when the game is enlarged like this. All things to think about.

Rules Questions

That being said, the wording of some traits did give me some pause, and while we agreed on particular interpretations before we started, these may be worth flagging up for future interest:

  • Brave reads Remove one Pinned Marker for free before activating this Unit in your turn. I have always understood this to mean every turn, but it does seem like this ability allows a unit to shrug off all but the most withering punishment if so. At the same time, nothing says that it only applies once per game the way that Lucky does. Speaking of,
  • Lucky suggests that it could apply to any dice, but my own house rule has been that it must involve the unit whose Leader has this trait: so you can use Lucky to force a re-roll of fire by your unit, but not of a different unit in the same Field Force.
  • Idiot applies every time the unit is about to activate. Presumably this includes Stand To, which is a Free Action, and not actually passing your turn as such. We chose to treat Stand To as just passing and not activating, but perhaps you are supposed to roll before trying to Stand To.
Again, minor quibbles that really only come up in the course of playing, and where there are easy enough ways of resolving the matter.

Sunday, 10 September 2023

Capture the Crossroads – 7 September 2023

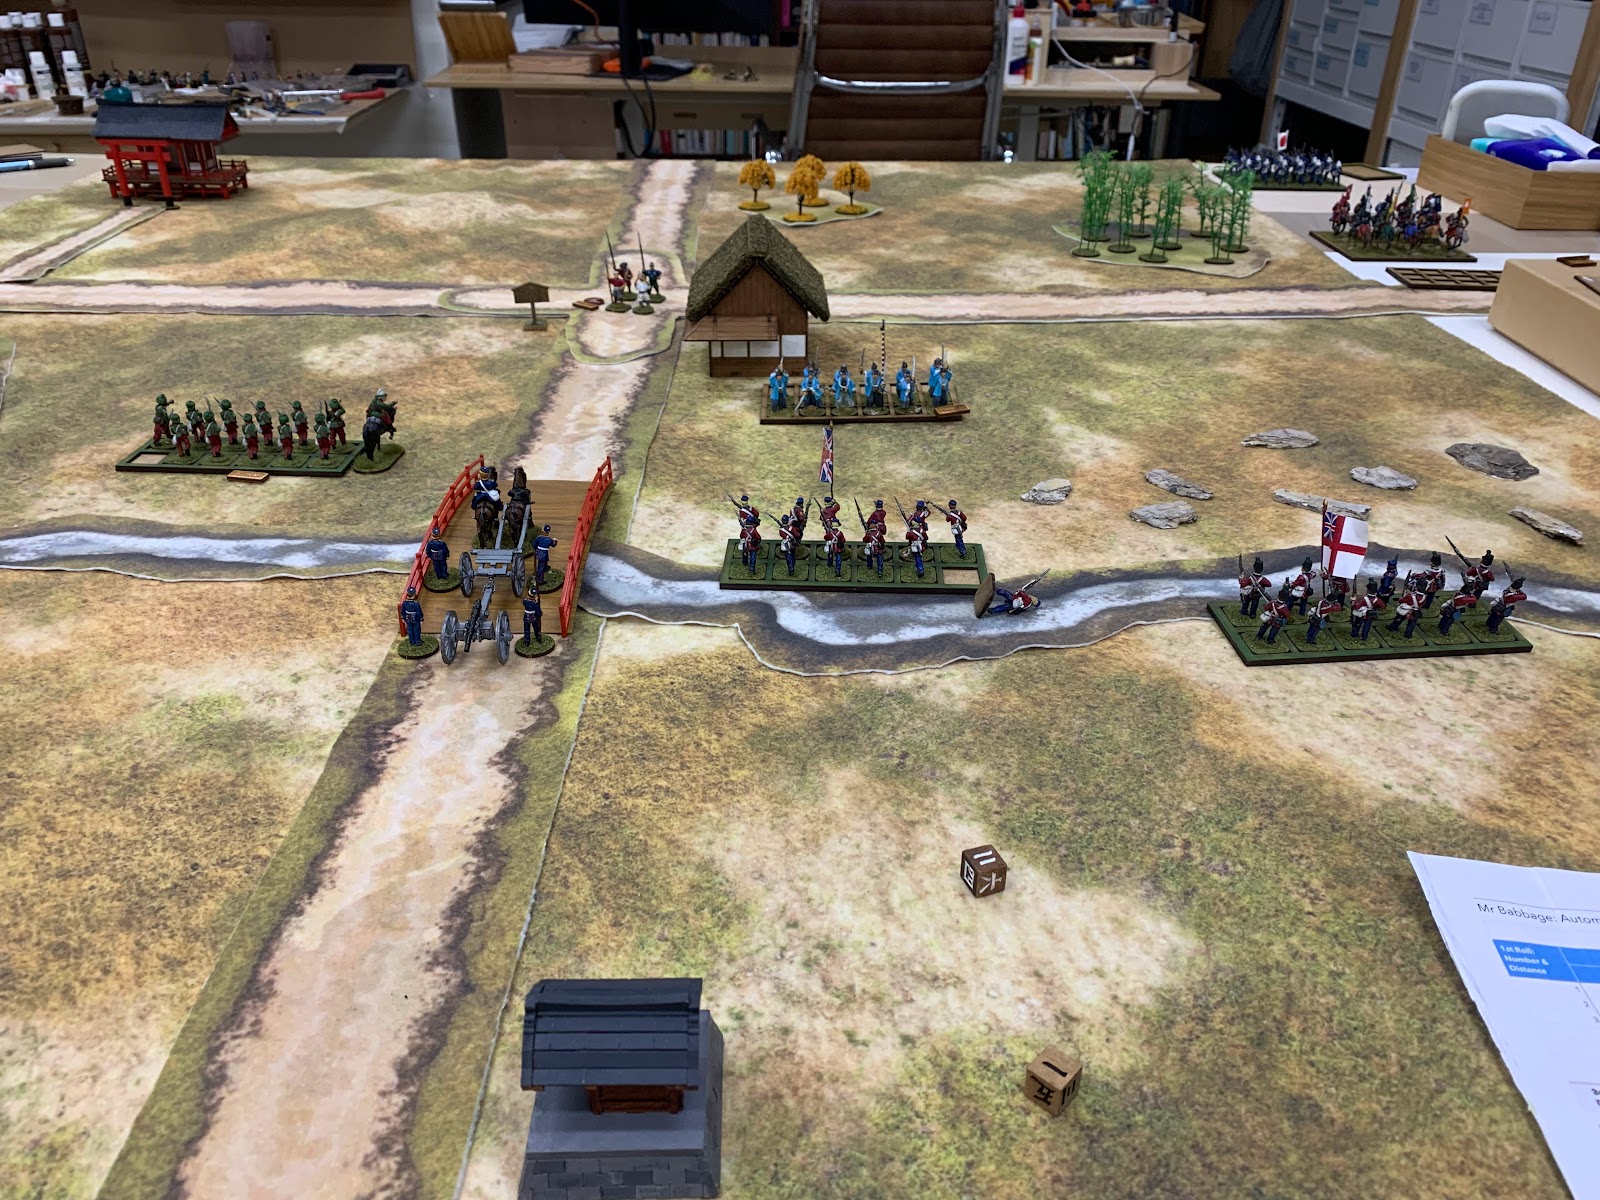
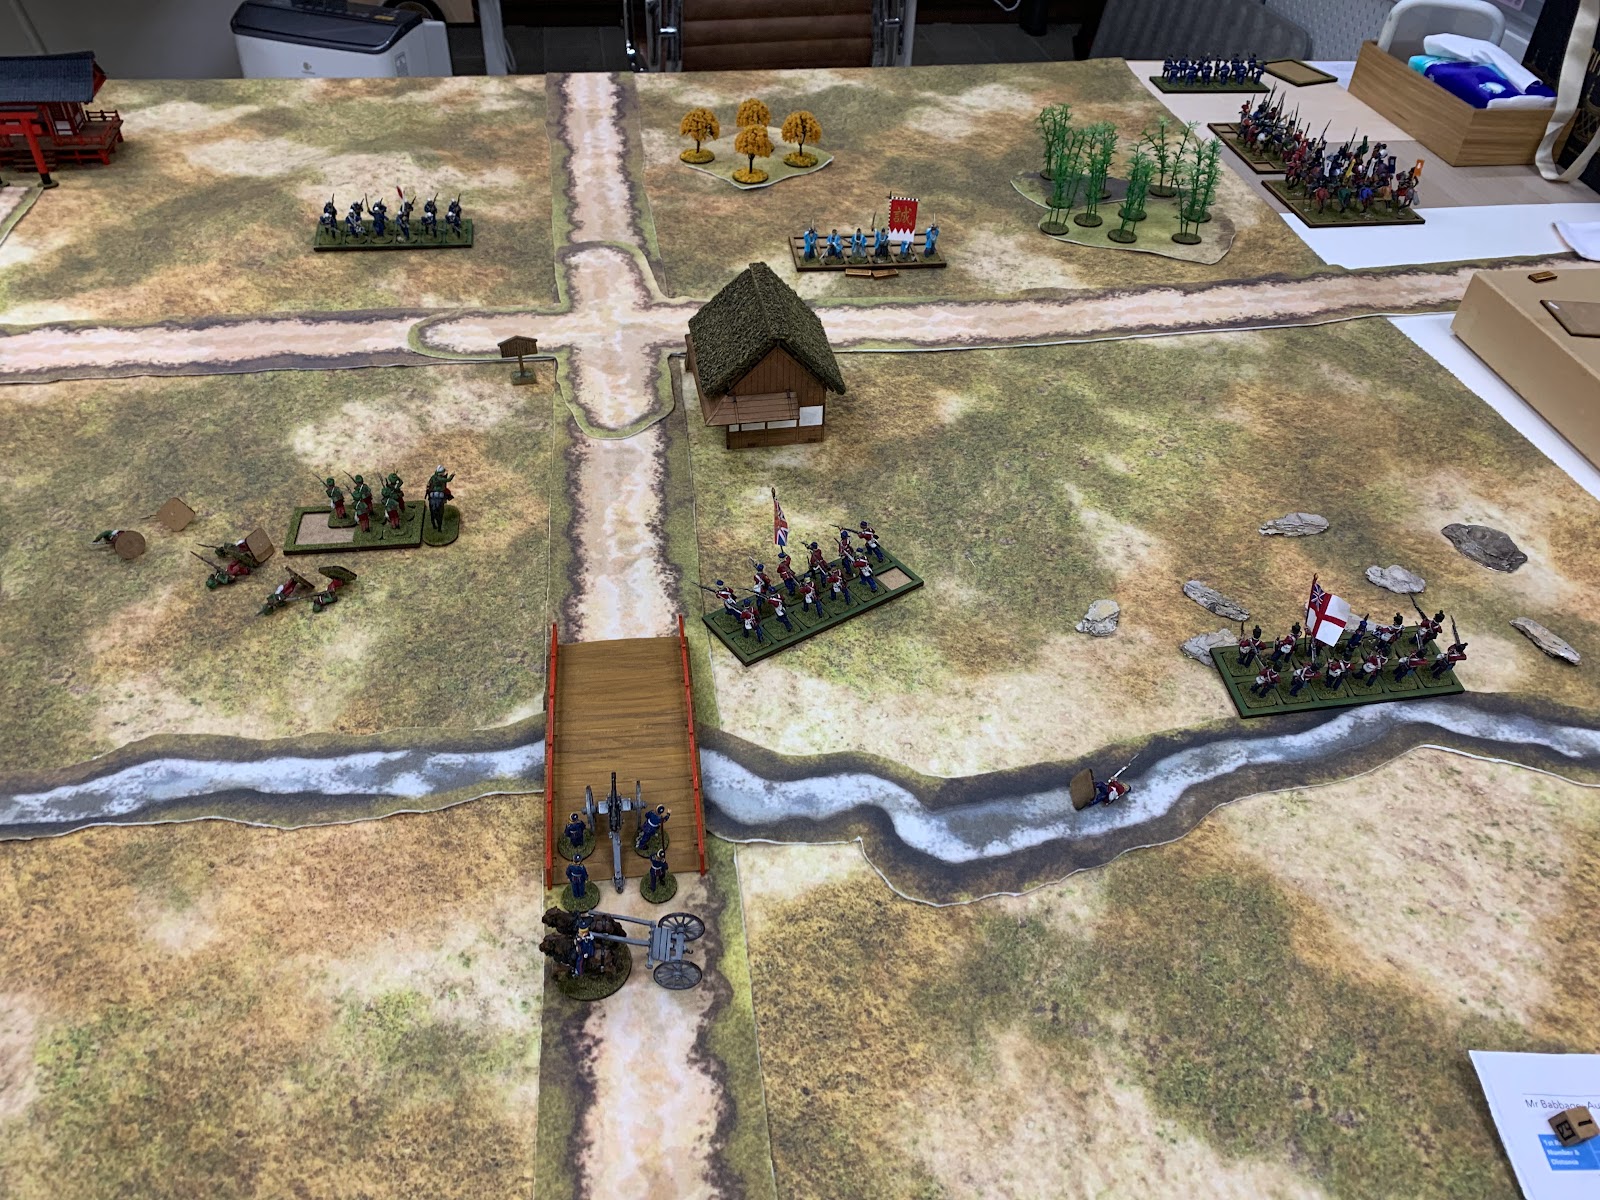
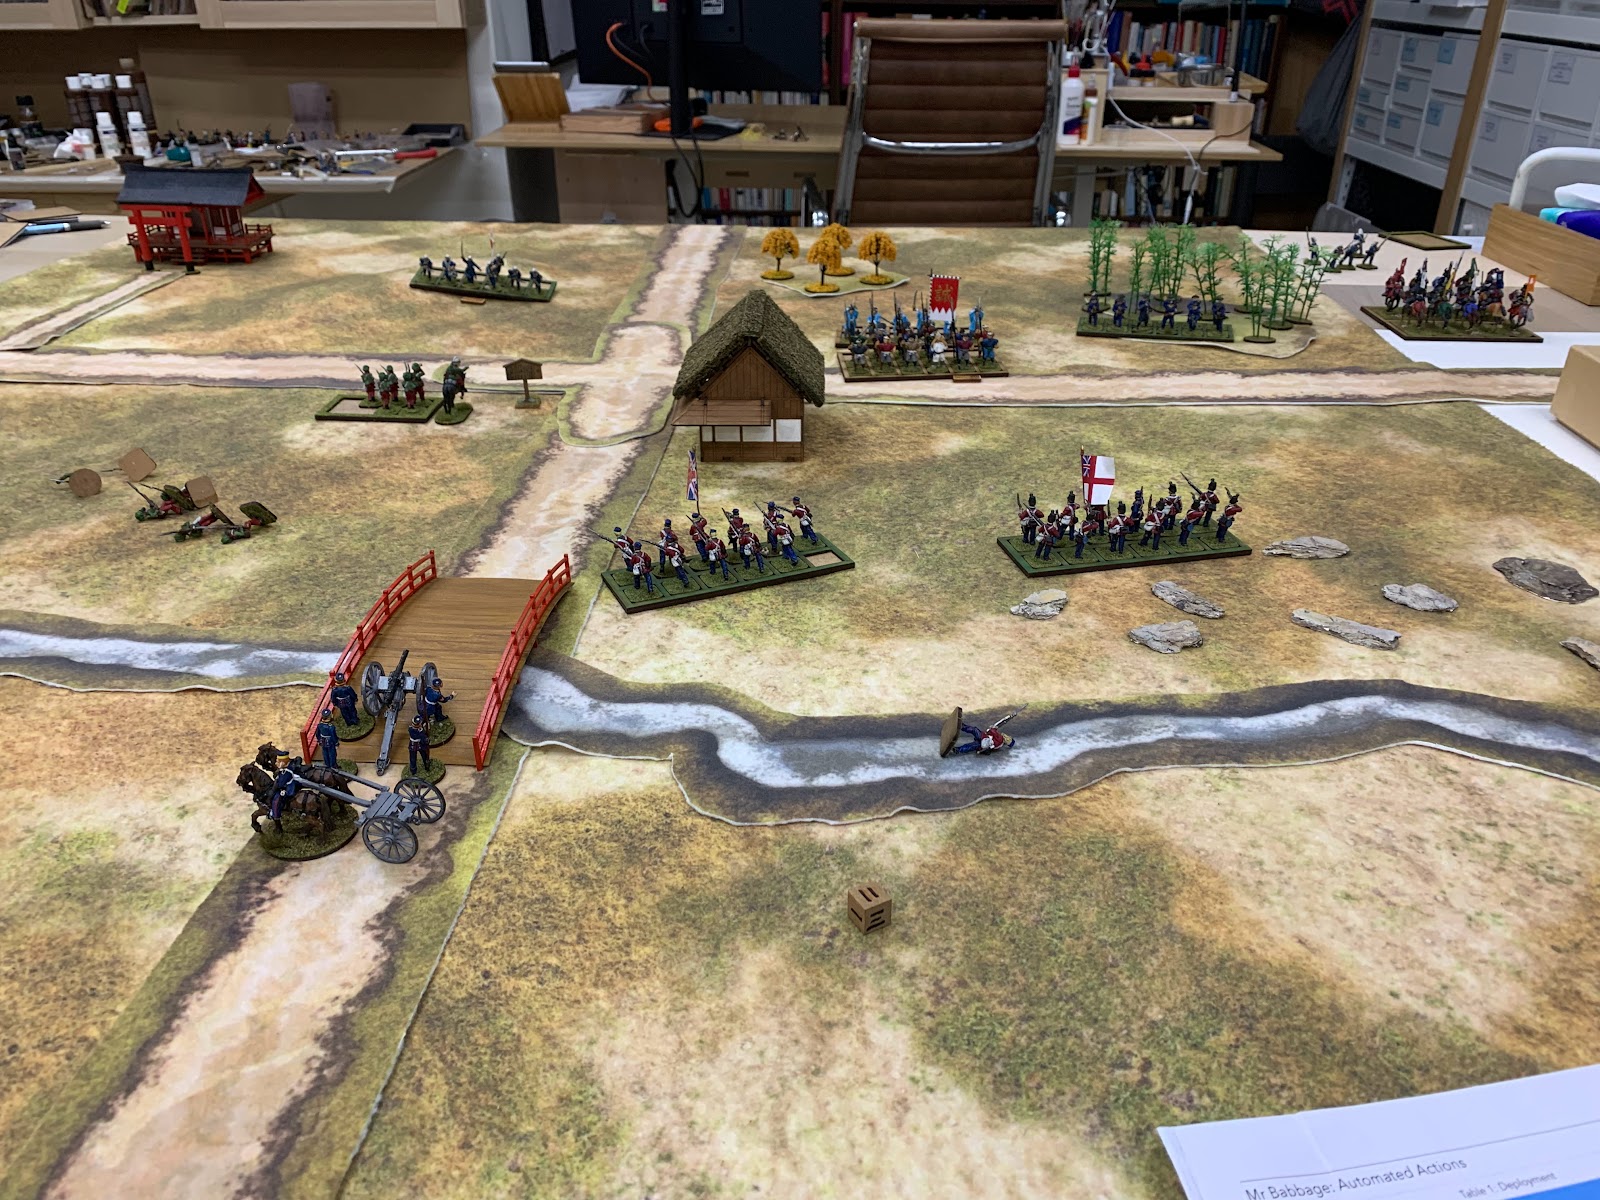
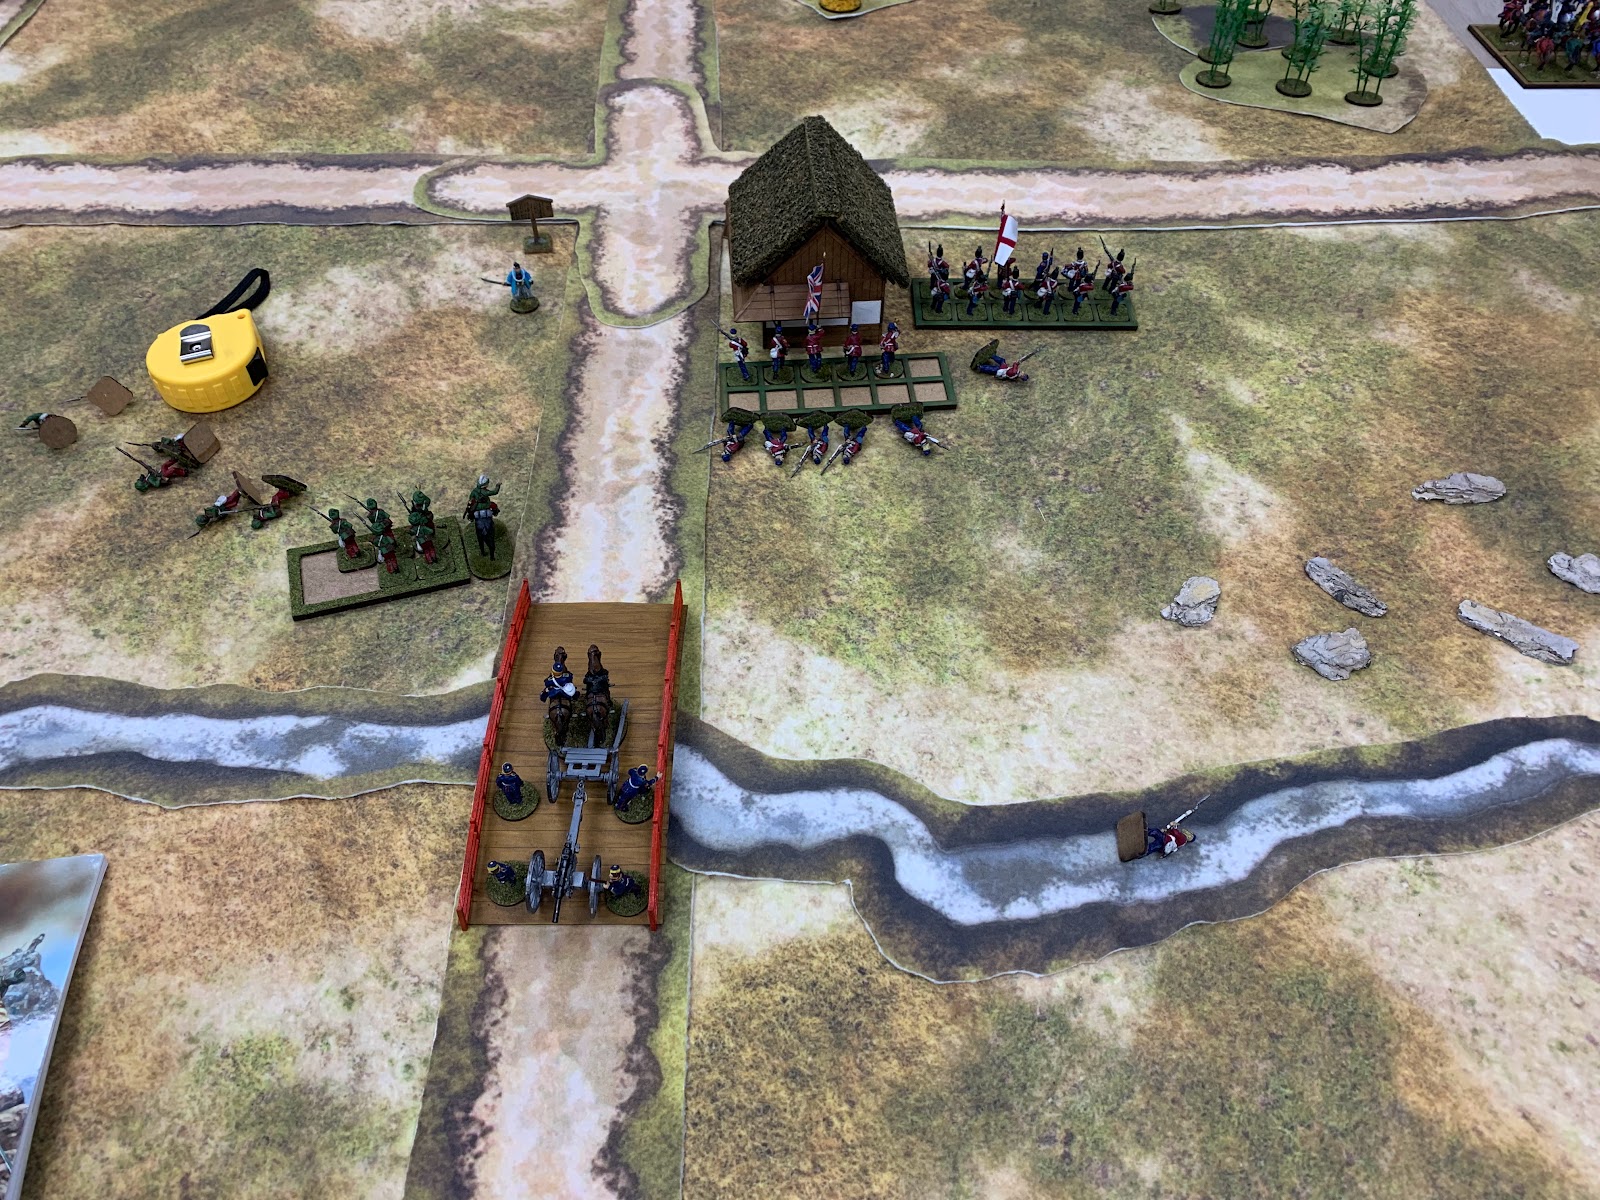
Despite having played The Men Who Would be Kings for a couple of years now, it struck me that I had never got round to trying its much-vaunted solo rules. With my normal sparring partners unavailable and some bad weather rolling in, I thought it would be a good chance to have a go, and also to break in some of my Anglo-Indian forces. The game lasted a whopping 29 turns so I'll try not to do a complete blow-by-blow; instead I'll try to give a relatively general summary of what happened, and my thoughts on the Mr Babbage system.

To get a criticism out of the way early on, how exactly to set up is not as clearly communicated as it might have been. That you should ideally just be playing a pure combat encounter rather than a scored scenario is the last of Mr Babbage's ten instructions, and when you are told to 'line your chaps up' you are not told whether to do so lengthways or widthways. Taking a cue from this solo game by Neil of the blog Toy Soldiers and Dining Room Battles, played admittedly using the half-unit-sized Skirmish Kings variant, I decided to play down the length of a roughly 6' by 5' area, deploying along a short edge.

As my self-imposed scenario objective, to give myself some reason to advance, I decided that my 1864 Anglo-Indian force had been tasked with securing a crossroads just over a bridge. The crossroads would be 4 feet away from my deployment, and the stream 2 feet in, counting as a fordable Obstacle for infantry and cavalry but impassable to artillery. There would be an inn at the crossroads (handled using the rules for buildings in the Satsuma Rebellion scenario book), and various obstructions scattered about – two hills (they're hard to spot in most of the photos, as they were formed using layered cardboard templates underneath the mat), three areas of woodland, and some rocky ground on the right opposite bank of the stream.

The terrain setup with the British deployment.

The Japanese force: Two unmodified Tribal Infantry, one Fierce Veteran Tribal Infantry (these being the Shinsengumi in blue coats), one Tribal Cavalry, one Irregular Infantry, and one Regular Infantry (the ones with the flag).

The British force: Two unmodified Regular Infantry (elements of the Royal Marines and the 20th Regiment of Foot), one Poorly-Armed Regular Infantry (Baluchis) and one Well-Drilled Field Gun with a Limber.

The rolls for Leadership quality and Leader Traits produced a decently middling lot. The British got two 5+ Leaders for the Marines and Baluchis, a 6+ for the gun, and a 7+ for the 20th Foot. The 20th Foot's officer was Unlucky (he could die on a roll of 3 on a Leader Casualty test as well as the normal roll of 2), while the Baluchis' officer was a Terrible Planner and would have to test each time his unit fired to see if they ran out of ammo. The leaders for the other two had traits with no other effect.

The Japanese had slightly worse leadership overall, and some worse traits too, and here again I ran into the rules not quite explicitly covering all the bases. Most of the Leader Traits work just fine – Weakling, Unlucky, Brutal, Cad, and The Major-General's Favourite Nephew all have effects that are exactly the same with automated command. But what about Shirker, which says that you cannot fire or attack until your unit has itself been fired on or attacked? Does 'attacking if possible' on the orders table include the Shirker effect? And if the unit were to be recycled and come back, would it need to be shot at again or would it count as having unshirked itself? Now, I decided to make it easy for myself and ignored the effect of Shirker, reckoning that it was bad enough that the best melee unit on the Japanese side was saddled with a 7+ leader, but I can certainly see the case for treating the trait as gospel.


On the left, my Mr Babbage QRS; on the right, my army lists for the afternoon. I reckoned that I was familiar enough with the rules that I'd remember unit stats off the top of my head without needing them spelled out.

Part I: The Cautious Advance (Turns 1-4)

Having realised early on that I hadn't set myself a time limit, I decided that speed was not going to be of the essence, and so my first goal would be to try and see if I could ford my infantry across the river in order to get the artillery across. I got lucky on my first turn as no enemies deployed, but on turn 2 all three of the Tribal Infantry emerged on the opposite bank. And here is where the third vagary of the rules came up: newly-deployed enemies appear at either long or short 'rifle range' from the unit that triggered their appearance. But what exactly is 'rifle range' for units not equipped with Modern or Obsolete Rifles? Now, for Antiquated Muskets/Foot Bows I can get it easily enough. But if, say, it's a unit of cavalry with Obsolete Carbines, is 'long rifle range' 12" as per their carbine range, or 18" per the range of Obsolete Rifles? If it's Tribal Infantry or Cavalry with a 6" short range and no long range, do all enemies appear at 6" distance or do you double it to 12" for long range? And critically, for my purposes, for Field Guns, am I deploying units at 16"/32" per the gun's range, or 12"/24" per literal rifle range? Now, I decided on the former, but I can see that being gamed by moving your artillery early to deliberately get enemy units to spawn relatively further away.

Midway through turn 2: The Japanese melee troops reveal themselves on the opposite bank.

What then happened was down to luck of the dice: the unarmoured spearmen at the crossroads Went to Ground, the Shinsengumi next to them decided to slink away, and the armoured spearmen also slunk away, only to get the result that meant they immediately reappeared again!

After a turn of indecisive fire and movement, I got a round of fire off across the line which successfully pinned both the armoured spearmen and the Shinsengumi, and killed the Unlucky leader of the unarmoured spearmen! (Though this failed to pin them.) The unarmoured spearmen rather wisely decided to Go to Ground again, while their friends failed to rally and withdrew.

End of turn 4: The beleaguered left wing falls back towards the road while the right hunkers down.

Part II: Crossing the Rubicon (Turns 5-9)

With the situation improving, I decided at this juncture to move my left up, re-limbering the gun and moving the Baluchis across the river. The core rules fail to tell you if units can cross Obstacles in Close Order, so I chose to let myself do that because I wanted to. The next turn, the Baluchis fired a devastating volley at the unarmoured spearmen and pinned them down. The armoured spearmen continued moving forwards, but the Shinsengumi routed and were again returned to the pool.

End of turn 6: Two increasingly bedraggled spear units now facing the brunt of the Anglo-Indian assault.

Turns 7 and 8 would be quiet on the left, but harrowing on the right. As the 20th Foot forded the river, they triggered the return of the Shinsengumi, and so now they faced the prospect of two successive waves of melee troops bearing down on them. 

End of turn 7: Things look dicey for the East Devonshires...

The next turn, with the enemy just shy of them, they were ordered to form Close Order... and failed! Reckoning that my best chance was to try and get the Shinsengumi Pinned and to simply hope for the best against the armoured spearmen, I had the Marines fire at close range, managing to inflict four casualties and the much-hoped-for Pinned result! With the bigger threat to the 20th dealt with, the Baluchis advanced again. And so came the fight with the spearmen.

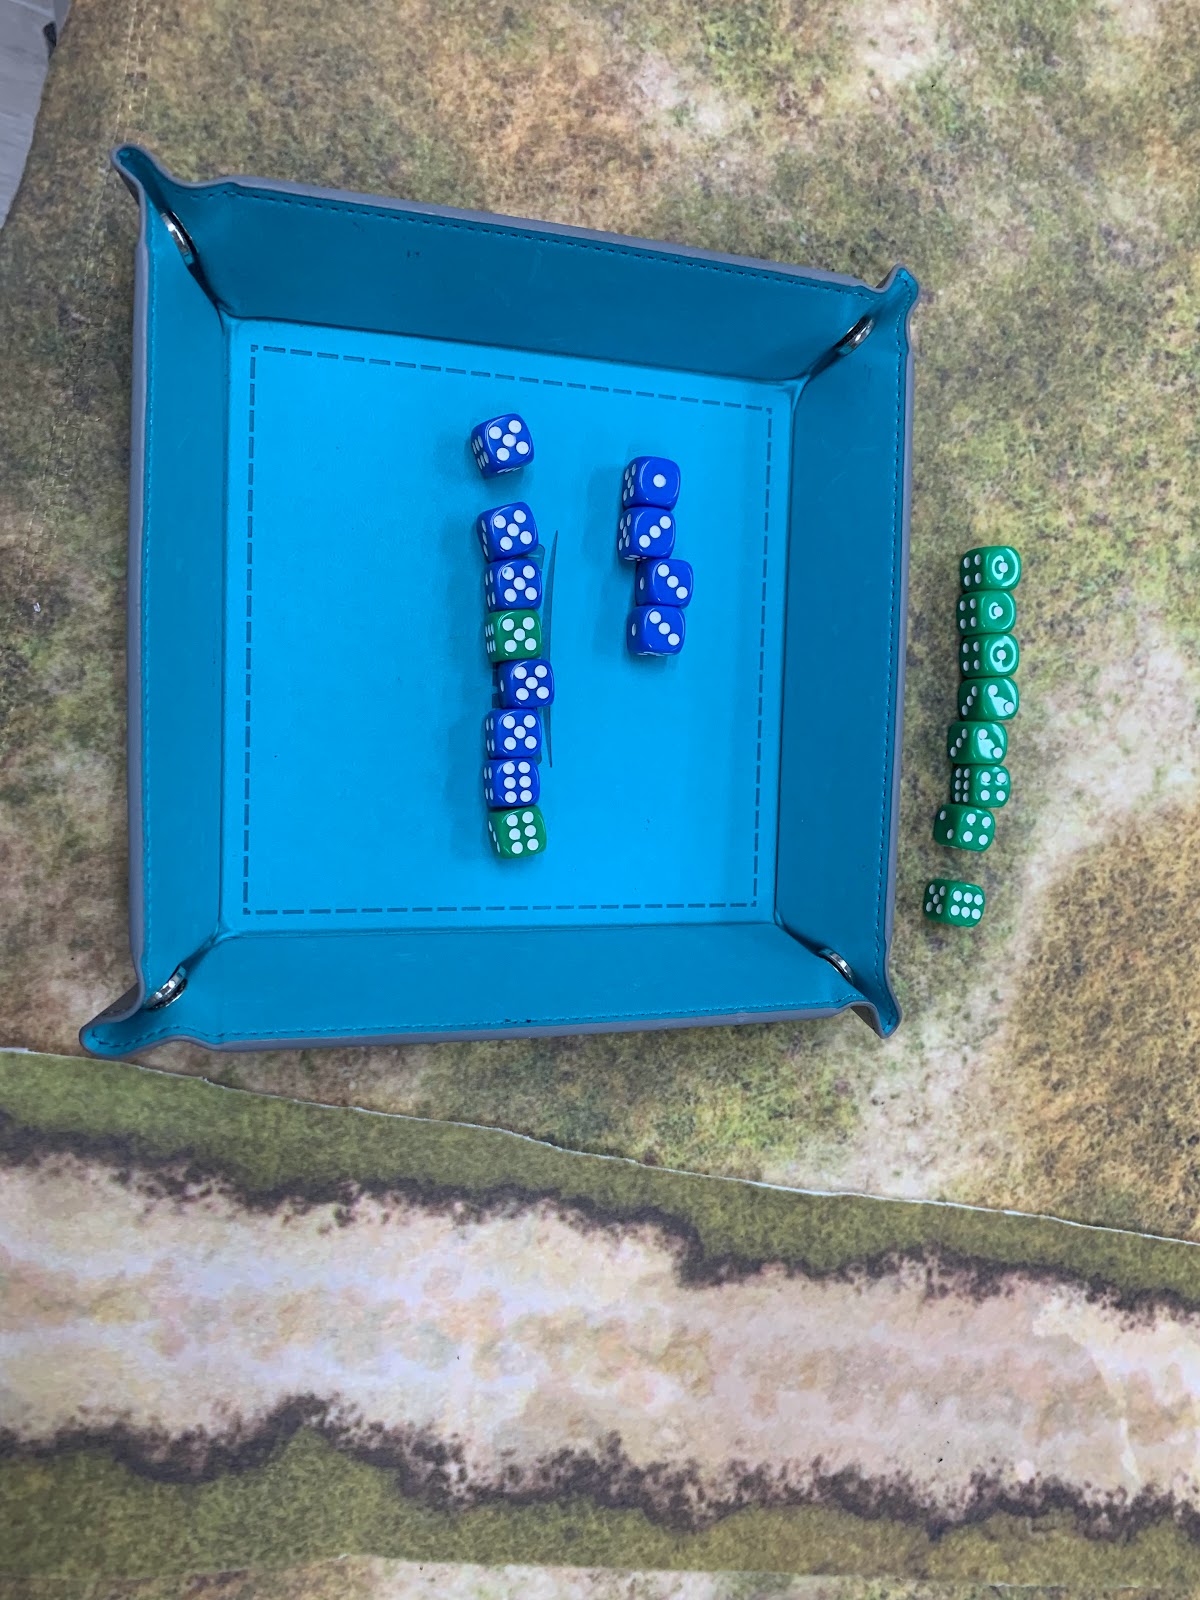
The expected attack from the armoured spearmen, but not quite the expected result: the dice for the 20th are in the tray, the ones for the spearmen outside.

Miraculously, the 20th managed to inflict 8 casualties on 12 dice, wiping out the spearmen, while the spearmen rolled only a single hit on 8 dice! Better yet, they rolled low enough that they said 'bye bye' and were permanently removed from the game – which would make subsequent units more likely to do the same.

End of turn 8: The spearmen vanish from the field.

And with that, it seemed safe to press onward. Turn 9 was mostly static, with the 20th getting a couple of kills on the Shinsengumi while the artillery and Marines failed to activate. But for the Baluchis, their luck was about to run out. While advancing in close order, in front of them appeared the Japanese regular infantry, who let off a devastating volley that killed four and left the unit Pinned. With the rest of the British force still moving into position – and likely to trigger yet more enemy movement in doing so – things suddenly took a turn for the worse.

End of turn 9: The Japanese regulars have just wreaked havoc on the Baluchis opposite.

Part III: Rescuing the Left (Turns 10-14)

The priority now became trying to suppress and ideally destroy the Japanese regulars without poking the hornet's nest too much by triggering too many enemy deployments. This again led to a bit of an uncertainty, although not an enormously severe one: the rules say that you check for automated deployment when you complete a Move or At the Double. Now, presumably Skirmish and Attack do not count, by dint of omission, but the rules don't say that you need to have a valid firing target to still Skirmish. So, in theory, perhaps you could use the Skirmish action to perform half-moves without triggering enemy deployments. This seems like very little reward for what it is, but I can imagine an edge case or two where it's worth deciding on how you'd like to deal with it.

I decided that I would follow the letter of the rules and not trigger enemy deployments on Skirmish. How fortuitous for me, as although the 20th Foot was in no position to try and get a shot off against the regulars, it could still fire at the Shinsengumi and be in position to Skirmish against the regulars on the next turn. The artillery unlimbered again to fire at the regulars, and the Baluchis successfully rallied. Although the regulars got another two of them, they failed to pin them down. Now the tide might just turn.

Turn 11, the moment of truth. The 20th Foot prepare to Skirmish against the regulars... and fail to activate. The Marines managed to cross the river without triggering any enemy deployments. The Baluchis managed to get a casualty on the regulars but not pin them... but the artillery got three and did! The unarmoured spearmen rather wisely chose to slink away and come back again later, the Shinsengumi continued to retreat... and the regulars rolled a double one and routed! Hurrah! And on the recycling table they rolled, er, a six, meaning they reappeared at full strength at long rifle range in front of the unit that destroyed them. Blast!

This, incidentally, led to another ambiguity: if a unit slinks away or routs, who counts as having destroyed it? I interpreted it as meaning simply the nearest enemy unit, but again, you may wish to alter that in your own games.

End of turn 11: Shinsengumi continue retreating but the regulars reappeared immediately.

The next round of fire was a bit disappointing. Two more Shinsengumi were downed and two regulars, but no pin was caused. This seemed to spell disaster for the already-beleaguered Baluchis... only for the regulars to roll a 1 and slink away! Only for them to then roll a 6 and reappear exactly where they had disappeared from!

End of turn 12: Notice any difference? Good – there basically wasn't one.

I was getting a little irked by these blue-jacketed fellows at this stage, but at least the 20th Foot were in position to start firing at full effect, and the combined weight of fire was enough to get a pin on the regulars. Unfortunately, the Marines on the right managed to bring the unarmoured spear unit back into the fight again, as well as the Japanese irregulars. (Note again a point of uncertainty: if one of Mr Babbage's units loses its leader, does it return Leaderless? I decided yes.) These broadly did very little except move slightly menacingly towards me, and frustratingly the Shinsengumi rallied and lost their two Pinned markers.

Turn 14 went well during the British phase. The 20th Foot switched tack towards the unarmoured spearmen and Pinned them; the Marines failed to cause a pin on the irregulars but they were still outside Obsolete Rifle range so that was less of a worry. The Baluchis and artillery together managed to cause four casualties and a pin on the regulars, a nice reverse from earlier. Unfortunately, the Japanese actions caused some problems. The irregulars were to Act with Caution (which, based on my read of the rules, seems to mean they ought to either Stand To or fall back towards cover if there are no enemies in range), but the regulars rallied, and worse still, the Shinsengumi again slunk away only to then roll a 6 and immediately reappear!

End of turn 14: The regulars are now badly damaged but there is a new threat forming on the British right.

Part IV: Weathering the Storm (Turns 15-21)

Things definitively tipped in my favour at this point. To begin with, most of the Japanese force was successfully suppressed, but it began pulling itself together. The first half of 17 nearly spelled disaster for the left again, as the Baluchis fired at the regulars, causing one casualty, but failed to pin, and worse still, finally ran out of ammunition! On the other hand, the irregulars were very much worse for wear after three turns of fire.

Middle of turn 17: The Baluchis now in a tight spot, having run out of ammunition and now stuck in close order in full view of the remaining regulars; on the other hand the Japanese irregulars have dwindled considerably.

But then the Japanese turn happened, and things were mixed for them. The unarmoured spearmen routed and said 'bye bye', taking yet another unit off the list. The Shinsengumi managed to rally, but out of position and within firing range of the Marines. The irregulars rallied, all two of them. And then the regulars fired... and missed the Baluchis completely! Thanking Allah for their good fortune, they withdrew in good order the next turn. The irregulars slunk away but remained in the pool, while the Shinsengumi were again Pinned for a turn before rallying. The trained infantry, however, would slink away, saying 'bye bye' as well. Three down, three to go.

Unfortunately, a succession of bad activation rolls meant that on turn 21, the last seven Shinsengumi managed to catch the 20th Foot out in the open. With six casualties a side, the sole surviving Shinsengumi was obliged to withdraw, but that one move had wiped out half an infantry unit – casualties I could at this point afford to take but which I was nevertheless not happy to have done.

End of turn 21: The last Shinsengumi surveys the carnage his fallen comrades inflicted upon the British line.

Part V: Mopping Up (Turns 21-29)

I decided near the end to fudge things and bring back the irregulars and, after a couple of turns, to also bring in the cavalry, just to see what would happen. The irregulars did little and just got shot to pieces at range, although they got very lucky and rallied on Turn 29 despite having lost their leader and being laden with four Pinned results. The cavalry, despite a turn of failing to activate which resulted in their suffering seven losses due to fire, still got a charge off and slew three Marines for two of their own.

Turn 29: The last Japanese cavalry charge home against the Royal Marines.

It was at this juncture that I encountered the final ambiguity in the rules: do cavalry under automated command automatically perform Follow-Up Attacks? I said 'yes' and had the cavalry officer hurl himself at the Marines, who took him down at no further loss to themselves. They got very lucky and were technically Gone but not Forgotten, but I decided it wasn't worth continuing as the day was getting long, and called it a pretty definitive Anglo-Indian victory.

Final Tally

The Anglo-Indian force inflicted 111 casualties: 17 in melée and 94 by fire. It suffered 16 losses out of a starting force of 40 (36 infantry and 4 artillery crew), which I thought was pretty good under the circumstances and could have been considerably worse. I don't think the die rolling was that dramatic on the whole – the spearmen completely collapsing against the 20th Foot at the river notwithstanding – although the probabilities this game evened out in odd ways, where units tended to return with great frequency, but not to do very much when actually in the field. Still, the automated Japanese made a good showing.

Initial Thoughts

Despite the litany of minor complaints, I really had fun with this. I was already a big fan of the friction-heavy mechanics of the Kings base rules, and the solo rules just added layer upon layer to that. The chaotic and unpredictable deployment of enemy units, the ruthlessly – and recklessly – aggressive posture that the automated actions prescribe for them, and the theoretically infinite reserves until the first couple of units call it quits, all added up to a fantastically frictional game that kept me on edge from the moment the first enemies popped up. I went in with an open mind and came out an eager convert.

What struck me was the way in which the asymmetry of the system manifested. Mr. Babbage has a considerable advantage in absolute numbers, but the player gets to exercise a lot of influence over how much of Babbage's force actually comes into play, because they can choose to simply stop moving and deal with the enemies already in the field. What this seems to lead to is that the player will fight a succession of advantageous engagements but take attrition each time. The question then becomes which side reaches its tipping point first: do Mr. Babbage's men start calling it quits and melt away first, or does the player's force get worn down to the point at which it can no longer reliably stand up to each successive wave of attacks? Neither side is really able to force a truly decisive engagement: the player can stop Babbage from bringing a decisive force to bear, but neither can the player be sure how much damage they are causing to Babbage's army.

Points to Consider

It is because I liked this system so much that I mentioned so many of my minor issues with ambiguities, because I think they are easy to resolve with some thought, but still require thinking about.

  • Can you play this along the length of the table rather than the width? Yes, but it seems to make it tricky if an enemy unit is supposed to deploy 24" to the side or rear of yours. I'll have a go on a setup bigger than 6' by 4' and see what the extra movement room does.
  • Should all Leader traits apply to automated units where relevant? I personally think so. Why should only I be hampered by poor officership!?
  • What is 'rifle range'? I would say that this should be defined by the firing ranges of the unit as written, and that units that only have a 6" short range fire should count as having 12" for their 'long rifle range'. Field guns therefore are also 16"/32".
  • Do units that lose their leaders due to a failed Leader Casualty roll get them back if they slink away and don't say 'bye bye'? If not, do units that are wiped out altogether (and thus skip the Leader Casualty roll)? I'm inclined to say yes to the former but no to the latter.
  • When told to 'act with caution', automated units are told to Go to Ground if Tribal Infantry (does this also apply to Irregulars with Fieldcraft?), to fire if there is an eligible target, or to 'move no closer to the nearest enemy' otherwise. Does a unit of Shooters with no eligible targets specifically head for cover? This seems to fit with the general Mr. Babbage instructions, so I interpreted this as a yes.
  • Do cavalry Follow-Up automatically? I think they should.
  • Who counts as having 'destroyed' a unit if it routs or slinks away? My preference is to say that it's the nearest unit to have successfully fired on or attacked it in the time since the 'destroyed' unit last appeared, even if the 'destroying' unit caused no casualties or Pinned results.

The above are all my personal interpretations, but they seem cromulent enough. Of course, my opinion is likely to change if, during the next game, one of these leads to some disastrous result for me, in which case clearly the correct interpretation is something else.

Final Final Thoughts

I thought this was a very engaging experience and I do heartily recommend it for anyone who's already played Kings in a more conventional two-or-more-players setup and can supply both armies for a given period. The caveat I'd offer is that it does seem to take longer to play than a normal game, precisely because Mr. Babbage's forces are both larger than they appear and committed in smaller quantities. But if my first game is anything to go by, that time will fly by.

General Roundup for Early August

It's been a fairly hectic period with a lot of games for me, so rather than spending lots of time writing lots of detailed battle report...