A Bakufu Official's Bizarre Adventure: A Ronin AAR
Following some recent weather events, it was back to the usual Tuesday gaming slot with a quick and brutal game of Craig Woodfield's Ronin. While I've been pivoting to En Garde! for my feudal-era games, I hadn't yet come up with an idea for how to adapt the firearm profiles in the Late Edo appendices or how to adjust the points costs, so back to Ronin it was.
The Setup
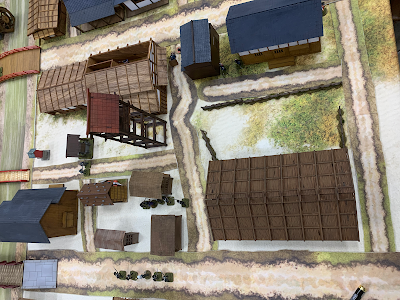
The scenario I chose was, however, an En Garde! one, Escort, if for no other reason than to do a big urban setup with many of the buildings I've accumulated over the last two years. In addition to looking at the version in the book, I also checked the Ronin version published in North Star's online magazine, which would have served as its basis. This helped to reconcile a couple of issues I found in the En Garde! version:
- Firstly, while the En Garde! version stipulates a 10-turn limit, it doesn't give a table size. I misread and thought that the Ronin version calls for a table 36" deep, and I had 45", so I raised the limit to 13 – in fact the Ronin version calls for 30" deep, so I could have gone for 15.
- Secondly, in En Garde! the escorting force has only half the points allowance of the intercepting one. This seemed absurdly low, but the Ronin version has the two forces equal. I split the difference at two-thirds.
- Thirdly, in En Garde! you are advised to use a lot of terrain, but also instructed to use standard terrain placement. Based on the rationale for the scenario I chose to disregard the latter, and did a densely built-up area.
My scenario, loosely inspired by the smuggling of Prince Rinnoji-no-miya Kōgen to join the Shogunate fleet after the Battle of Ueno, would see a fully-modernised Imperial force in a coastal town attempting to intercept a Shogunate force fleeing to shore with an unarmed official.
The Imperial force, split between myself and another player with no prior experience with Ronin, would comprise
- 12 Soldiers
- 3 Captains
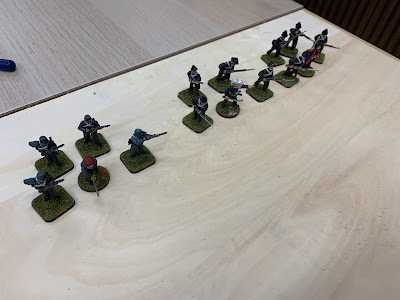
Totalling a nice even 240 points. Technically you're only allowed one Captain per five Soldiers, but who's really keeping count?
The Shogunate force, played by someone with a little past Ronin experience, would comprise
- 5 Soldiers
- 1 Captain
- 2 Samurai (unarmoured)
- 1 Hatamoto (unarmoured, with Kenjutsu and a revolver)
- 1 Civilian

Totalling 161 points – a sliver over 2/3rds but not enough to worry about. Per the letter of the rules, Shogunate forces are supposed to be less than 50% modernised troops by numbers, but this is both arbitrary and inaccurate and so I chose to ignore it. I also gave the Hatamoto a revolver per the Shinsengumi and Yakuza lists.
The Shogunate escort scored 1 victory point for every Rank of model that successfully left the table, and a further 10 for the Civilian. The Imperial attackers would achieve the same score for every model that they killed. With the Shogunate force having a total of 17 Ranks across their fighting models, that meant a total of 27 points up for grabs, with 14 being the minimum number for victory.
The table was set up as follows:

The Shogunate force would come in from the landward side, with the 'safe' line being the edge of the foam. Buildings would all provide Hard cover.
Per the rules, the attacking force deploys 15" in from its starting edge, and then the escort deploys 1" in from its own edge. Because of this, the attackers are likely to be spread out to start with, and will need to concentrate quickly, while the escorting player(s) have the luxury of deciding on their desired route. The river here bisected the table into two possible approaches: the left bank of the river (which, confusingly, was the Imperial right flank, from which most of the photos are taken), was a little wider but more irregular, while the right bank was narrower but offered a couple of more direct routes.
The Game

 |
| End of Turn 1 |
 |
| End of Turn 2 |
 |
| End of Turn 3 |
The first three turns were all about positioning: the leftmost Imperial section moved forward to outflank the Shogunate troops, while the rightmost moved up to take cover in the market. The section on the bridge stayed put to begin with, but once it became clear that the Shogunate main body was heading leftwards, we started moving it to block the endmost junction.
A firefight began between the Imperial troops in the market and the Shogunate soldiers in the alley, leading to one Light wound on a Shogunate rifleman but no further damage.
 |
| End of Turn 4 |
 |
| End of Turn 5 |
 |
| End of Turn 6 |
Despite the Shogunate player's reservations, his three – soon two – riflemen on the right were pretty successful in keeping the Imperial force occupied, and although the Imperial force inflicted several wounds for the loss of only one man, the elite component of the Shogunate force had managed to get around the stable, with the sea in sight.
This made priority rolls in the subsequent turns vital: whenever the Imperial player went first, that meant a chance for at least one figure to get a shot off before a Shogunate samurai pinned him down. But if the Shogunate got to go first, that possibility dissipated.
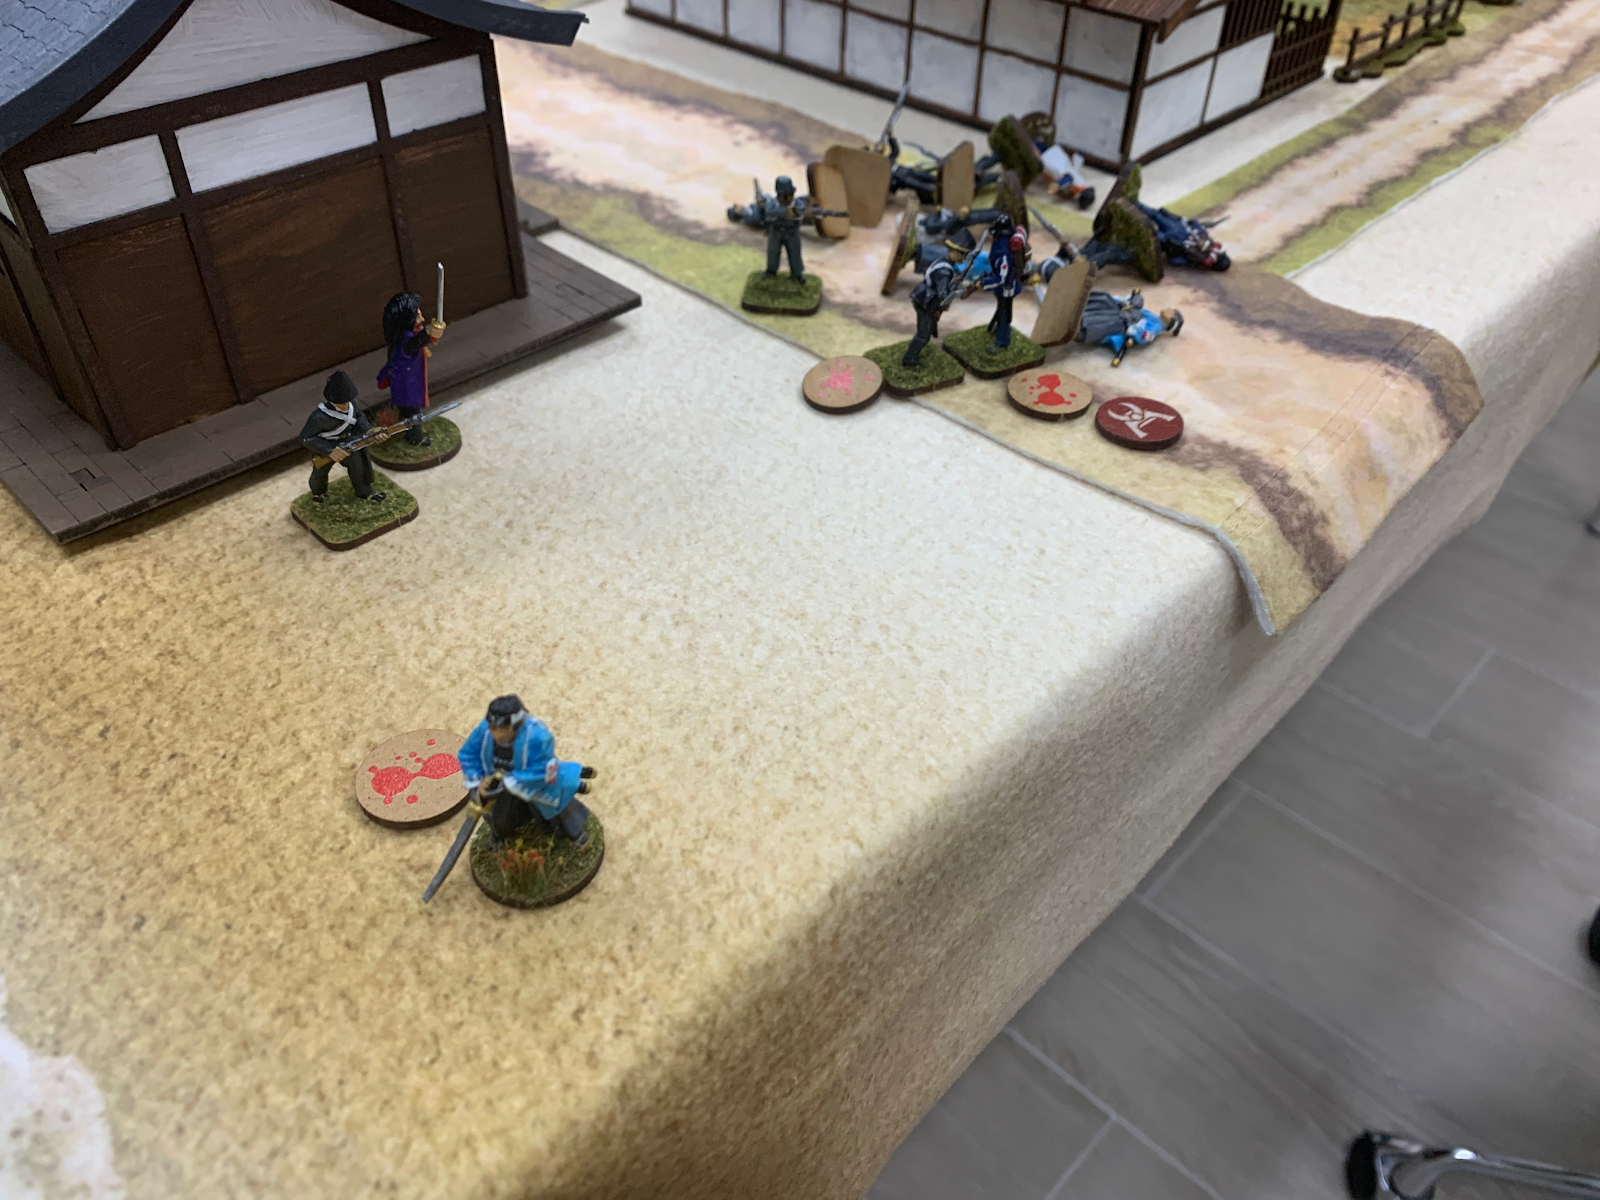
The first melee would finally take place on Turn 7 (not pictured), which saw the Shogunate Captain take a Grievous wound, but remain alive. After some light wounds from firing, the big melee would take place on Turn 8:
 |
| Turn 8: the Shogunate player rightfully pointing out that he still has one man yet to move before melee starts! |
 |
| The result of the melee: Three men down for the Imperials, but one Shogunate infantryman falls, and the already-wounded Samurai becomes Grievously wounded. |
 |
| A particular highlight: the Samurai who took the Grievous wound had attempted an Enhanced attack, and, well... the dice speak for themselves. |
 |
| End of Turn 8: a couple of Shogunate infantry still at the back as a rearguard, but the action is decidedly elsewhere. |
The Shogunate player won Priority for Turn 9 and so the Civilian wisely legged it to shore. The rest of the turn went rather less auspiciously: the Hatamoto won his melees, but both Samurai were killed and the Shogunate Captain as well. Still, the Imperials were down a further three men.
 |
| End of Turn 9 |
Turn 10 saw the Imperials make a critical blunder. The Shogunate got Priority and had the Hatamoto run for shore, but he was still within 6" of one of the Imperial infantrymen. We had (correctly) reckoned that we could pin the Hatamoto down by moving him into contact, but decided to focus on positioning the other men first. In so doing we forgot that there was still a Shogunate infantryman active, who moved into melee and pinned down our man!
We managed to inflict a Grievous wound from firing during the Action Phase, but that was still not enough to stop the Hatamoto from reaching shore if he activated first.
 |
| End of Turn 10 |
Which he did, reaching the shore and safety, netting the Shogunate 14 points and thus the victory.
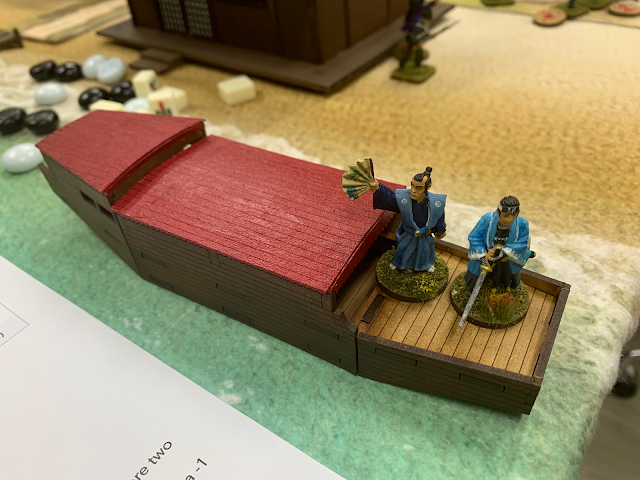 |
| The official and the head of his escort, badly wounded but alive, slip away into the night. |
Summing Up
This one really came down to the wire, and I think raising the escort's force allowance was necessary. What I'm unsure about is whether that is inherent to the scenario itself, or if it's a product of us using the 1860s rules, where the limit on the number of missile weapons in a force is effectively lifted if you take the Imperial list to its logical conclusion. The missile-heavy attacking force had the ability to remain stationary and inflict a lot of damage in a way the escort couldn't really return.
As and when I get round to finishing some more substantial feudal Japanese forces I may well return to this scenario, but for next time, I have different ideas in mind while remaining in the 1860s.


Comments
Post a Comment