A Short, Sharp Shock
After a moderate absence from the gaming table, I decided on a relatively straightforward return game, which was also a good chance to make use of one of my Salute purchases, namely an official card deck for Sharp Practice, after over half a decade using ordinary playing cards for Napoleonics and a few custom-painted tokens for earlier Boshin games.
The Shogunate force had a Status III Leader in charge of two Groups of Bakufu regulars, a Status II with two Aizu musketeer Groups (I initially brought three out by mistake), a Status II with a Group of breechloader-armed Yugekitai skirmishers, and a Status II with a Group of Shinsengumi shock troops.
The Imperial force comprised a Status III Leader with two Groups of Chōshū riflemen, a Status II with two of poorer-quality allied riflemen, and a Status II with a Group of breechloader-armed Kiheitai light infantry. In addition, there was an 8-man Group of porters, whom I rated as Militia for melée purposes and Conscripts & Volunteers for all others.


Gareth was doing well at first, having managed to kill two Imperials with his skirmishers, but then his luck began to change. He had rather boldly moved his line riflemen out in an open column towards the road, but had overlooked the Imperial allied riflemen in the village, a group of whom turned round and poured fire right into their flank, putting them at 4 Shock each. Then, the Imperials managed to get four Command Cards for a bonus activation, and so, combining this with ordinary leader activations afterward, I was able to inflict yet more losses on the Shogunate riflemen and skirmishers, including knocking out their Status III leader on a lucky hit.

Then, when rolling for the effect of hits, Gareth rolled a disastrous mixture of 5s and 6s, with his skirmisher officer also being knocked out in the process:

With just two men left and six Shock, the unit broke – the first one of the game.

Further fire from across the river was now piling excess Shock on the Shogunate riflemen. Whether they could still eke out a victory depended on whether the Shinsengumi could get to grips with someone, and whether the Aizu musketeers could get a good volley off against the isolated riflemen in the village streets.

Well, the next turn, Gareth managed to get his Shinsengumi going first, and, with a succession of good movement rolls, ploughed straight into the supply bearers, to lethal effect:

Technically, by the letter of the scenario wording, the Shogunate had won, but they were rather far behind in Force Morale so we decided to play on. As I tried to go through some evolutions to salvage my position, moving my line into an Open Column facing the Shinsengumi, I managed – again – to get a Leader to sprain his ankle thanks to a random event.
The hope was that I'd get the riflemen to go again next turn, and pour flanking fire into the Shinsengumi before they got a charge off. No such luck.
The Shinsengumi took four losses while inflicting five, including killing the Imperial Leader. What had been a roughly 4-point edge in Force Morale had narrowed down to nothing. Fortunately, things by the river were still going my way, and, feeling a little bloodthirsty, I fell on the rear of Gareth's retreating column with my skirmishers, deciding the bayonet would beat out the bullet here.

Unsurprisingly, the rear group did not like it up 'em.
By the end of Turn 7, the Shogunate position had almost collapsed, but the Imperials were faring little better, with one Leader dead, one wounded, and one with a sprained ankle. Deciding to play on just to finish it all off, I was able to rout the Shogunate riflemen again before the Shinsengumi got another charge off on my poor, helpless infantry, and thus technically won on Force Morale while failing at achieving my scenario objectives.

Meanwhile, up in the village, the Aizu musketeers had got a good number of potential hits, but unfortunately for them I managed to get a very good damage roll and only took three Shock from that particular volley:

I'll say this: of all the games we've played, this was certainly one of them, and it's one that showcased the real swings and roundabouts that can happen in a game of Sharp Practice. In the end we both agreed that Gareth had overcommitted without making sure his Aizu men were in place to disrupt the activities of the imperial vanguard force, and rushed into an attack against the head of the reinforcing column that would already know which side the enemy would be on, rather than taking the opportunity to hit it in the flank when it was further along the road. Still, he did manage to get some good charges off with the Shinsengumi, and, had the cards lined up better, his skirmishers could have done quite a bit more damage than they did.
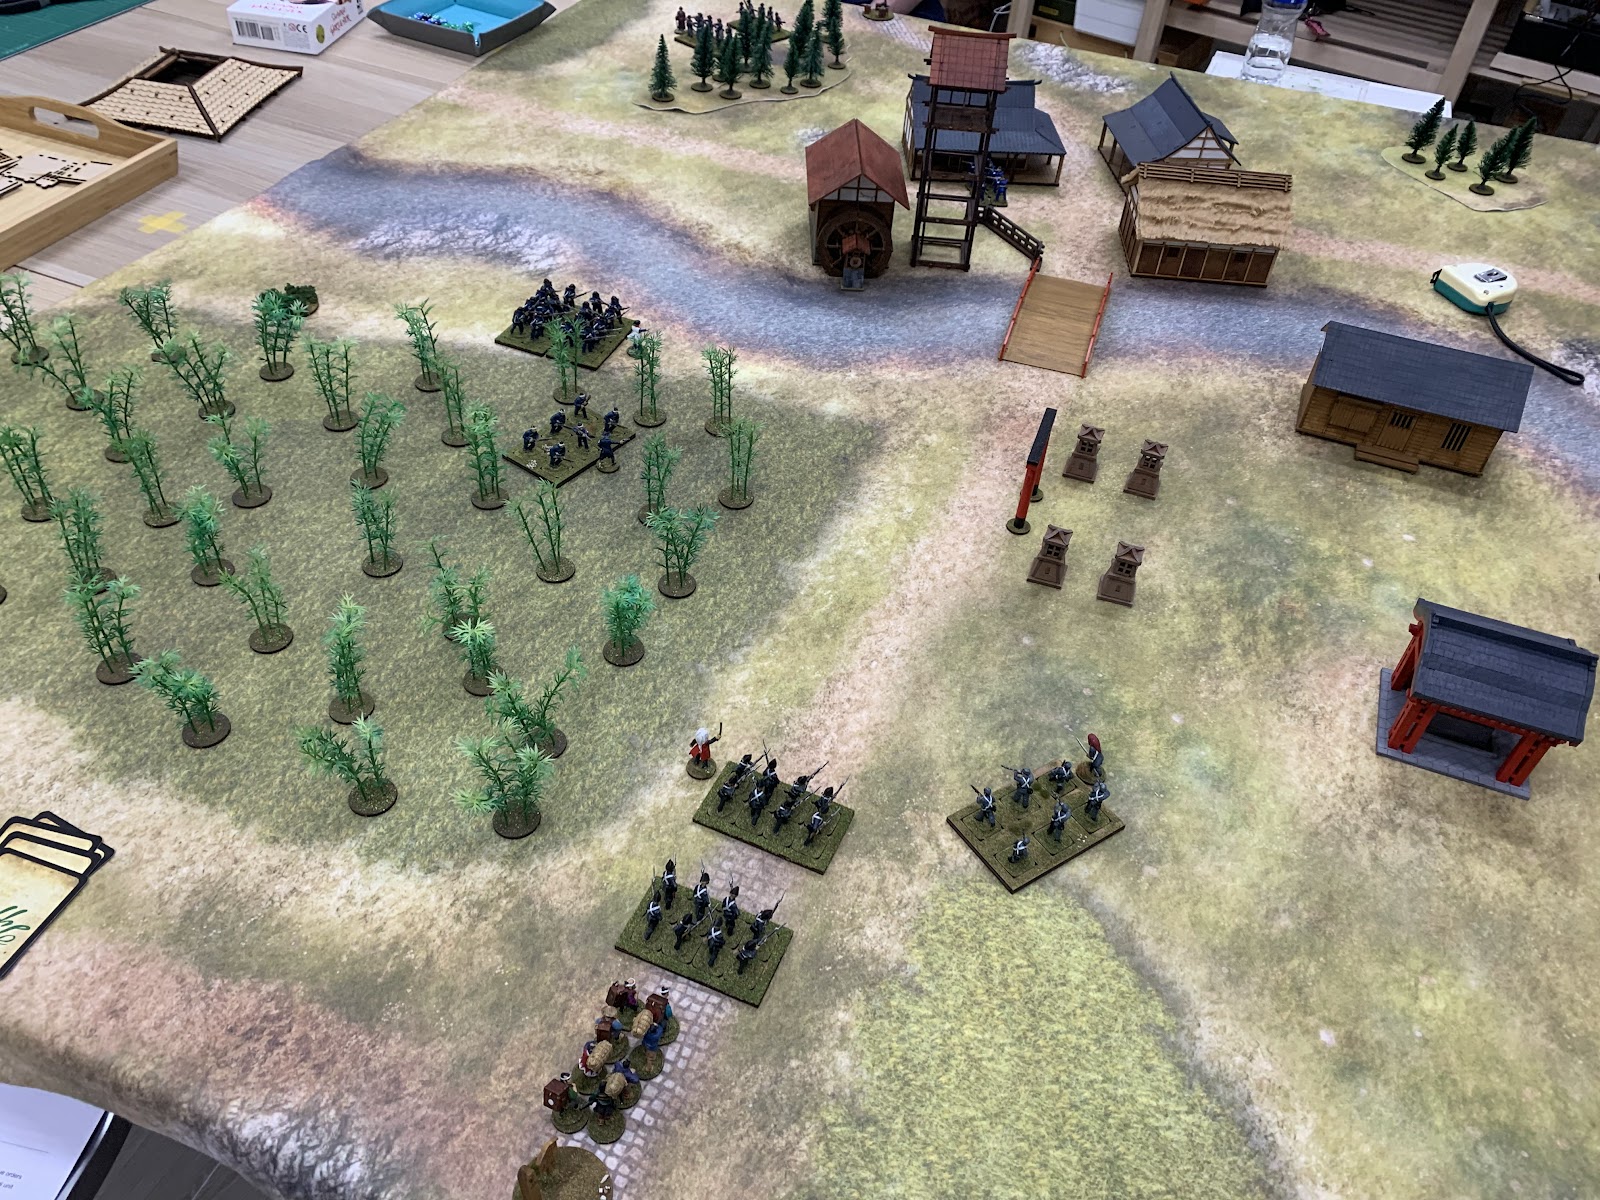
The basic idea was simply to get two forces on the table with some relatively straightforward objectives and see how we got on. The Imperial force would have two Groups and their Leader already on-table holding a village, while the remainder would try to get up to the village with a supply train in tow. The Shogunate force's objective was to either take the village from the Imperial force or to prevent the supplies getting there. With the Imperial force seeming to have the harder time of things, I decided to take them, while my opponent (Gareth) took the Shogunate force.
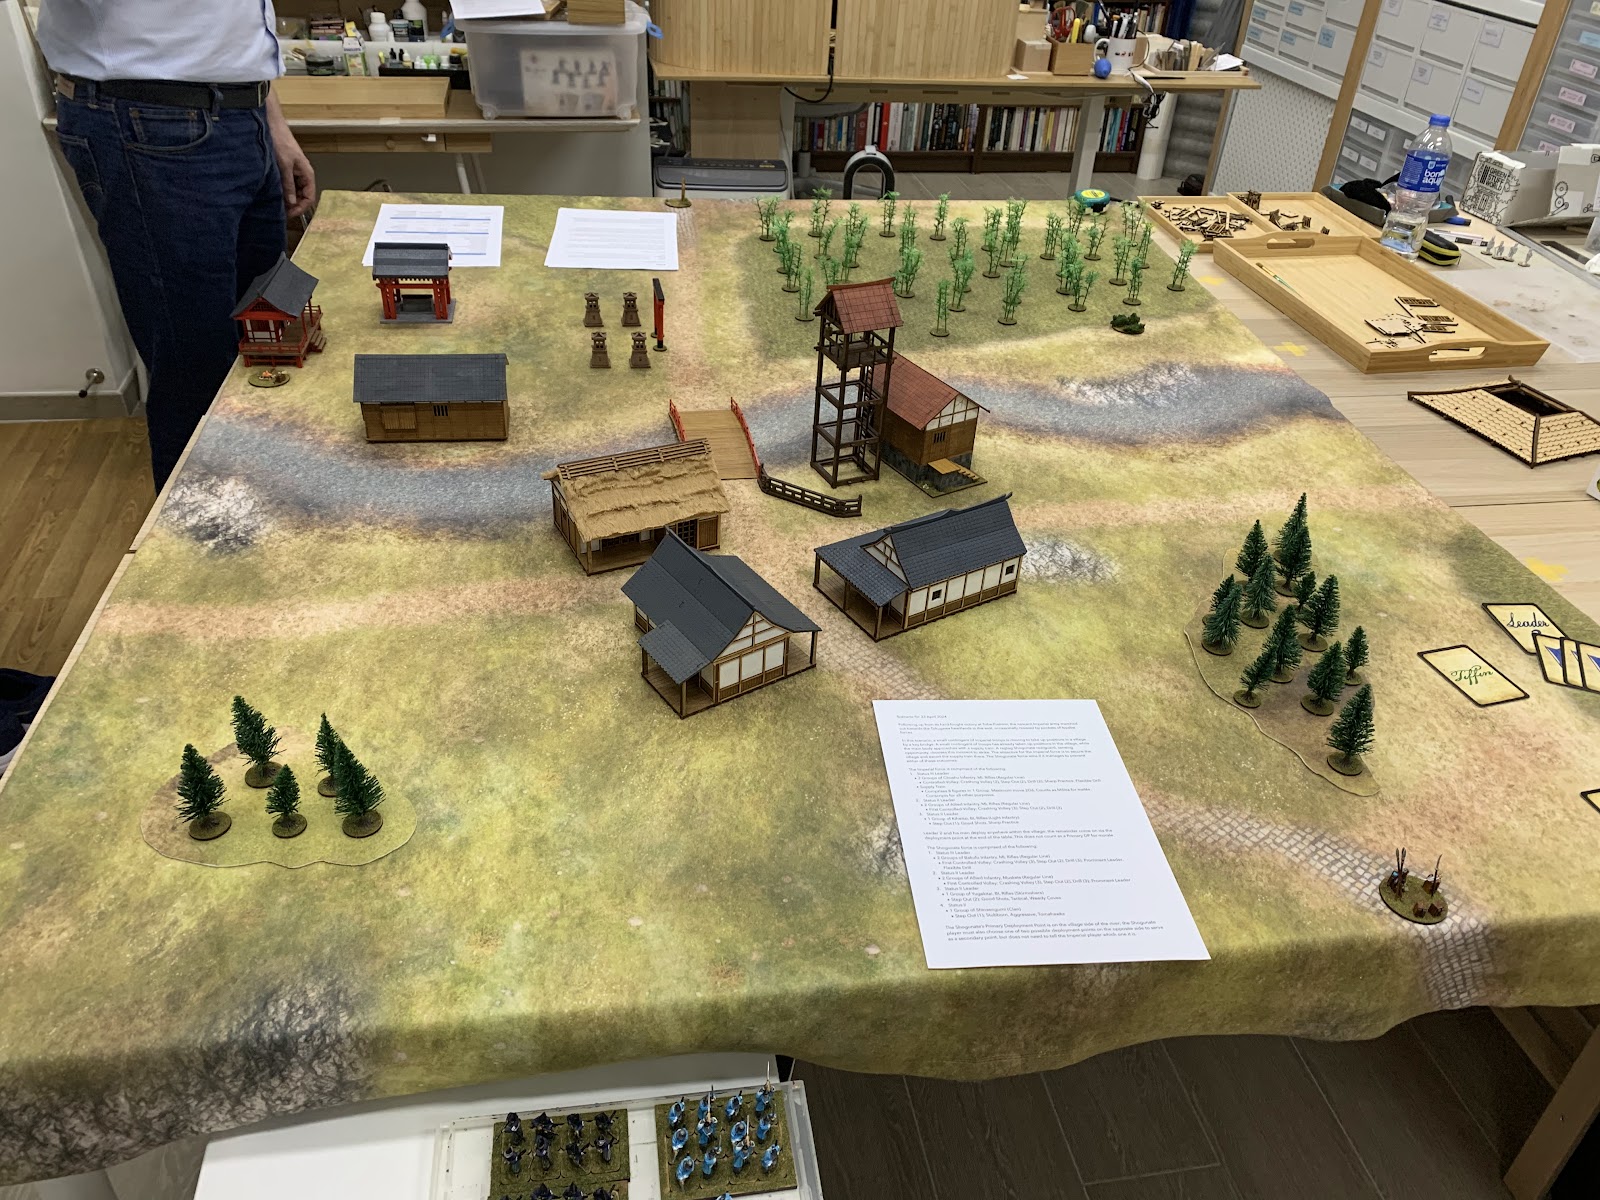 |
| The table setup: The overall size was about 5' by 6', with the village about 2' in from one of the short edges and the river down the middle. I do quite like this mat by Cigar Box but the river does make it tricky to come up with good scenarios that don't just become a fight for the crossing in the centre. |
The Shogunate force had a Status III Leader in charge of two Groups of Bakufu regulars, a Status II with two Aizu musketeer Groups (I initially brought three out by mistake), a Status II with a Group of breechloader-armed Yugekitai skirmishers, and a Status II with a Group of Shinsengumi shock troops.
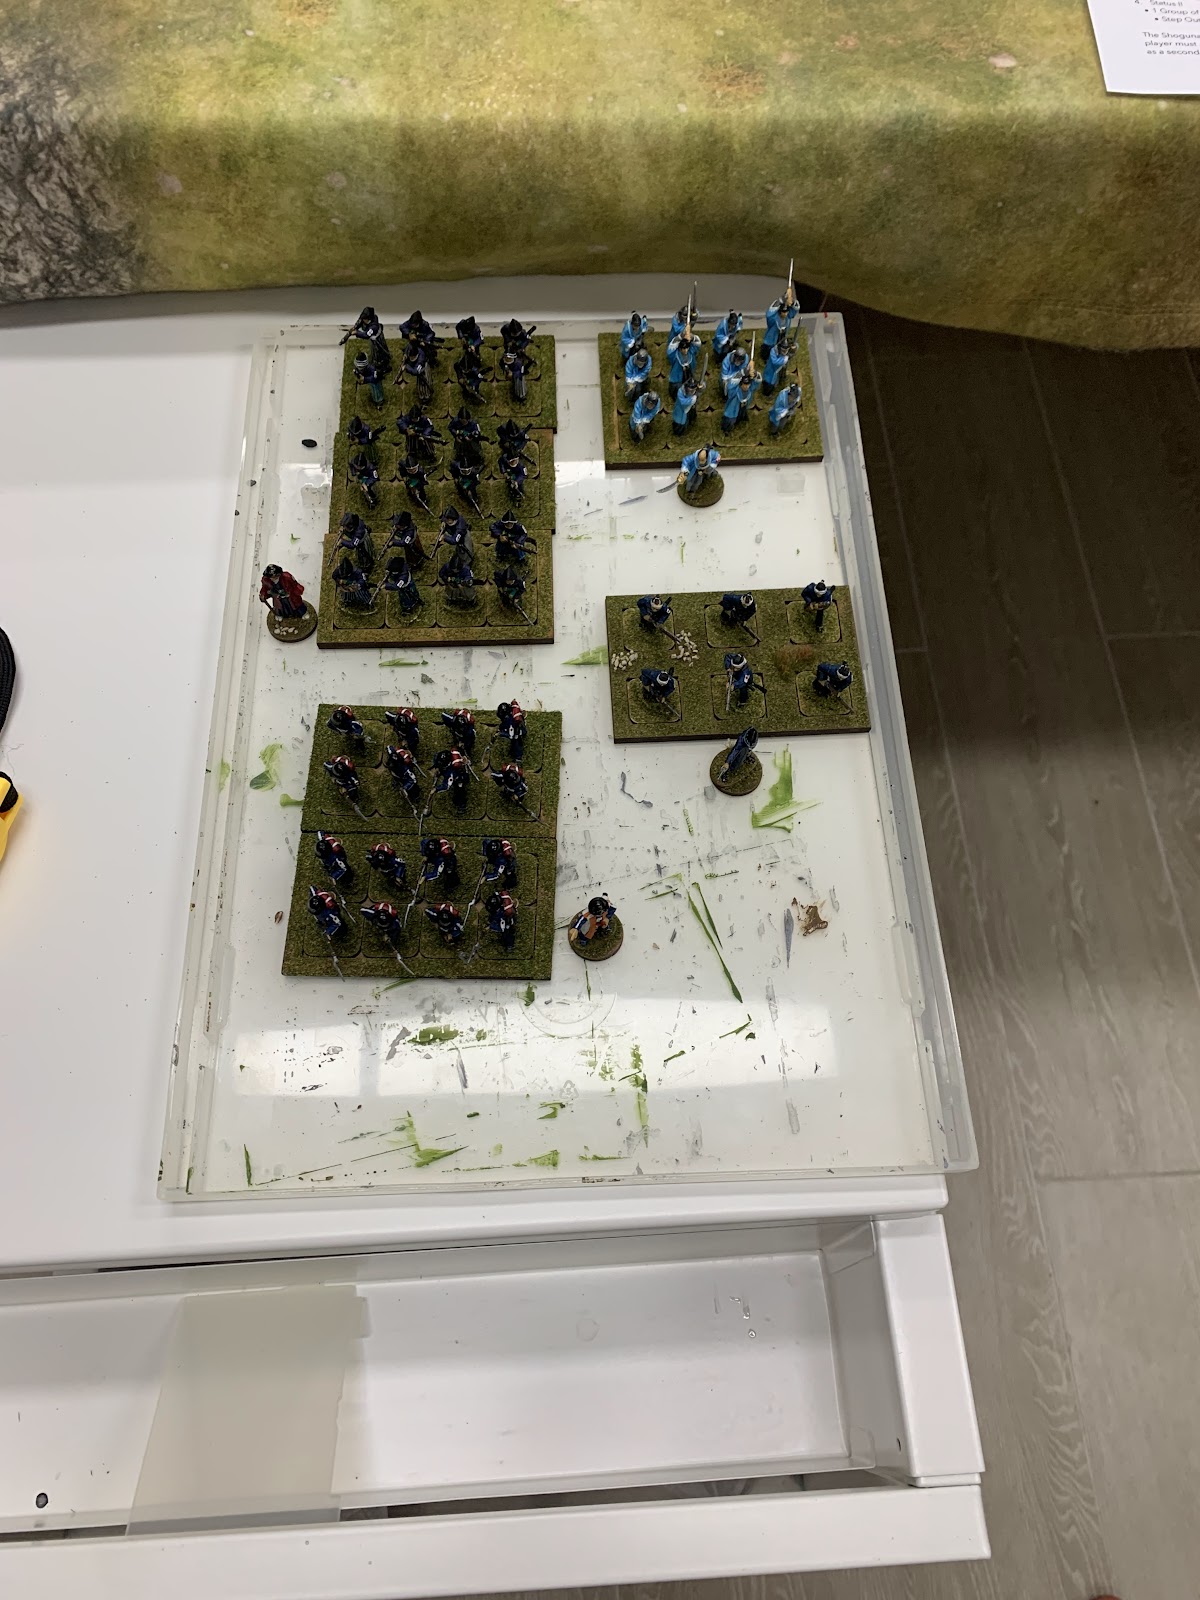 |
| The Shogunate force (before I realised they had 1 unit too many) |
The Imperial force comprised a Status III Leader with two Groups of Chōshū riflemen, a Status II with two of poorer-quality allied riflemen, and a Status II with a Group of breechloader-armed Kiheitai light infantry. In addition, there was an 8-man Group of porters, whom I rated as Militia for melée purposes and Conscripts & Volunteers for all others.
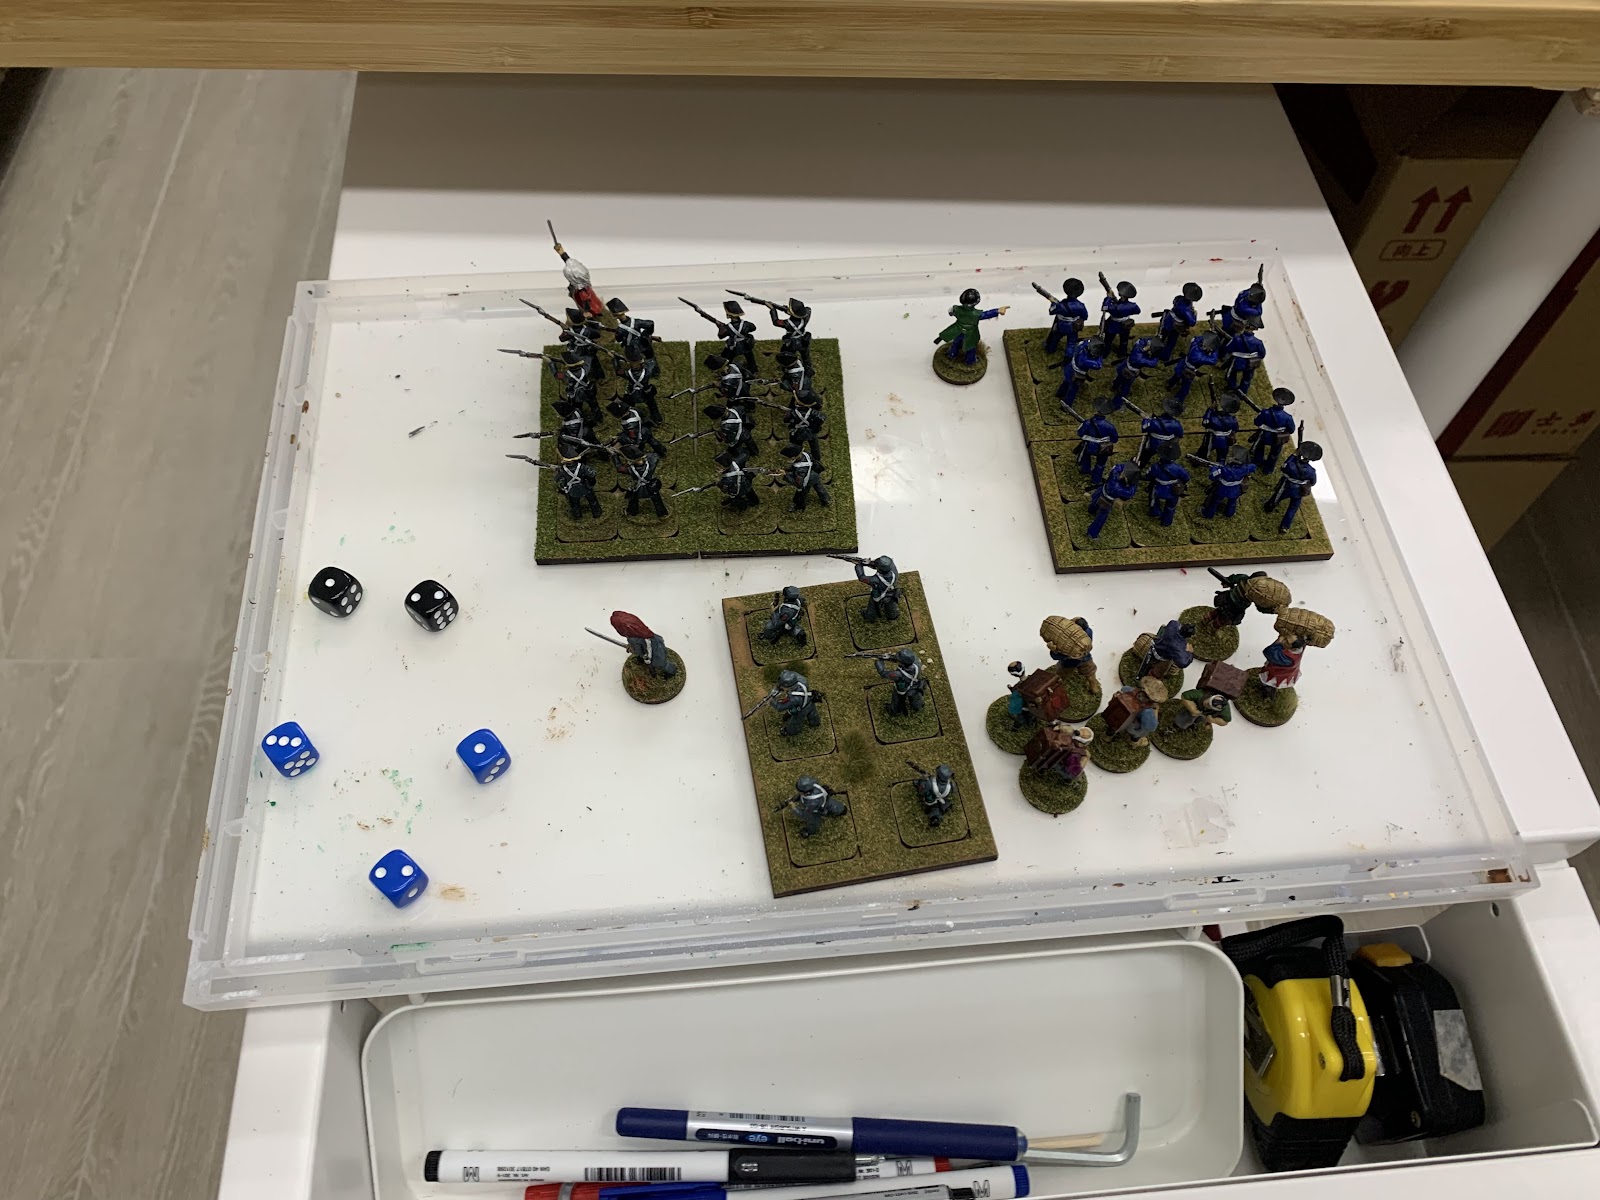 |
| The Imperial force (this time correct) |
The two Imperial allied riflemen started out in the village, while the remainder would come on from a Deployment Point at the other end of the table. Gareth's Shogunate force had a Primary DP near the village, and could choose one of two secondary DPs (unknown to me) on the other side of the river.
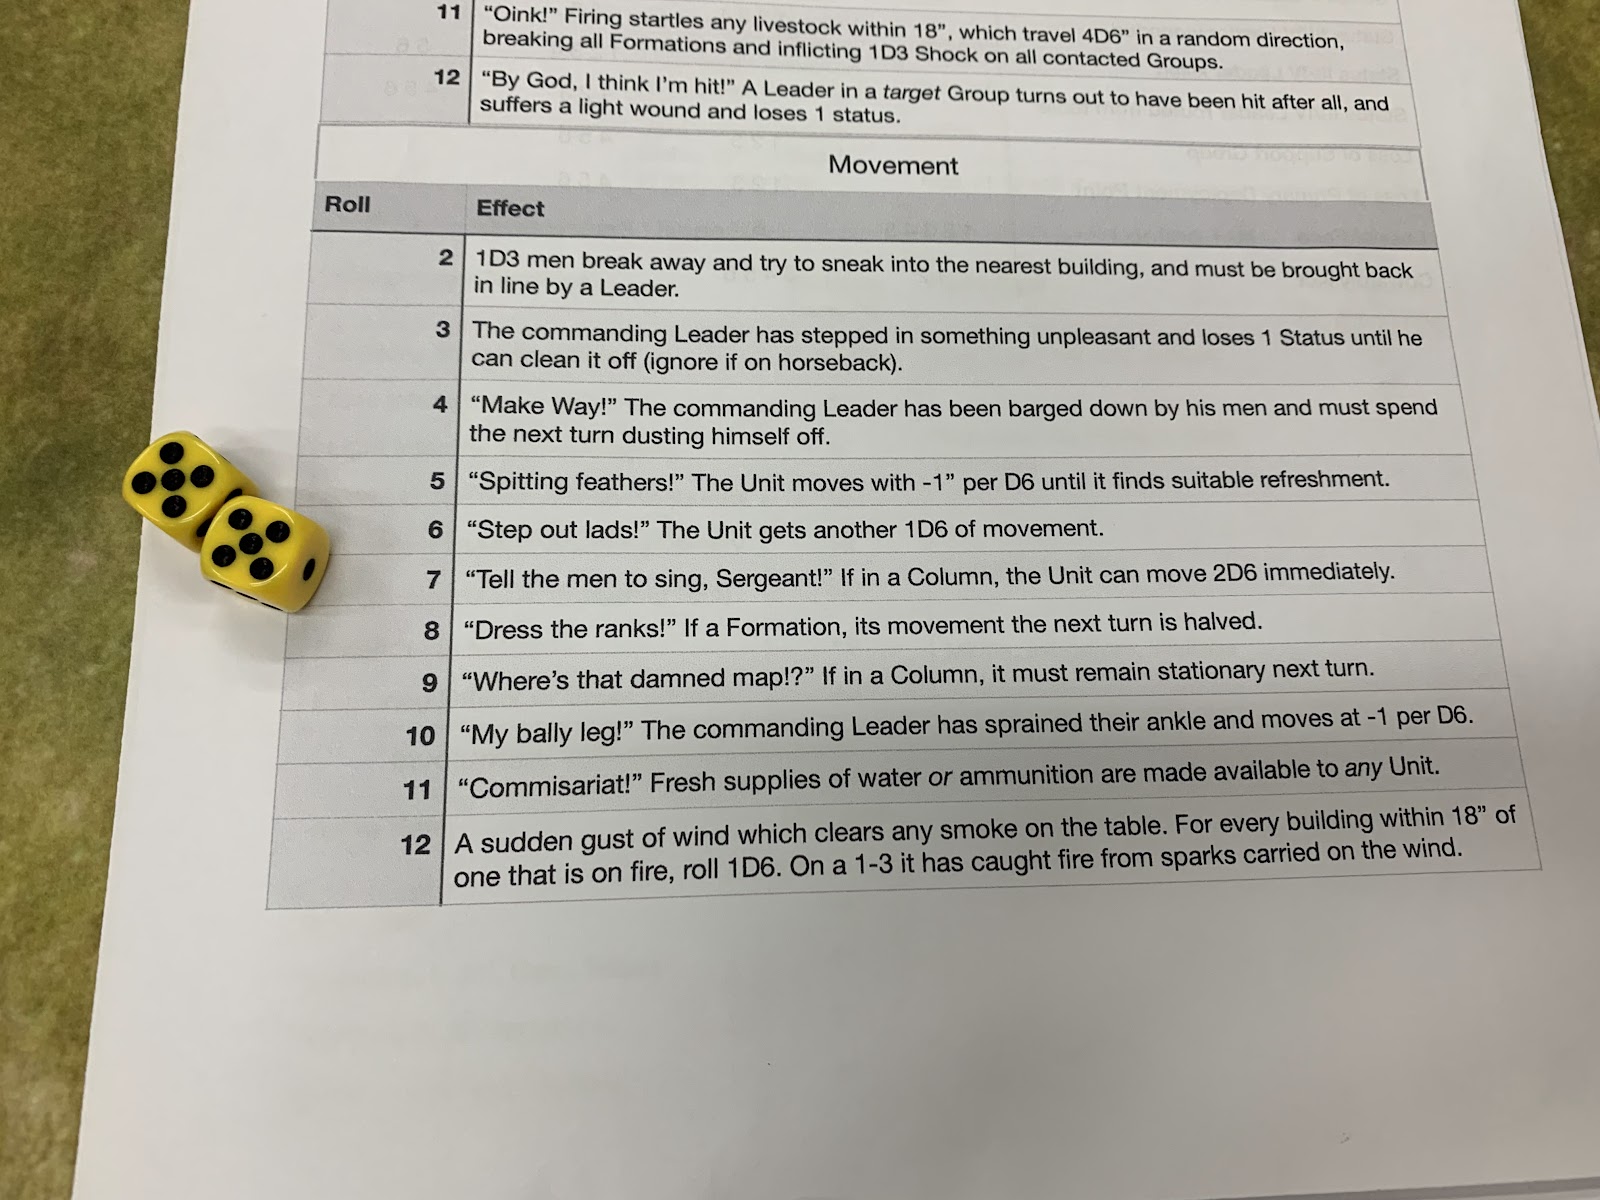
One thing to note is that I also incorporated a couple of additional rules based on a pick and mix of Simon Walker and John Savage's suggested amendments for the late 19th century in the 2019 and 2022 issues of the Lard Magazine. We didn't end up actually making use of the Extended Order rules today (which I mostly based off John Savage's), but I did make sure to include a variation on Simon Walker's suggestion for smoke: In addition to smoke being produced on a roll of 7 during a Firing Random Event, you also roll an extra D6 of a different colour every time a unit fires; if the result is equal to or less than the number of times the unit has fired this turn, you add smoke in front of the unit. So a unit with muzzleloaders firing once a turn will only throw up smoke if it rolls a 1; a unit with breechloaders firing twice will throw up smoke if it rolls a 1 the first time, or a 1 or 2 the second; a unit with breechloaders firing four times thanks to a four-card bonus activation is more or less asking for the battlefield to get fogged over.
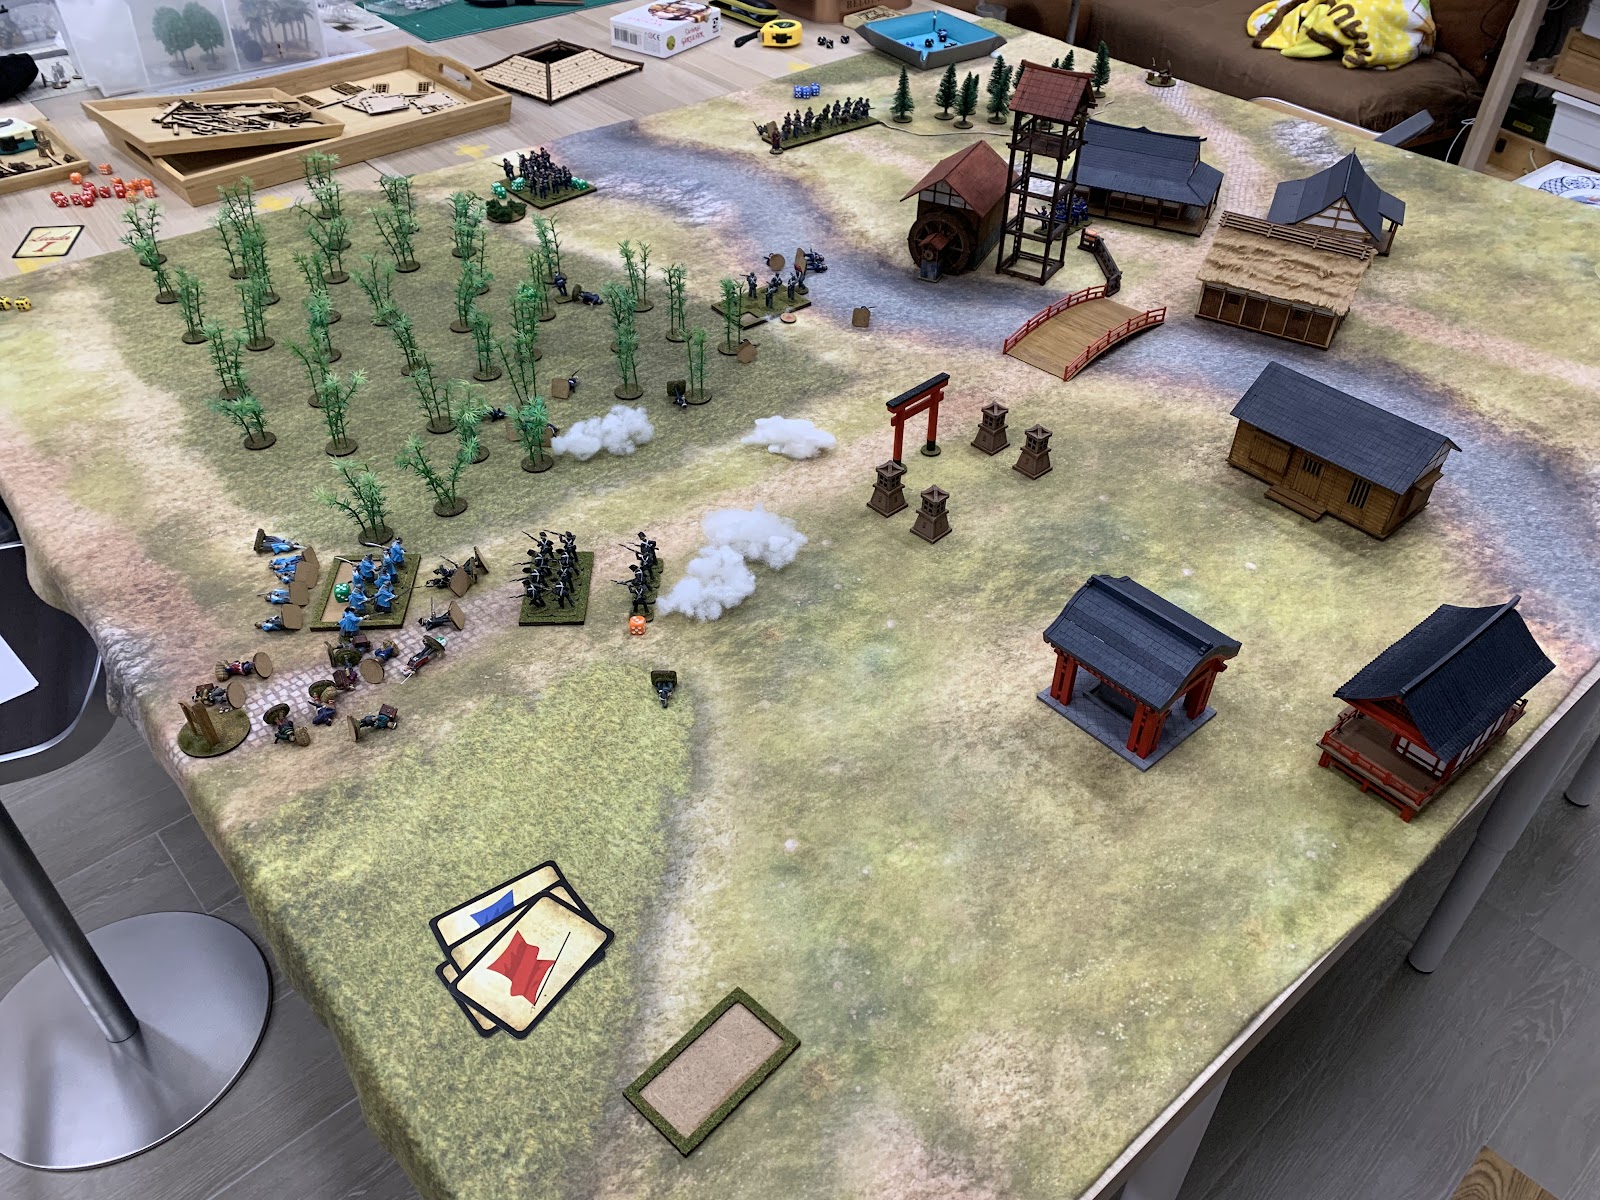
The action progressed quicker than initially anticipated. The first two and a half turns saw almost entirely Shogunate activations, followed by Imperial (during which the Leader in the village sprained his ankle), followed by Shogunate again, during which Gareth decided to try and force a quick conclusion by immediately deploying the bulk of his forces, mainly on the non-village side of the river, leaving just a token force of Aizu musketeers to try to tie down the Imperial force in the village. Unfortunately, in the second half of turn 3, things really started turning round for the Imperials.
Gareth was doing well at first, having managed to kill two Imperials with his skirmishers, but then his luck began to change. He had rather boldly moved his line riflemen out in an open column towards the road, but had overlooked the Imperial allied riflemen in the village, a group of whom turned round and poured fire right into their flank, putting them at 4 Shock each. Then, the Imperials managed to get four Command Cards for a bonus activation, and so, combining this with ordinary leader activations afterward, I was able to inflict yet more losses on the Shogunate riflemen and skirmishers, including knocking out their Status III leader on a lucky hit.
Turn 4 proved to be pivotal. I managed to get yet another four-card bonus and prepared another volley, which I was able to fire off when my Leader cards came up:
Then, when rolling for the effect of hits, Gareth rolled a disastrous mixture of 5s and 6s, with his skirmisher officer also being knocked out in the process:
With just two men left and six Shock, the unit broke – the first one of the game.
However, Gareth did get one lucky break when, before his skirmishers were seen off, they fired at mine and seemingly failed to score any hits. But then, on a Firing Random Event he managed to get a double 6, meaning he got a wound on my Kiheitai Leader!
Further fire from across the river was now piling excess Shock on the Shogunate riflemen. Whether they could still eke out a victory depended on whether the Shinsengumi could get to grips with someone, and whether the Aizu musketeers could get a good volley off against the isolated riflemen in the village streets.
Well, the next turn, Gareth managed to get his Shinsengumi going first, and, with a succession of good movement rolls, ploughed straight into the supply bearers, to lethal effect:
Technically, by the letter of the scenario wording, the Shogunate had won, but they were rather far behind in Force Morale so we decided to play on. As I tried to go through some evolutions to salvage my position, moving my line into an Open Column facing the Shinsengumi, I managed – again – to get a Leader to sprain his ankle thanks to a random event.
The hope was that I'd get the riflemen to go again next turn, and pour flanking fire into the Shinsengumi before they got a charge off. No such luck.
 |
| Er, it seems like I resurrected a dead Imperial here. Well, not that it would have lasted long! |
The Shinsengumi took four losses while inflicting five, including killing the Imperial Leader. What had been a roughly 4-point edge in Force Morale had narrowed down to nothing. Fortunately, things by the river were still going my way, and, feeling a little bloodthirsty, I fell on the rear of Gareth's retreating column with my skirmishers, deciding the bayonet would beat out the bullet here.
Unsurprisingly, the rear group did not like it up 'em.
By the end of Turn 7, the Shogunate position had almost collapsed, but the Imperials were faring little better, with one Leader dead, one wounded, and one with a sprained ankle. Deciding to play on just to finish it all off, I was able to rout the Shogunate riflemen again before the Shinsengumi got another charge off on my poor, helpless infantry, and thus technically won on Force Morale while failing at achieving my scenario objectives.
Meanwhile, up in the village, the Aizu musketeers had got a good number of potential hits, but unfortunately for them I managed to get a very good damage roll and only took three Shock from that particular volley:
I'll say this: of all the games we've played, this was certainly one of them, and it's one that showcased the real swings and roundabouts that can happen in a game of Sharp Practice. In the end we both agreed that Gareth had overcommitted without making sure his Aizu men were in place to disrupt the activities of the imperial vanguard force, and rushed into an attack against the head of the reinforcing column that would already know which side the enemy would be on, rather than taking the opportunity to hit it in the flank when it was further along the road. Still, he did manage to get some good charges off with the Shinsengumi, and, had the cards lined up better, his skirmishers could have done quite a bit more damage than they did.
For my part, I was quite happy with the results of adding in the smoke rules (and also having it apply to all units, not just line formations). For the Kiheitai in particular it added a certain impetus in making it necessary to keep moving forwards through your own smoke, and the risk that any unit might end up laying smoke in front of itself pushed me to try and make my units more mobile, particularly my gallant bluecoated riflemen.
More plans lie in store for later, but that's for another time.


Comments
Post a Comment